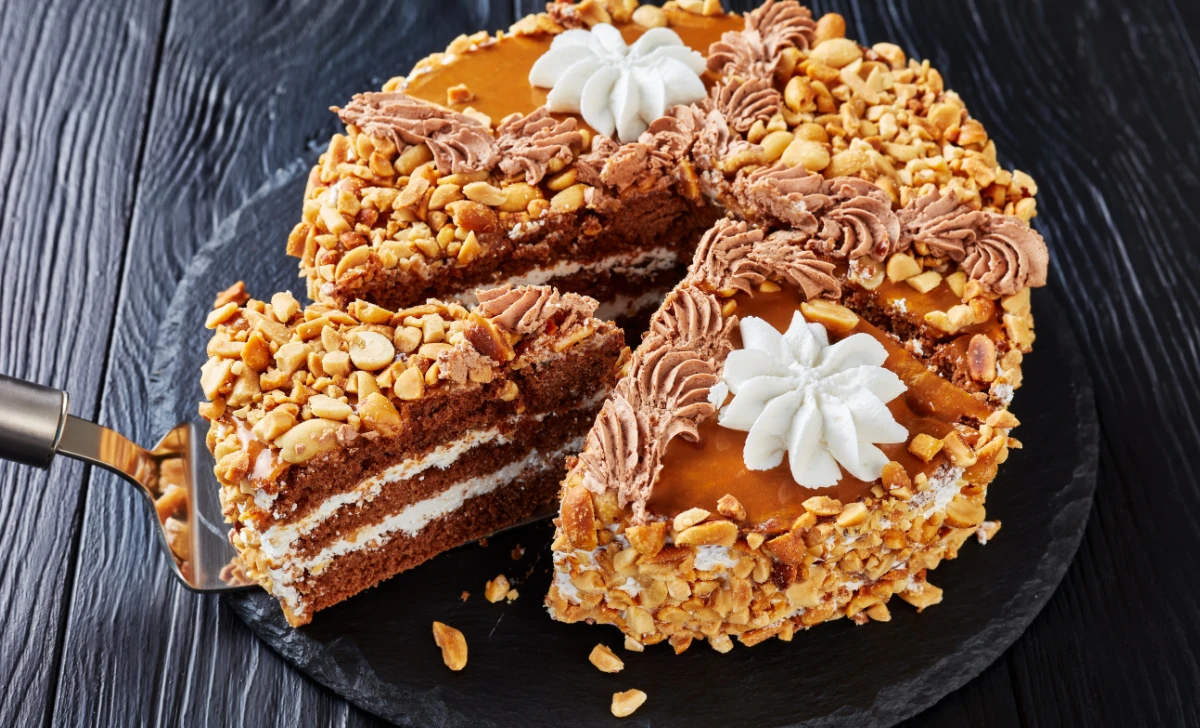
Are you ready to embark on a delightful baking adventure that will tickle your taste buds and leave you craving for more? Look no further than the luscious realm of Peanut Butter Cake. This delectable treat combines the richness of peanut butter with the sweetness of cake, creating a match made in dessert heaven. Whether you’re an experienced baker or a kitchen newbie, this article will guide you through the step-by-step process of creating a peanut butter cake that will have everyone asking for seconds.
[ez-toc]
History
The history of the Peanut Butter Cake is a tale that weaves together the rich traditions of baking and the irresistible allure of peanut butter. This beloved dessert has a lineage that dates back to the early 20th century, when creativity in the kitchen was met with a dash of culinary curiosity.
Early Inspirations and Innovations
The story begins with the introduction of peanut butter to households across America in the late 1800s. This nutty spread quickly captured the hearts and taste buds of people, inspiring creative minds to explore its potential in the world of desserts. It was the 1920s that witnessed the fusion of peanut butter with cake, giving rise to the Peanut Butter Cake.
Imagine bakers in quaint kitchens, experimenting with different ratios of peanut butter, flour, and sugar. The earliest versions of Peanut Butter Cake were simple yet revolutionary. These cakes often featured a basic blend of ingredients, showcasing the essence of peanut butter in a moist and delightful form.
The Great Depression and Culinary Comfort
As the Great Depression swept across the nation in the 1930s, home cooks turned to baking as a source of comfort. Peanut Butter Cake emerged as a beacon of solace, offering an affordable yet delectable treat that could be shared with family and friends. The scarcity of ingredients during these times led to resourcefulness, giving rise to ingenious variations of the cake.
In many households, the Peanut Butter Cake became a symbol of resilience and creativity, a testament to the human spirit’s ability to find joy even in challenging circumstances. The cake’s ability to bring people together over a shared dessert contributed to its enduring popularity.
Post-War Innovations and Flavor Expansions
As the world emerged from the shadows of World War II, culinary innovation flourished. The 1950s marked a period of experimentation and flavor expansion for the Peanut Butter Cake. Bakers began incorporating ingredients like chocolate chips, bananas, and even marshmallow fluff to elevate the cake’s taste and texture.
The era of suburban kitchens saw housewives embracing convenience and innovation. Peanut Butter Cake recipes evolved to include shortcuts, such as using pre-made cake mixes and canned frosting. These adaptations made the cake more accessible to a wider audience, further embedding it in the fabric of American baking.
Modern Twist and Global Influence
With the advent of the internet in the late 20th century, the Peanut Butter Cake transcended geographical boundaries. Recipes, tips, and variations were shared across digital platforms, allowing home bakers from around the world to put their unique spin on the classic treat.
Today, the Peanut Butter Cake continues to evolve. Bakers experiment with diverse nut butters, alternative flours, and innovative frosting techniques. The cake’s versatility has also led to adaptations that cater to dietary preferences, including gluten-free and vegan versions.
A Flavorful Legacy and Heartfelt Indulgence
The Peanut Butter Cake’s journey through time is a testament to its enduring appeal. From its humble origins to its modern reinventions, this cake has consistently offered comfort, indulgence, and a delightful blend of flavors. With each bite, we’re reminded of the ingenuity and creativity that define the world of baking.
So, the next time you savor a slice of Peanut Butter Cake, remember that you’re partaking in a legacy that spans generations. It’s a dessert that has not only filled bellies but also warmed hearts, making it a cherished addition to the tapestry of culinary history.
Time
| Step | Time |
|---|---|
| Preparing Ingredients | 20 minutes |
| Mixing the Wet Ingredients | 10 minutes |
| Combining the Dry Ingredients | 5 minutes |
| Bringing Wet and Dry Together | 5 minutes |
| Baking the Cake | 30-35 minutes |
| Creating the Peanut Butter Frosting | 15 minutes |
| Assembling the Cake Layers | 10 minutes |
| Applying the Crumb Coat | 10 minutes |
| Final Frosting and Finishing Touches | 15 minutes |
| Indulging and Enjoying | Timeless |
| Total Time | Approx. 1.5 hours |
Ingredients
| Ingredients | Quantity |
|---|---|
| Flour | 1 cup |
| Sugar | 1/2 cup |
| Baking powder | 1 teaspoon |
| Salt | 1/4 teaspoon |
| Butter | 1/4 cup |
| Creamy peanut butter | 1/4 cup |
| Eggs | 1 |
| Vanilla extract | 1 teaspoon |
| Milk | 1/2 cup |
Directions
Step 1: Preparing Ingredients
Gather all the required ingredients for the recipe. Preheat your oven to the appropriate temperature and grease your cake pans to prevent sticking.
Step 2: Mixing the Wet Ingredients
In a mixing bowl, combine the butter, creamy peanut butter, and sugar. Use an electric mixer to blend them until smooth and creamy. Add in the egg and the vanilla extract, one at a time, mixing well after each addition.
Step 3: Combining the Dry Ingredients
In a separate bowl, whisk together the flour, baking powder, and a pinch of salt. This will be the dry mixture that provides structure to your cake.
Step 4: Bringing Wet and Dry Together
Gradually add the dry mixture into the bowl of wet ingredients, alternating with the milk. Mix gently until all the ingredients are well combined, creating a smooth batter that highlights the harmonious blend of peanut butter and cake.
Step 5: Baking the Cake
Pour the batter into the prepared cake pans, smoothing the tops with a spatula. Place the pans in the preheated oven and bake for approximately 30-35 minutes. The cake is ready when a toothpick inserted into the center comes out with a few moist crumbs attached. Once baked, remove the pans from the oven and let the cakes cool on a wire rack.
Step 6: Creating the Peanut Butter Frosting
While the cakes are cooling, prepare the peanut butter frosting. In a mixing bowl, beat the butter until it’s light and fluffy. Gradually add the creamy peanut butter and vanilla extract, continuing to whip until the mixture is smooth and velvety.
Step 7: Assembling the Cake Layers
Place one cake layer on a cake stand or serving plate. Spread a generous layer of the prepared peanut butter frosting evenly over the top. Gently place the second cake layer on top to create a delightful cake sandwich.
Step 8: Applying the Crumb Coat
Apply a thin layer of frosting over the entire cake. This initial layer, known as the “crumb coat,” helps seal in any cake crumbs and provides a smooth base for the final layer of frosting. Place the cake in the refrigerator for a short while to allow the crumb coat to set.
Step 9: Final Frosting and Finishing Touches
Once the crumb coat is set, take the cake out of the refrigerator and apply the final layer of peanut butter frosting. Use a spatula to create smooth and decorative swirls on the cake’s surface. Get creative with your frosting design!
Step 10: Indulging and Enjoying
Your Peanut Butter Cake is now ready to be enjoyed. Cut yourself a generous slice and savor the delectable fusion of flavors and textures that define this dessert masterpiece. Share with a loved one or relish it all by yourself.
Follow these steps, and you’ll have a mouthwatering Peanut Butter Cake that’s sure to impress and satisfy your cravings. Happy baking and indulging!
Equipment Required
Nutrition Information
| Nutrition Information | Per Serving |
|---|---|
| Serving Size | 1 slice (1/8th of cake) |
| Calories | Approx. 300 kcal |
| Total Fat | 15g |
| Saturated Fat | 6g |
| Trans Fat | 0g |
| Cholesterol | 40mg |
| Sodium | 200mg |
| Total Carbohydrates | 36g |
| Dietary Fiber | 1g |
| Sugars | 20g |
| Protein | 6g |
| Vitamin D | 2% DV |
| Calcium | 4% DV |
| Iron | 8% DV |
| Potassium | 2% DV |
Please note that these values are approximate and may vary based on specific ingredients and portion sizes. Always check packaging and ingredient labels for precise nutritional information.
Tips
- Choose Quality Peanut Butter: Opt for a high-quality, creamy peanut butter to ensure rich and authentic flavor in your cake.
- Avoid Overmixing: When combining wet and dry ingredients, mix just until incorporated. Overmixing can lead to a dense cake.
- Room Temperature Ingredients: Let ingredients like butter, eggs, and milk come to room temperature before baking. This promotes even mixing and better texture.
- Test for Doneness: To check if your cake is done, insert a toothpick into the center. It should come out with a few moist crumbs attached, indicating a perfectly moist cake.
- Perfect the Frosting Consistency: Adjust the frosting’s consistency by adding milk for thinning or powdered sugar for thickening. Aim for a spreadable but not too runny consistency.
- Layer Frosting Neatly: To prevent cake crumbs from mixing into the frosting, apply a thin layer (crumb coat) before the final layer. This gives you a smooth canvas to work with.
- Customize with Nuts: For an extra crunch, consider adding chopped peanuts on top of the frosting or between cake layers.
- Incorporate Filling: Spread a layer of fruit jam or jelly between the cake layers for a delightful fruity twist.
Pros & Cons
| Pros | Cons |
|---|---|
| ✅ Delightful blend of peanut butter and cake flavors | ❌ Higher in calories and fat |
| ✅ Versatile for customization and variations | ❌ Potential allergen for nut-sensitive individuals |
| ✅ Offers a comforting and indulgent dessert experience | ❌ Requires careful measurement and mixing for optimal texture |
| ✅ Suitable for various occasions and celebrations | ❌ Longer preparation time compared to store-bought desserts |
| ✅ Can be adapted for dietary preferences like vegan or gluten-free | ❌ May require additional equipment and tools for baking |
Conclusion
In conclusion, the journey through the world of Peanut Butter Cake has been nothing short of delightful. From its humble origins to its modern adaptations, this dessert embodies the perfect marriage of peanut butter’s nutty richness and the comforting allure of cake. As you venture into your kitchen armed with flour, sugar, and a jar of creamy peanut butter, you’re embarking on an adventure that promises not only a delectable treat but also a heartwarming experience.
Imagine the aroma wafting through your kitchen as the cake bakes, a tantalizing preview of the indulgence that awaits. Picture yourself spreading velvety peanut butter frosting between layers of moist cake, creating a masterpiece that’s as visually stunning as it is tantalizing to the taste buds. With each bite, you’re embracing a symphony of flavors and textures that have been enjoyed across generations.
As you dive into the Peanut Butter Cake recipe, remember that baking is a labor of love, a creative journey that allows you to infuse your own personality into each ingredient and technique. From the choice of peanut butter to the design of your frosting swirls, you’re crafting a unique masterpiece that reflects your individuality.
So, don your apron, gather your tools, and let the magic unfold. Invite friends or family to join you on this culinary escapade, sharing laughter and joy as you embark on a delicious adventure. Whether it’s a special occasion or simply a craving for something delightful, this Peanut Butter Cake is a testament to the joy that baking can bring.
Allow yourself to savor the rewards of your efforts as you savor each forkful of this cake. With every bite, you’re not only indulging in a delicious dessert but also celebrating the art of creating something from scratch. The Peanut Butter Cake recipe beckons you to embrace the flavors, the process, and the joy that come with baking.
So why wait? Let your kitchen be your canvas, and let this Peanut Butter Cake be your masterpiece. Try out the recipe, and let the flavors dance on your palate as you relish the culmination of your baking prowess. Your taste buds, and those you share it with, will thank you for embarking on this scrumptious journey. Happy baking and happy indulging!
Facts
- Fact 1: Peanut Butter Powerhouse 🥜
- Did you know that peanut butter was originally developed as a protein-rich food source for people with poor teeth? Little did they know that it would one day become the star of our beloved Peanut Butter Cake recipe, adding a nutty twist to our dessert dreams.
- Fact 2: Sweet Symphony of the 1920s 🎵
- The 1920s, famously known as the Roaring Twenties, not only gave birth to jazz and flapper fashion but also witnessed the inception of the Peanut Butter Cake. This scrumptious creation boogied its way into the hearts of bakers, combining peanut butter’s rhythm with cake’s melody.
- Fact 3: The Great Depression’s Sweet Escape 🍰
- As the Great Depression gripped the nation, baking became a means of solace and creativity. The Peanut Butter Cake emerged as a symbol of resilience, reminding us that even in tough times, a slice of cake can bring a moment of sweetness.
- Fact 4: A 1950s Kitchen Extravaganza 🍽️
- In the 1950s, kitchen experimentation was all the rage. Bakers went wild with Peanut Butter Cake variations, adding everything from chocolate chips to marshmallow fluff. It was like a cake carnival where every flavor wanted a ticket to the party!
- Fact 5: A Slice of Online Legacy 🌐
- With the internet’s advent, the Peanut Butter Cake recipe spread like wildfire. From forums to social media, bakers worldwide shared their love for this dessert. It’s a testament to how a single recipe can create a global community of dessert enthusiasts, all connected by a shared love for peanut buttery goodness.
FAQ’s
Can I use crunchy peanut butter for the cake?
Absolutely! Using crunchy peanut butter will add a delightful texture and extra nuttiness to the cake.
What can I substitute for eggs to make it vegan?
To make the cake vegan, you can use alternatives like applesauce, mashed bananas, or a commercial egg replacer. Follow the suggested measurement on the egg replacer packaging.
How do I prevent my cake from turning out dry?
To ensure a moist cake, avoid overbaking it. Check for doneness by inserting a toothpick into the center – it should come out with a few moist crumbs attached.
Can I make cupcakes instead of a whole cake?
Certainly! Adjust the baking time to around 15-20 minutes for cupcakes. Fill each cupcake liner about two-thirds full and check for doneness with a toothpick.
Is this cake suitable for people with nut allergies?
Unfortunately, this cake contains peanut butter, which is a nut product. If you’re looking for a nut-free alternative, consider using a nut-free spread or sunflower seed butter.
Can I freeze the cake for later?
Yes, you can freeze the cake. Wrap individual slices tightly in plastic wrap, place them in an airtight container, and store in the freezer for up to three months. Thaw in the refrigerator before enjoying.
How do I store leftover cake?
Store leftover cake in an airtight container at room temperature for up to 2-3 days. For longer storage, refrigerate the cake, but allow it to come to room temperature before serving for optimal flavor and texture.
Can I add chocolate chips to the batter?
Absolutely! Adding chocolate chips to the batter can create a delightful chocolate-peanut butter combo. Toss them in a bit of flour before adding to prevent sinking during baking.
How can I prevent the cake from sticking to the pan?
Grease the cake pans with butter or non-stick cooking spray and line the bottom with parchment paper. This will help the cake release easily after baking.
Can I use natural peanut butter instead of creamy peanut butter?
While you can use natural peanut butter, keep in mind that it might have a slightly different consistency due to its lower sugar content. This can affect the cake’s texture and flavor, so consider using a mix of both natural and creamy peanut butter for optimal results.



Leave a Review