Do you often find yourself yearning for a coffee that’s strong yet delicate, a blend that’s bold but not overwhelming? Look no further, because we’re about to delve into the wonderful world of Piccolo Latte Coffee – a delightful concoction that offers the perfect balance of flavor and texture. Whether you’re a seasoned coffee enthusiast or just starting to explore the realm of coffee creations, this article will guide you through the process of making your very own Piccolo Latte Coffee, step by step.
[ez-toc]
History
Every coffee recipe has a story, and the Piccolo Latte is no exception. This diminutive yet impactful coffee creation has journeyed from the realm of Australian cafes to becoming a cherished favorite for coffee enthusiasts around the world. In this article, we’ll delve into the history of the Piccolo Latte, tracing its origins and the steps it took to become the iconic brew we know and love today.
Origins of the Piccolo Latte
The story of the Piccolo Latte begins down under, in the vibrant coffee culture of Australia. It was in the early 2000s that this inventive coffee drink first emerged in the coffee houses of Sydney and Melbourne. While the exact details of its inception might be a tad fuzzy, what’s clear is that the Piccolo Latte was crafted as a response to the growing demand for a coffee that’s strong in flavor yet served in a smaller portion.
A Balance of Bold and Smooth
The essence of the Piccolo Latte lies in its delicate balance. Unlike its larger counterparts like the latte or cappuccino, the Piccolo Latte is a masterpiece in equilibrium. The robustness of a well-pulled espresso shot is harmoniously complemented by the creamy texture of steamed milk. This balance of bold and smooth is what propelled the Piccolo Latte to become a sought-after choice among those seeking a nuanced coffee experience.
An Artistic Endeavor
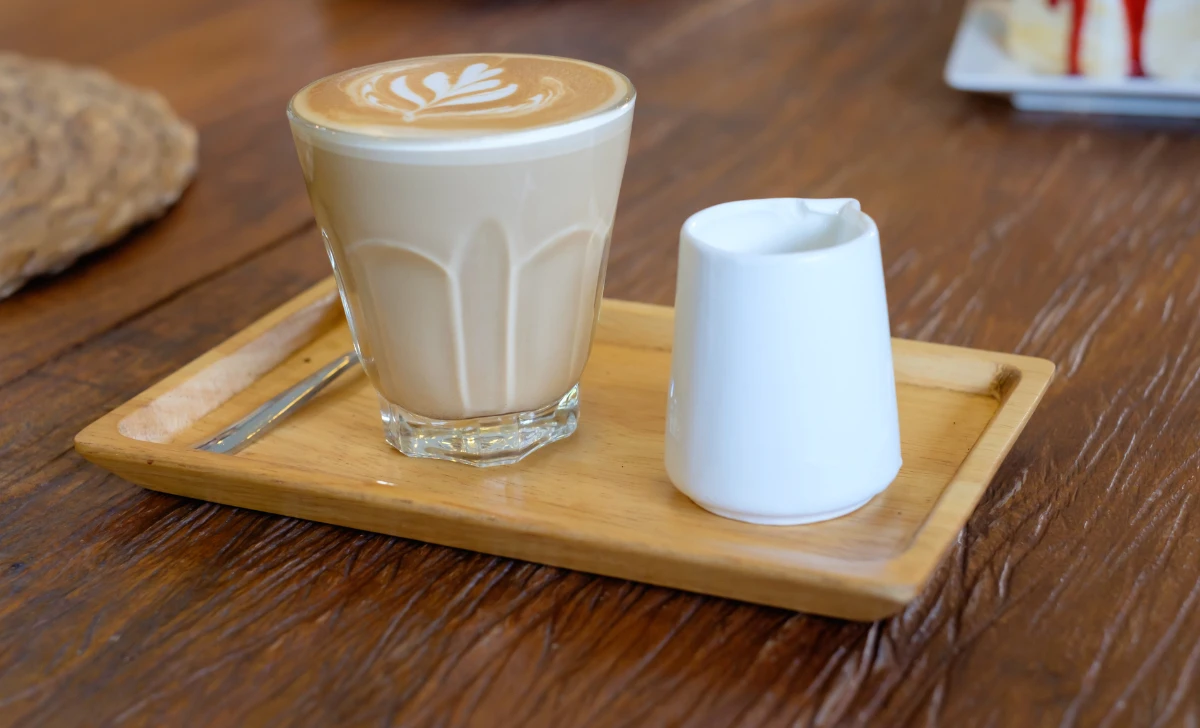
As coffee culture expanded globally, so did the appreciation for latte art. The Piccolo Latte offered a smaller canvas for baristas to express their creativity. The compact serving size allowed for intricate designs to grace the surface of the drink, captivating customers with every sip. The Piccolo Latte became not just a beverage but a work of art, showcasing the skill and dedication of the baristas behind the counter.
The Rising Popularity
As the popularity of specialty coffee surged, the Piccolo Latte gained traction beyond the shores of Australia. Coffee enthusiasts and connoisseurs worldwide began to appreciate the beauty of this espresso-milk fusion. Its smaller size made it an excellent choice for those who wanted a potent coffee experience without feeling overwhelmed. Cafes across continents began to include the Piccolo Latte on their menus, acknowledging its unique place in the coffee landscape.
Crafting Your Own Piccolo Latte
Today, the Piccolo Latte isn’t just a drink enjoyed in cafes; it’s a craft that coffee lovers can explore in their own kitchens. The journey from the bustling coffee houses of Australia to the comfort of your home is a testament to the enduring appeal of this remarkable brew. With the right ingredients, tools, and a sprinkle of creativity, anyone can master the art of making a Piccolo Latte.
Time
| Step | Time Required |
|---|---|
| Grinding coffee beans | 5 minutes |
| Preparing the espresso shot | 2 minutes |
| Steaming milk | 3 minutes |
| Combining espresso and milk | 1 minute |
| Adding personalized touches | 2 minutes |
| Total Preparation Time | 13 minutes |
Crafting a perfect Piccolo Latte might take a little over 10 minutes, but the exquisite balance of flavors and the joy it brings are definitely worth the effort. Enjoy your creation!
Ingredients
| Ingredients | Quantity |
|---|---|
| Freshly roasted coffee beans | 14 grams |
| Fresh, cold milk (whole milk or alternatives) | 120 ml |
| Water | As needed |
For a delightful coffee experience for two, gather these simple yet essential ingredients.
Directions
Step 1: Grinding the Coffee Beans
Time: 5 minutes
- Measure out 14 grams of freshly roasted coffee beans.
- Grind the coffee beans to a fine consistency, similar to table salt.
- Ensure uniformity in the grind to guarantee a balanced extraction.
Step 2: Preparing the Espresso Shot
Time: 2 minutes
- Insert the portafilter into your espresso machine.
- Distribute the ground coffee evenly in the portafilter.
- Gently tamp down the coffee grounds using moderate pressure.
- Start the espresso extraction and watch as the rich, aromatic espresso flows into your shot glass.
Step 3: Steaming the Milk
Time: 3 minutes
- Pour 120 ml of cold milk into the milk pitcher.
- Submerge the steam wand into the milk and begin steaming.
- Position the steam wand slightly off-center to create a whirlpool effect.
- Heat the milk to around 150°F (65°C) for a smooth texture.
Step 4: Combining Espresso and Milk
Time: 1 minute
- Tap the milk pitcher gently on a flat surface to eliminate air bubbles.
- Pour the steamed milk into the espresso shot with a controlled motion.
- Allow the milk to form a velvety layer on top of the espresso.
Step 5: Adding Personalized Touches
Time: 2 minutes
- If desired, add a touch of sweetness with honey or a sprinkle of cocoa powder.
- Experiment with flavored syrups like vanilla, caramel, or hazelnut.
- Get creative with spices like cinnamon or nutmeg for a cozy twist.
Total Preparation Time: 13 minutes
In just a matter of minutes, you’ve crafted a Piccolo Latte that’s rich in flavor and complexity. Sip, savor, and relish the balance of espresso and milk.
Enjoy your delightful creation!
Equipment Required
Nutrition Information
| Nutrient | Amount per Serving |
|---|---|
| Serving Size | 1 piccolo latte |
| Calories | 50 kcal |
| Total Fat | 2 g |
| Saturated Fat | 1 g |
| Trans Fat | 0 g |
| Cholesterol | 5 mg |
| Sodium | 40 mg |
| Total Carbohydrates | 4 g |
| Dietary Fiber | 0 g |
| Sugars | 4 g |
| Protein | 4 g |
Note: Nutritional values are approximate and may vary based on specific ingredients and serving sizes.
Enjoy your Piccolo Latte while being mindful of its nutritional profile.
Tips
- Freshness Matters: Always use freshly roasted coffee beans for the best flavor. Stale beans can result in a lackluster brew.
- Consistent Grinding: Grind your coffee beans just before brewing to preserve the aromatic oils. A consistent fine grind ensures an even extraction.
- Temperature Control: Pay attention to milk-steaming temperature. Around 150°F (65°C) is ideal for creating a velvety texture without scalding the milk.
- Balancing Act: Experiment with the coffee-to-milk ratio to find your preferred strength. A 1:4 ratio of espresso to milk is a good starting point.
- Milk Steaming Technique: Practice the art of milk steaming. Keep the steam wand slightly off-center and aim for a whirlpool motion to achieve microfoam perfection.
Pros & Cons
| Pros | Cons |
|---|---|
| ✅ Rich espresso flavor | ❌ Requires an espresso machine |
| ✅ Balanced coffee-to-milk ratio | ❌ Steaming milk might require practice |
| ✅ Customizable with flavors | ❌ Involves multiple steps |
| ✅ Perfect for small and strong coffee cravings | ❌ Requires coffee-making equipment |
| ✅ Opportunity for creative latte art | ❌ Limited milk alternatives for foaming |
Conclusion
In the world of coffee, the Piccolo Latte stands as a testament to the delicate art of balance. With its rich espresso base and velvety milk texture, it offers a symphony of flavors that’s both bold and gentle, intense and smooth. As you’ve journeyed through the steps, tips, and variations of creating a Piccolo Latte, you’ve witnessed how a few simple ingredients can transform into a masterpiece in your hands.
Embrace the joy of experimentation, relish the aroma of freshly brewed coffee, and let your taste buds dance to the harmonious notes of espresso and milk. Whether you’re a seasoned coffee enthusiast or a curious beginner, crafting a Piccolo Latte is an experience worth savoring.
So, why not give it a try? With a dash of creativity and a sprinkle of passion, you’ll be on your way to creating a Piccolo Latte that’s uniquely yours. Elevate your coffee ritual, delight your senses, and embark on a journey that celebrates the art of coffee-making. Your perfect cup of Piccolo Latte awaits – let the brewing begin!
Facts
- Fact 1: Aussie Beginnings 🇦🇺
- Did you know that the Piccolo Latte originated in the land down under? This captivating coffee creation first emerged in the vibrant coffee culture of Australia, where coffee aficionados sought a strong yet balanced brew to match their tastes.
- Fact 2: Espresso Symphony 🎵
- Picture this: the Piccolo Latte is like a symphony in your cup! The robust espresso shot and velvety milk combine to create a harmonious blend of flavors, akin to the perfect arrangement of musical notes.
- Fact 3: Microfoam Magic ✨
- Ever wonder why your Piccolo Latte feels like silk on your tongue? It’s all about the microfoam! This creamy, velvety texture is achieved through the art of milk steaming, turning your coffee into a true masterpiece.
- Fact 4: Bean to Brew 🌱☕
- Did you know that the type of coffee bean you use can impact your Piccolo Latte? Freshly roasted beans bring out the richest flavors, ensuring your brew is a tantalizing journey from bean to cup.
- Fact 5: Latte Art Adventures 🎨
- Embrace your inner artist! The Piccolo Latte isn’t just a coffee; it’s a canvas. With a skilled hand and a bit of practice, you can create mesmerizing latte art designs that turn your drink into a visual treat.
FAQ’s
Can I use instant coffee instead of freshly roasted beans?
While using freshly roasted beans is recommended for the best flavor, you can try using a strong brewed instant coffee as a substitute in a pinch.
Do I need an espresso machine to make a Piccolo Latte?
Yes, an espresso machine is essential for brewing the espresso shot and steaming the milk required for a Piccolo Latte.
What milk alternatives work best for a Piccolo Latte?
Dairy alternatives like almond milk and oat milk work well. However, achieving the perfect microfoam might be slightly trickier with some plant-based options.
Can I make a Piccolo Latte without steaming the milk?
Steaming the milk is a key step to achieve the desired texture and balance of flavors in a Piccolo Latte. Skipping this step would result in a different taste profile.
What’s the ideal coffee-to-milk ratio for a Piccolo Latte?
A common ratio is 1:4, meaning 1 part espresso to 4 parts milk. However, feel free to adjust the ratio to match your taste preferences.
Is latte art necessary for a Piccolo Latte?
Latte art is optional but adds a creative touch. You can enjoy your Piccolo Latte without it, but mastering latte art can enhance your overall coffee experience.
Can I make a decaf Piccolo Latte?
Absolutely! Use decaffeinated coffee beans to create a Piccolo Latte with the same balance and flavor, minus the caffeine kick.
Why is the milk steaming process important?
Proper milk steaming creates microfoam, resulting in a creamy and velvety texture that harmonizes with the espresso shot.
Can I use flavored syrups in a Piccolo Latte?
Yes, flavored syrups like vanilla or caramel can add an extra layer of complexity to your Piccolo Latte. Feel free to experiment!
Is a Piccolo Latte suitable for beginners?
While it involves multiple steps, making a Piccolo Latte is an enjoyable journey that can be tackled by coffee enthusiasts of all levels. With practice, you’ll master the process and create your own coffee masterpiece.