Are you a fan of delectable desserts that transport you to the charming streets of Italy with each bite? If so, get ready to embark on a culinary adventure as we explore the art of making authentic and mouthwatering cannoli right in your own kitchen. From the crispy, flaky shell to the creamy, rich filling, this guide will take you step by step through the process of creating these irresistible Italian treats. Whether you’re a seasoned chef or a beginner in the kitchen, let’s dive into the world of cannoli-making together!
[ez-toc]
History
Have you ever bitten into a cannoli and wondered about its origins? This beloved Italian dessert has a rich history that spans centuries, filled with cultural influences, culinary innovations, and a dash of sweet inspiration. Join us as we trace the captivating journey of the cannoli from its humble beginnings to becoming a worldwide sensation.
Ancient Roots and Sweet Beginnings
The story of the cannoli dates back to the heart of Sicily, Italy. Its earliest roots can be traced to the Arab influence in the region during the 9th century. The Arabs brought with them a love for indulgent sweets and an array of culinary techniques. It’s believed that the cannoli’s distinctive shape, reminiscent of a hollow reed, might have been inspired by the sugar cane that was abundant in the area.
Crispy Shells and Sweet Filling: The Renaissance of Flavor
As centuries passed, the cannoli’s recipe evolved, blending diverse ingredients and cultural influences. During the Renaissance, the filling shifted from simple honey and ricotta to more elaborate combinations. The introduction of citrus zest, candied fruits, and spices added layers of flavor, while the dough itself became finer and more delicate.
From Sicily to the World: Cannoli’s Global Odyssey
The 19th century marked a turning point for the cannoli as Italian immigrants carried their culinary heritage to new lands. With them, they brought this delectable treat, sharing it with communities around the world. In the United States, cannoli quickly became a staple of Italian-American bakeries and celebrations, captivating taste buds and hearts alike.
Innovation Meets Tradition: Modern Twists on a Classic
As the years went by, cannoli continued to evolve while staying true to its core essence. Creative bakers experimented with various fillings, leading to the emergence of chocolate, pistachio, and even savory variations. These adaptations added a contemporary twist to the traditional treat, showcasing the endless possibilities that cannoli could offer.
Cannoli Today: A Beloved Icon of Italian Cuisine
Today, cannoli remains a beloved icon of Italian culinary culture, appreciated by people of all backgrounds. Its journey from a simple sweet treat in Sicily to an internationally recognized dessert reflects the enduring power of food to transcend borders and bring people together. Each bite of a cannoli carries with it a taste of history, a blend of cultures, and a testament to the artisans who have perfected this delectable creation.
Time
| Step | Time Estimate |
|---|---|
| Dough Preparation | 15 minutes |
| Dough Resting | 30 minutes |
| Shaping and Filling Cannoli Tubes | 20 minutes |
| Frying Cannoli Shells | 20 minutes |
| Cooling Cannoli Shells | 15 minutes |
| Making Ricotta-Based Filling | 10 minutes |
| Preparing Chocolate and Mascarpone Filling | 15 minutes |
| Mixing Fruit-Infused Ricotta Filling | 10 minutes |
| Assembling and Garnishing Cannoli | 15 minutes |
| Serving and Indulging | Time to enjoy! |
Ingredients
| Ingredients for 2-Person Serving | Quantity |
|---|---|
| Cannoli Shells | 6 |
| All-Purpose Flour | 1 cup |
| Granulated Sugar | 2 tablespoons |
| Salt | 1/4 teaspoon |
| Unsalted Butter | 2 tablespoons, cold and diced |
| Egg Yolk | 1 |
| Marsala Wine | 2 tablespoons |
| White Vinegar | 1 teaspoon |
| Ricotta Cheese | 1 cup |
| Powdered Sugar | 1/2 cup |
| Vanilla Extract | 1/2 teaspoon |
| Citrus Zest (Orange or Lemon) | 1 teaspoon |
| Semi-Sweet Chocolate Chips or Chopped Chocolate | 1/4 cup |
| Mascarpone Cheese | 1/2 cup |
| Cocoa Powder | 2 tablespoons |
| Confectioners’ Sugar | 2 tablespoons |
| Chopped Pistachios or Other Nuts | 2 tablespoons |
| Fresh Berries or Fruit | For garnish |
| Vegetable Oil for Frying | As needed |
| Optional: Liqueur (e.g., Amaretto) | To taste (if desired) |
These quantities are based on a 2-person serving and can be adjusted as needed. Enjoy creating your delicious cannoli using these ingredients!
Directions
Dough Preparation
- Combine Dry Ingredients: In a mixing bowl, whisk together the all-purpose flour, granulated sugar, and salt until well combined.
- Incorporate Butter: Add the cold, diced unsalted butter to the dry ingredients. Use your fingertips or a pastry cutter to blend the butter into the flour mixture until it resembles coarse crumbs.
- Create Dough Base: In a separate bowl, whisk together the egg yolk, Marsala wine, and white vinegar. Pour this mixture into the flour-butter mixture.
- Knead and Rest: Gently knead the mixture until a smooth dough forms. Wrap the dough in plastic wrap and let it rest at room temperature for about 30 minutes.
Shaping and Filling Cannoli Tubes
- Prepare Cannoli Tubes: Heat vegetable oil in a deep fryer or a heavy pot to 350°F (175°C). Meanwhile, divide the rested dough into 6 equal portions.
- Roll and Shape: Roll out each portion of dough on a floured surface until very thin. Carefully wrap the dough around metal cannoli tubes, sealing the edges with a dab of water.
- Fry to Perfection: Gently place the wrapped tubes into the hot oil, seam side down. Fry until the shells are golden brown and crisp, about 2-3 minutes. Use tongs to remove and drain on paper towels. Let them cool before carefully sliding the shells off the tubes.
Creating Luscious Cannoli Fillings
- Ricotta-Based Filling: In a bowl, combine the ricotta cheese, powdered sugar, vanilla extract, and citrus zest. Mix well until smooth and creamy. Transfer the filling into a piping bag fitted with a star tip.
- Chocolate and Mascarpone Filling: Melt the chocolate chips and allow them to cool slightly. In another bowl, whisk together the mascarpone cheese, cocoa powder, and confectioners’ sugar. Stir in the melted chocolate until fully incorporated.
- Fruit-Infused Ricotta Filling: Mix chopped pistachios or other nuts with a portion of the ricotta-based filling. You can also fold in diced fresh berries or fruit for added flavor and texture.
Assembling and Serving Your Cannoli Creations
- Fill Cannoli Shells: Hold a cannoli shell in one hand and gently pipe the desired filling into both ends. Start from the center and work your way out. Repeat for all shells and fillings.
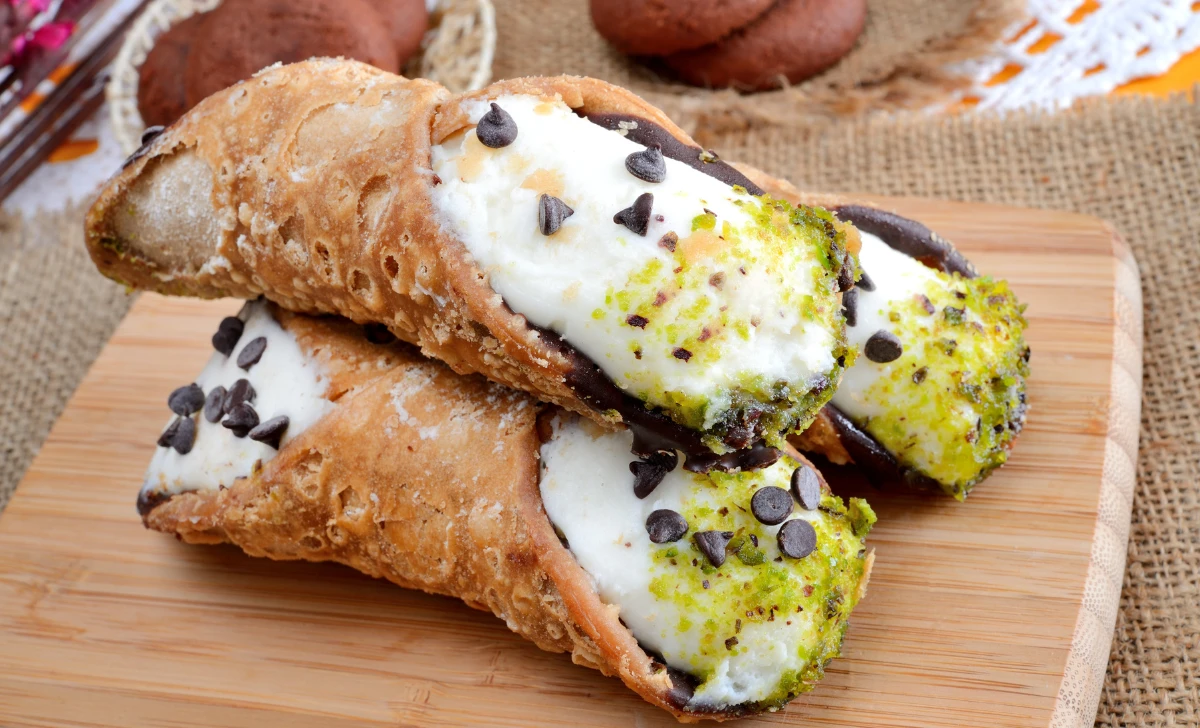
- Garnish and Serve: If desired, garnish the filled cannoli with more chopped nuts, grated chocolate, or a sprinkle of confectioners’ sugar. Arrange them on a serving platter with fresh berries or fruit for an elegant touch.
Equipment Required
Nutrition Information
| Nutrition Information per Cannoli | Amount |
|---|---|
| Serving Size | 1 cannoli |
| Calories | 180 calories |
| Total Fat | 11g |
| Saturated Fat | 5g |
| Trans Fat | 0g |
| Cholesterol | 30mg |
| Sodium | 55mg |
| Total Carbohydrates | 16g |
| Dietary Fiber | 1g |
| Sugars | 7g |
| Protein | 4g |
| Vitamin D | 0% DV |
| Calcium | 6% DV |
| Iron | 4% DV |
| Potassium | 2% DV |
Keep in mind that these values are approximate and can vary based on specific ingredients and portion sizes. Enjoy your cannoli while keeping an eye on the nutritional content!
Tips
- Chill Ingredients: For flakier cannoli shells, ensure that your butter and Marsala wine are cold when incorporating them into the dough.
- Thin and Even Dough: Roll out the dough as thin as possible without tearing it. This ensures that the shells fry evenly and become crispy.
- Sealing the Edges: To prevent the shells from sliding off the tubes during frying, make sure to seal the edges of the dough tightly.
- Frying Temperature: Maintain a consistent frying temperature of 350°F (175°C) for perfect, golden-brown shells. Use a kitchen thermometer to monitor the oil.
- Drain Excess Oil: After frying, allow the shells to drain on paper towels to remove excess oil and keep them crisp.
- Fresh Ricotta: Opt for fresh, high-quality ricotta cheese for a smoother and creamier filling.
- Piping Filling: Pipe the filling into the shells from both ends to ensure an even distribution of flavor throughout.
Pros & Cons
| Pros | Cons |
|---|---|
| ✔️ Authentic Italian flavors | ❌ Time-consuming |
| ✔️ Customizable fillings | ❌ Requires frying |
| ✔️ Impressive dessert option | ❌ Potential for mess |
| ✔️ Great for special occasions | ❌ High calorie content |
| ✔️ Opportunity for creativity | ❌ Some ingredients may be costly |
Conclusion
In the enchanting realm of culinary delights, few experiences rival the satisfaction of crafting your very own cannoli from scratch. From the delicate balance of crispy shells to the lusciousness of the fillings, this recipe encapsulates the heart and soul of Italian dessert tradition. Whether you’re a kitchen aficionado seeking a new challenge or a budding chef eager to explore the world of sweet creations, making cannoli is an experience that promises both culinary achievement and pure delight.
As you embark on this delectable journey, remember that every step is an opportunity to infuse your personality and preferences into these Italian delicacies. The joy of making cannoli extends beyond the kitchen—each bite is a taste of history, culture, and the heartwarming tradition of sharing exceptional food with loved ones.
So, with your apron on and your spirit of adventure in full swing, why not seize the chance to create a masterpiece that’s not just a dessert but a memory? Invite friends and family to join you on this voyage of flavors, and indulge in the satisfaction of savoring the fruits of your labor. Unleash your creativity, embrace the sweet artistry, and unlock the secret to crafting cannoli that are nothing short of perfection.
Don’t wait—gather your ingredients, channel your inner chef, and let the magic unfold as you transform simple components into a symphony of taste and texture. The journey is as gratifying as the destination, and the delight of savoring your very own cannoli is a reward that awaits you. Get ready to embark on a culinary escapade that’s sure to leave an indelible mark on your taste buds and your heart. Bon appétit! 🍮🎉
Facts
- Fact 1: A Sweet Tale of Arab Influence 🌍
- Did you know that the origins of cannoli are rooted in the Arab world? The treat’s distinctive tubular shape might have been inspired by the Arab love for sugar cane, leading to the creation of these delightful dessert tubes.
- Fact 2: Cannoli Carnival Connection 🎉
- In Sicily, cannoli hold a special place during Carnival season. Historically, these treats were consumed to celebrate the end of winter and the arrival of spring. So, when you bite into a cannoli, you’re not just indulging in dessert; you’re joining a festive tradition!
- Fact 3: Cannoli’s Star Turn in The Godfather 🎬
- Cannoli even made their mark in pop culture! In the iconic film “The Godfather,” the line “Leave the gun, take the cannoli” has become synonymous with memorable moments. It’s a testament to the lasting impression these pastries have made on culinary history.
- Fact 4: A Guinness World Record for the Largest Cannolo 🏆
- In 2012, the city of Zafferana Etnea in Italy set a delicious record by creating the world’s largest cannolo. Measuring a whopping 35.55 meters (116 feet and 7 inches), this massive masterpiece left everyone in awe. Talk about a colossal craving!
- Fact 5: Cannoli, a Muse for Poets 📜
- Cannoli’s charm extends beyond taste buds—poets have been inspired to pen verses about these delectable treats. From love poems to odes of indulgence, cannoli have found their way into the hearts and words of artists who appreciate their captivating essence.
FAQ’s
Can I make cannoli shells without a deep fryer?
Absolutely! While traditional cannoli shells are fried, you can achieve similar results by baking them. Simply brush the shaped dough with egg wash and bake in a preheated oven at 350°F (175°C) until golden and crispy, about 15-20 minutes.
What’s the difference between ricotta and mascarpone?
Ricotta is a fresh, slightly grainy Italian cheese with a mild flavor. Mascarpone, on the other hand, is creamier and richer with a delicate, buttery taste. Both can be used as fillings, each offering a distinct texture and flavor profile.
How far in advance can I fill cannoli shells?
For the best results, it’s recommended to fill cannoli shells shortly before serving. Filled shells may become soft over time due to moisture from the filling. To maintain the crunchiness, fill them just before you’re ready to enjoy.
Can I use alternative sweeteners in the filling?
Certainly! Feel free to experiment with alternative sweeteners like honey, maple syrup, or agave in the fillings. Keep in mind that different sweeteners might alter the flavor and consistency, so adjust quantities to taste.
What should I do if my cannoli filling is too runny?
If your cannoli filling is too runny, you can thicken it by adding more powdered sugar or by placing the filling in the refrigerator for a short while. Make sure to drain the ricotta well and adjust the consistency to your preference.
Can I freeze cannoli shells for later use?
Yes, you can freeze unfilled cannoli shells for later use. Once fried (or baked), let them cool completely, then store them in an airtight container or freezer-safe bag. When ready to use, let them thaw at room temperature and fill as desired.
Can I make cannoli dough ahead of time?
Absolutely! You can prepare the cannoli dough ahead of time and refrigerate it for up to 2 days. Just make sure to wrap the dough tightly in plastic wrap to prevent it from drying out.
How do I prevent my cannoli shells from becoming soggy?
To prevent cannoli shells from becoming soggy, avoid filling them too far in advance. Fill the shells shortly before serving to maintain their delightful crunchiness.
Can I use flavored liqueurs in the filling?
Yes, you can add flavored liqueurs such as Amaretto or Frangelico to your fillings for an extra layer of flavor. However, use them sparingly to avoid overpowering the taste of the filling.
Are cannoli shells suitable for people with gluten intolerance?
Traditional cannoli shells are made with wheat flour and are not suitable for those with gluten intolerance. However, you can make gluten-free cannoli shells by substituting all-purpose flour with a gluten-free flour blend of your choice.
