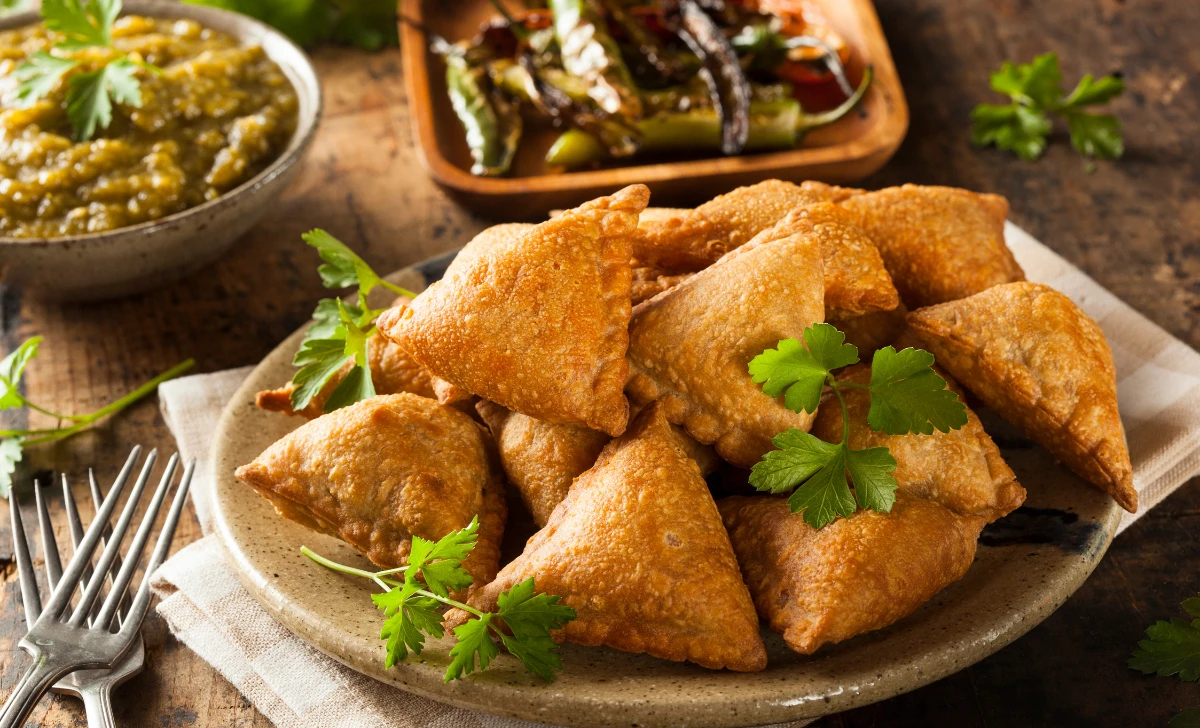
When it comes to delectable Indian snacks, the Vegetable Samosa holds a special place. These deep-fried, crispy pastries filled with a savory mixture of vegetables and spices are a favorite not only in India but around the world. Whether you enjoy them as a tea-time treat or an appetizer at parties, the vegetable samosas are sure to tantalize your taste buds with their flavorful goodness. In this article, we’ll dive into the art of making these scrumptious samosas step by step, so let’s get started!
[ez-toc]
History
The history of Vegetable Samosas is as rich and diverse as the flavors they offer. These delightful pastries have a fascinating origin that dates back centuries and is deeply rooted in the culinary heritage of the Indian subcontinent.
Ancient Beginnings
The earliest versions of samosas can be traced back to the Middle East, where a similar snack known as “sambusak” was popular among traders and travelers. Sambusak, like samosas, consisted of a pastry shell filled with meat, lentils, or other savory ingredients.
Arrival in the Indian Subcontinent
The samosa made its way to the Indian subcontinent during the medieval period, thanks to the cultural and commercial exchanges between Central Asia and the Indian region. The Persian influence on Indian cuisine played a significant role in the integration of samosas into the local food culture.
Evolution in India
As samosas found their way into India, the locals began to adapt the recipe according to their tastes and preferences. The traditional fillings evolved to include a variety of ingredients, including vegetables, potatoes, peas, and spices like cumin, coriander, and garam masala.
Regional Variations
As the recipe spread across the Indian subcontinent, each region developed its unique take on the samosa. In Northern India, the popular potato-filled samosas gained fame, while in Southern India, different fillings like lentils and coconut became prominent. In some regions, the samosas were made with a flaky pastry, while in others, a thicker and crisper dough was used.
Culinary Symbolism
The samosa holds cultural significance beyond just being a delicious snack. In Indian households, samosas often mark special occasions and celebrations. They are also commonly served during religious festivals, weddings, and family gatherings, symbolizing unity and togetherness.
Global Popularity
Over time, the popularity of vegetable samosas transcended borders, and they became a beloved international snack. Indian restaurants worldwide feature samosas on their menus, and their distinctive taste and crunchy texture have won the hearts of people from different cultures.
Time
| Step | Time Required |
|---|---|
| Preparation of the Samosa Dough | 30 minutes |
| Making the Vegetable Filling | 20 minutes |
| Rolling and Stuffing the Samosas | 25 minutes |
| Folding and Sealing the Samosas | 15 minutes |
| Heating Oil and Preparing for Frying | 10 minutes |
| Frying the Samosas | 20 minutes |
| Draining and Cooling | 10 minutes |
| Total Cooking and Preparation Time | 2 hours 10 minutes |
Note: Cooking and preparation times may vary depending on individual cooking skills and experience.
Ingredients
| Ingredients | Quantity |
|---|---|
| All-purpose flour | 1 cup |
| Vegetable oil | 2 tablespoons |
| Water | 1/4 cup |
| Potatoes, boiled and mashed | 2 medium-sized |
| Green peas, boiled | 1/2 cup |
| Carrots, finely chopped | 1/4 cup |
| Green beans, finely chopped | 1/4 cup |
| Onion, finely chopped | 1 small |
| Ginger-garlic paste | 1 teaspoon |
| Green chili, finely chopped | 1 |
| Cumin seeds | 1/2 teaspoon |
| Coriander powder | 1 teaspoon |
| Garam masala | 1/2 teaspoon |
| Turmeric powder | 1/4 teaspoon |
| Red chili powder | 1/2 teaspoon |
| Fresh coriander leaves | A handful |
| Lemon juice | 1 tablespoon |
| Salt | To taste |
Note: The ingredient quantities mentioned in the table are for a 2-person serving of vegetable samosas. Adjust the quantities accordingly for more servings.
Directions
Step 1: Prepare the Samosa Dough
- In a mixing bowl, combine the all-purpose flour, 2 tablespoons of vegetable oil, and a pinch of salt.
- Gradually add water to the flour mixture while kneading the dough.
- Knead the dough until it becomes smooth and firm.
- Cover the dough with a damp cloth and let it rest for 20-30 minutes.
Step 2: Make the Vegetable Filling
- Heat a tablespoon of vegetable oil in a pan over medium heat.
- Add cumin seeds to the hot oil and let them sizzle for a few seconds.
- Stir in the finely chopped onion and sauté until it turns translucent.
- Add ginger-garlic paste and green chili to the pan. Cook for another minute.
- Toss in the chopped carrots, green beans, boiled green peas, and mashed potatoes.
- Sprinkle turmeric powder, red chili powder, coriander powder, garam masala, and salt over the vegetables.
- Mix the ingredients thoroughly and cook the filling for 5-7 minutes until the flavors blend.
- Add freshly chopped coriander leaves and lemon juice to the mixture, giving it a final stir.
- Remove the filling from heat and let it cool down.
Step 3: Rolling and Stuffing the Samosas
- Divide the rested dough into equal-sized small balls.
- Take one dough ball and roll it into a thin, oval-shaped sheet on a floured surface.
- Cut the oval sheet in half, creating two semi-circles.
- Form a cone by folding one semi-circle and sealing the edges with water.
- Fill the cone with a generous amount of the vegetable filling.
- Seal the open end of the cone to form a triangular samosa.
- Repeat the process with the rest of the dough balls and filling.
Step 4: Folding and Sealing the Samosas
- With all the samosas ready, press the edges firmly to ensure they are well-sealed.
- You can use a fork to crimp the edges for a decorative touch.
Step 5: Frying the Samosas
- Heat vegetable oil in a deep pan over medium heat.
- Once the oil is hot, carefully add the prepared samosas into the oil, a few at a time.
- Fry the samosas until they turn golden brown and crisp on all sides.
- Remove the fried samosas and place them on a paper towel to drain excess oil.
Step 6: Draining and Cooling
- Let the fried samosas cool down slightly to a warm temperature.
- Serve the vegetable samosas with your favorite dipping sauce or chutney.
Enjoy the delightful taste of freshly made Vegetable Samosas with your loved ones!
Equipment Required
Nutrition Information
| Nutrient | Amount |
|---|---|
| Serving Size | 1 samosa |
| Calories | 120 kcal |
| Total Fat | 6.5g |
| – Saturated Fat | 1.5g |
| – Trans Fat | 0g |
| Cholesterol | 0mg |
| Sodium | 180mg |
| Total Carbohydrates | 13g |
| – Dietary Fiber | 1.5g |
| – Sugars | 1g |
| Protein | 3g |
| Vitamin D | 0mcg |
| Calcium | 15mg |
| Iron | 1mg |
| Potassium | 110mg |
Note: Nutritional values may vary based on specific ingredients used and cooking methods. The values mentioned above are approximate and based on general nutritional data for vegetable samosas.
Tips
- Perfecting the Dough: Ensure the samosa dough is neither too soft nor too stiff. Adjust the amount of water while kneading to achieve the right consistency for a crispy yet flaky texture.
- Avoid Overstuffing: Be mindful not to overstuff the samosas, as it may cause them to burst open during frying. The filling should be well-distributed but leave enough space to seal the edges properly.
- Sealing Techniques: For a secure seal, use a water-flour paste to stick the edges of the samosas together. You can also pinch and fold the edges for a decorative finish.
- Maintaining Oil Temperature: While frying, ensure the oil is adequately hot but not smoking. Fry the samosas in batches to maintain consistent oil temperature and even cooking.
- Drain Excess Oil: After frying, place the samosas on a paper towel-lined plate to remove excess oil, ensuring they remain crisp.
- Experiment with Fillings: Get creative with fillings by incorporating your favorite vegetables, tofu, paneer, or minced meat for non-vegetarian options.
- Baking Option: If you prefer a healthier version, you can bake the samosas instead of deep-frying. Brush them with oil and bake at 200°C (400°F) until golden brown.
- Make-Ahead Preparation: Prepare the samosa filling and dough in advance and store them separately in the refrigerator for a quick assembly when needed.
- Freezing Instructions: Freeze the uncooked samosas on a baking sheet lined with parchment paper. Once frozen, store them in a zip-lock bag. Fry directly from frozen when required.
- Serve Fresh and Hot: Vegetable samosas taste best when served fresh and hot. Enjoy them with chutneys or sauces for a burst of flavors.
Pros & Cons
| Pros | Cons |
|---|---|
| ✔️ Delicious and Flavorful Snack | ❌ High in Calories |
| ✔️ Versatile Filling Options | ❌ Deep-Fried and Not Healthiest |
| ✔️ Great for Tea-Time or Parties | ❌ Time-Consuming Preparation |
| ✔️ Cultural Significance | ❌ Requires Skillful Folding |
| ✔️ Can be Made in Advance | ❌ May Burst During Frying |
Conclusion
In conclusion, the Vegetable Samosa recipe is a delightful and flavorful journey into the heart of Indian cuisine. These crispy, golden-brown pastries filled with a mouthwatering combination of vegetables and spices are a treat for the taste buds. The history and cultural significance behind samosas add an extra layer of appreciation to this beloved snack.
With a little practice and attention to detail, you can master the art of making samosas in your kitchen. The versatile fillings allow you to get creative and cater to various taste preferences. Whether you’re hosting a party, enjoying a tea-time treat, or looking for a delicious appetizer, vegetable samosas are the perfect choice.
While samosas are undeniably indulgent, the joy they bring is well worth it. Treat yourself and your loved ones to the delightful taste of homemade samosas, and experience the warmth and comfort of Indian flavors in every bite.
So, roll up your sleeves, follow the step-by-step guide, and embark on a culinary adventure with vegetable samosas. Don’t be afraid to experiment with different fillings and techniques to make this recipe truly your own. Get ready to savor the crispy, spiced goodness of vegetable samosas that will surely leave you craving for more!
Facts
- Fact 1: Ancient Culinary Treasure 🌍
- 🔍 Did you know that samosas have a fascinating history that predates the modern age? The concept of filled pastries can be traced back to ancient Persia, where they were known as “sambusak.” From there, they traveled through the ancient Silk Road routes to reach the Indian subcontinent, where they evolved into the beloved vegetable samosas we know today.
- Fact 2: Samosa: A Symbol of Good Fortune 🌟
- 🍀 In India, samosas hold special significance beyond their culinary appeal. They are often considered a symbol of good fortune and prosperity. As a result, they are commonly served during festivals, weddings, and other celebratory occasions, symbolizing the hope for a prosperous and joyous life.
- Fact 3: Samosas in Space 🚀🪐
- 🌌 In 2011, Indian-American astronaut Sunita Williams carried a special stash of samosas to space during her space mission. These space samosas were vacuum-sealed to avoid crumbs floating in zero gravity, allowing her to enjoy a taste of home while orbiting the Earth.
- Fact 4: Guinness World Record Samosa 🏆
- 🎖️ In 2017, a team of chefs in Bengaluru, India, created the world’s largest samosa, earning a spot in the Guinness World Records. This massive samosa weighed a whopping 153.1 kilograms (337.5 pounds) and stood tall as a testament to the love and passion for this delectable snack.
- Fact 5: Samosas on National Currency 💰
- 💸 The humble samosa’s popularity is so immense in India that it has found a place on the country’s national currency. On the 50-rupee note, a motif of two samosas is featured, representing the country’s rich culinary heritage and the cultural significance of this iconic snack.
FAQ’s
Can I make the samosa dough ahead of time and store it for later use?
Yes, you can prepare the samosa dough in advance and store it in an airtight container in the refrigerator for up to 24 hours. Just make sure to bring it back to room temperature before rolling and shaping.
Can I freeze the prepared vegetable samosas before frying them?
Absolutely! You can freeze the uncooked samosas on a baking sheet lined with parchment paper. Once frozen, transfer them to a zip-lock bag for storage. Fry them directly from frozen when needed.
Can I use store-bought pastry sheets for making samosas instead of making the dough from scratch?
Yes, you can use store-bought pastry sheets like puff pastry or spring roll wrappers as a time-saving alternative to homemade dough. Just ensure the fillings are well-sealed and follow the same frying or baking process.
How do I prevent the samosas from becoming too oily while frying?
To prevent excess oil absorption, make sure the oil is at the right temperature before frying. Fry the samosas in small batches to maintain consistent oil temperature, and place them on paper towels to drain excess oil after frying.
Can I make gluten-free samosas?
Yes, you can make gluten-free samosas by using gluten-free all-purpose flour for the dough. Additionally, ensure that all the filling ingredients are gluten-free.
Are vegetable samosas suitable for vegans?
Yes, vegetable samosas are typically vegan-friendly. However, always check the specific recipe to ensure there are no animal-based ingredients in the dough or filling.
Can I bake samosas instead of frying them to reduce calories?
Absolutely! Baking samosas is a healthier option. Brush them with oil and bake at 200°C (400°F) until they turn golden brown and crisp.
How can I reheat leftover samosas to maintain their crispiness?
To reheat leftover samosas, preheat the oven to 180°C (350°F) and place them on a baking sheet. Bake for about 10 minutes until they are heated through and crispy again.
Can I use an air fryer to make samosas?
Yes, an air fryer is a great option for making samosas with less oil. Preheat the air fryer, brush the samosas with a little oil, and air fry at 190°C (375°F) until golden and crispy.
Are vegetable samosas spicy? Can I adjust the spiciness level to my preference?
The spiciness of vegetable samosas can be adjusted to your liking by controlling the amount of green chili or red chili powder in the filling. You can make them mild or fiery hot, depending on your taste preferences.