When it comes to bagels, most people immediately think of the iconic New York bagels. But hold onto your taste buds because we’re about to take you on a culinary journey to the vibrant city of Montreal, where the bagels are just as beloved, but with a unique twist that sets them apart. Get ready to discover the secrets of crafting Montreal-style bagels that are chewy on the inside, slightly sweet, and irresistibly delicious. So, put on your apron and let’s dive into this delectable adventure!
[ez-toc]
History
As you embark on your journey to master the art of crafting Montreal bagels, it’s only fitting to take a step back in time and explore the rich history that has shaped these delectable treats into what they are today. The story of Montreal bagels is a tale of culture, community, and culinary innovation that has captured the hearts and taste buds of people far and wide.
The Beginnings of a Culinary Icon
The origins of Montreal bagels can be traced back to the early 20th century when Jewish immigrants brought with them their cherished recipes and culinary traditions to the bustling city. As they settled into their new homes, these immigrants infused their culture into the local food scene, giving birth to a unique culinary phenomenon: the Montreal bagel.
A Twist on Tradition
What sets Montreal bagels apart from their counterparts around the world is their distinct character. Unlike the larger and chewier New York bagels, Montreal bagels are smaller, denser, and possess a touch of sweetness that makes them stand out. This twist on tradition is thought to have emerged from the use of honey in the dough, which imparts a delicate flavor and a golden hue to the finished product.
The Craftsmanship Behind the Bagel
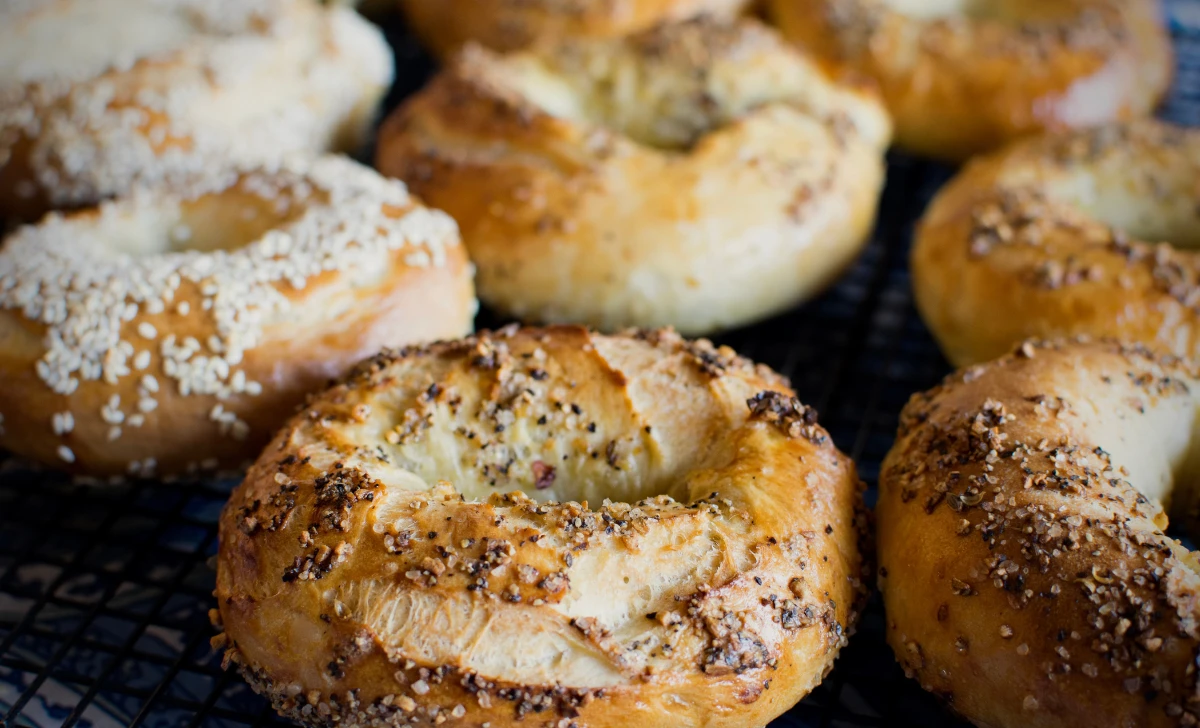
Crafting Montreal bagels isn’t just about mixing ingredients; it’s a labor of love and a display of skill. Bakers carefully mix high-gluten flour, yeast, water, honey, and a pinch of salt to create a dough that’s as smooth as a jazz melody. This dough is then hand-rolled, looped, and shaped into the iconic round form that Montreal bagels are known for.
A Dip in Flavorful History
One of the most unique aspects of the Montreal bagel-making process is the honey-sweetened boiling water bath that each bagel takes before hitting the oven. This step not only imparts a touch of sweetness to the bagel but also creates a glossy, golden crust that’s nothing short of irresistible. This practice harks back to the traditional method used by the original bagel makers, who believed that this step was crucial in achieving the perfect bagel.
The Baking Battle: Wood-Fired Ovens vs. Conventional Ovens
In the early days of Montreal bagel making, wood-fired ovens were the stage upon which these culinary wonders were brought to life. The crackling flames imparted a subtle smokiness to the bagels, enhancing their flavor profile. However, as technology advanced, conventional ovens entered the scene, offering a different yet equally satisfying baking experience. Today, both methods have their devoted proponents, making the baking battle an ongoing source of friendly rivalry.
A Rivalry Rooted in Flavor
The rivalry between Montreal bagels and New York bagels is a testament to the passion and pride that people feel for their culinary traditions. While New York bagels boast their signature chewiness, Montreal bagels counter with their unique combination of density and sweetness. It’s a bit like comparing two beloved genres of music – both incredible in their own right, yet striking different chords.
Spreading Joy, One Topping at a Time
As you venture into the world of Montreal bagels, you’ll discover a universe of toppings and spreads that elevate these treats to new heights. From classic cream cheese and smoked salmon to creative concoctions like sun-dried tomato and basil cream cheese, the possibilities are endless. Each topping adds a layer of flavor and personality, ensuring that every bite is a delightful surprise.
A Journey of Mastery
Crafting Montreal bagels isn’t just about following a recipe; it’s about embracing a culinary heritage and embarking on a journey of mastery. From perfecting the art of shaping and boiling to understanding the nuances of oven temperature, each step offers a chance to refine your skills and create bagels that are a testament to your dedication.
Preserving Tradition, Creating Memories
As you bite into your homemade Montreal bagel, you’re not just savoring a delicious treat – you’re honoring a tradition that has been passed down through generations. With each chewy bite, you’re creating memories that connect you to the past and shape the future. So, whether you’re enjoying your bagel with a loved one or sharing your creations with friends, know that you’re continuing a legacy that’s as rich and flavorful as the bagels themselves.
Time
| Step | Time |
|---|---|
| Preparing the Dough | 20 minutes |
| Shaping and Boiling | 45 minutes |
| Baking to Golden Perfection | 20 minutes |
| Total Time | 1 hour 25 minutes |
Keep in mind that these times are approximate and can vary based on your level of experience and the specific conditions in your kitchen. Enjoy your Montreal bagel-making adventure!
Ingredients
| Ingredients | Quantity |
|---|---|
| High-gluten flour | 2 cups |
| Yeast | 1 packet |
| Water | 1/2 cup |
| Honey | 2 tablespoons |
| Salt | 1/2 teaspoon |
| Egg wash | 1 egg (for brushing) |
Feel free to adjust the quantities based on your preferences and needs. Happy baking!
Directions
Step 1: Mixing the Dough
- In a large mixing bowl, combine 2 cups of high-gluten flour with 1 packet of yeast.
- Heat 1/2 cup of water until it’s warm but not hot. Pour the warm water into the flour-yeast mixture.
- Add 2 tablespoons of honey and 1/2 teaspoon of salt to the bowl.
- Mix the ingredients thoroughly until a soft, elastic dough forms.
Step 2: Shaping and Boiling
- Dust your workspace with a bit of flour. Turn out the dough onto the floured surface and knead it for a few minutes until it’s smooth.
- Divide the dough into equal portions and shape each portion into a ball.
- Take each dough ball and use your fingers to poke a hole in the center. Gently stretch the hole to form a bagel shape.
- In a pot, bring water to a gentle boil. Add a tablespoon of honey to the boiling water.
- Carefully place the shaped bagels into the boiling water. Let them boil for about 2 minutes on each side. This boiling step gives the bagels their distinct chewiness.
Step 3: Baking to Golden Perfection
- Preheat your oven to 375°F (190°C) while the bagels are boiling.
- Line a baking sheet with parchment paper.
- Once the bagels are boiled, remove them from the water and place them on the prepared baking sheet.
- Beat an egg to create an egg wash and brush it over the top of each bagel. This will give the bagels a shiny finish when baked.
- Place the baking sheet in the preheated oven and bake the bagels for about 20 minutes, or until they turn golden brown.
Step 4: Savoring Your Creation
- Once baked, take the bagels out of the oven and let them cool slightly before serving.
- Enjoy your homemade Montreal bagels warm, with your favorite cream cheese, smoked salmon, or any other topping you love.
Step 5: Basking in Your Culinary Triumph
- Take a moment to revel in the satisfaction of creating Montreal bagels from scratch.
- Share your bagels with friends and family, and savor the delicious results of your culinary adventure!
Remember, the journey of making Montreal bagels is as rewarding as the taste of the final product. Enjoy every step and relish the joy of creating something truly special in your kitchen!
Equipment Required
Nutrition Information
| Nutrient | Amount per Serving |
|---|---|
| Serving Size | 1 bagel |
| Calories | 240 kcal |
| Total Fat | 1.5 g |
| Saturated Fat | 0.2 g |
| Trans Fat | 0 g |
| Cholesterol | 0 mg |
| Sodium | 340 mg |
| Total Carbohydrates | 52 g |
| Dietary Fiber | 2 g |
| Sugars | 8 g |
| Protein | 7 g |
Please note that these values are approximate and can vary based on specific ingredients and portion sizes. Always refer to product labels or consult a nutritionist for precise information. Enjoy your delicious Montreal bagels responsibly!
Tips
- Quality Ingredients: Use high-quality ingredients for the best results. Fresh yeast and good-quality flour can make a noticeable difference in the texture and taste of your bagels.
- Room Temperature: Allow your yeast to activate properly by using lukewarm water. Cold water might hinder the yeast’s growth, while water that’s too hot can kill it.
- Kneading Technique: When kneading the dough, use a gentle yet firm motion. Over-kneading can result in tough bagels, so stop when the dough becomes smooth and elastic.
- Flour for Shaping: Keep a small bowl of flour nearby when shaping the bagels. This will help prevent sticking and make the shaping process smoother.
- Boiling Time: Boil each side of the bagel for about 2 minutes. This is sufficient to achieve a chewy exterior without making the bagels soggy.
- Egg Wash Effect: If you prefer a shiny finish, brush the bagels with an egg wash before baking. For a slightly less shiny appearance, you can omit this step.
- Baking Time: Keep a close eye on your bagels while baking. Depending on your oven, they might need a few extra minutes or slightly less time to achieve that perfect golden color.
- Cooling Time: Allow the bagels to cool slightly after baking before slicing into them. This prevents them from becoming too doughy and helps retain their shape.
Pros & Cons
| Pros | Cons |
|---|---|
| ✅ Unique and Distinctive Flavor | ❌ Time-Consuming Preparation |
| ✅ Chewy Texture and Golden Crust | ❌ Boiling Step Requires Careful Handling |
| ✅ Versatile Topping Options | ❌ Higher Caloric Content |
| ✅ Opportunity for Creativity and Variation | ❌ Contains Gluten |
| ✅ Homemade Delight, Perfect for Sharing | ❌ May Not Suit Dietary Restrictions |
Conclusion
As we come to the end of this culinary adventure, you’ve been introduced to the wonderful world of Montreal bagels – a unique twist on a beloved classic. From their sweet yet chewy texture to the golden crust that’s simply irresistible, these bagels offer a delightful taste experience that’s sure to leave you craving more.
Crafting your own Montreal bagels isn’t just about following a recipe; it’s about embracing a tradition that’s rich in history and flavor. The process, though requiring some time and care, is an opportunity to connect with the heart of Montreal’s culinary heritage and create memories that you’ll cherish.
Imagine the joy of sharing your freshly baked bagels with friends and family, experimenting with toppings that suit your palate, and relishing the satisfaction of mastering this culinary art form. Whether you’re a seasoned baker or a kitchen novice, the process of making Montreal bagels is an invitation to explore your creativity and embark on a journey of taste and discovery.
So, why not don your apron, gather your ingredients, and embrace the delicious challenge of making Montreal bagels from scratch? From the first bite to the last, you’ll be rewarded with a sense of accomplishment, the taste of tradition, and the knowledge that you’ve created something truly special.
Let the kitchen be your canvas, the dough be your muse, and the result be a plate of delectable Montreal bagels that are as unique as you are. So, go ahead – mix, shape, boil, and bake your way to a taste experience that’s not just memorable, but utterly unforgettable. Your kitchen awaits, and the journey to Montreal-style bagel perfection is ready to begin. Happy baking! 🥯👩🍳👨🍳
Facts
- 🥯 Bagel Fact #1: The Shape Symbolism
- Did you know that the iconic bagel shape isn’t just for aesthetics? The round shape with a hole in the middle isn’t just convenient for holding spreads; it’s said to represent the cycle of life, making every bite of a Montreal bagel a journey through tradition and symbolism.
- 🥨 Bagel Fact #2: Bagels in Space?
- Believe it or not, Montreal bagels once journeyed beyond our planet! In 1993, Canadian astronaut Chris Hadfield brought a stash of these delectable bagels aboard the space shuttle Atlantis. These bagels, crafted by the St-Viateur Bagel shop, floated around in a microgravity bakery, proving that even in space, good taste knows no bounds.
- 🧂 Bagel Fact #3: Seasoning Surprise
- While the “everything bagel” seasoning blend is a beloved favorite, Montreal bagels have their own unique version. Instead of poppy and sesame seeds, they’re often coated with a mix of poppy seeds, sesame seeds, and a hint of salt. It’s a flavor symphony that’s distinctly Montreal.
- 🥯 Bagel Fact #4: The Bagel Crawl Tradition
- In Montreal, a “bagel crawl” isn’t a peculiar insect event – it’s a delightful tradition! Locals and visitors alike embark on bagel crawls, exploring the city’s numerous bagel shops and indulging in fresh, warm bagels at each stop. It’s a foodie adventure that celebrates Montreal’s bagel culture one bite at a time.
- 🎶 Bagel Fact #5: Bagel Melodies
- Montreal bagels have even inspired music! The Bagel Song, a catchy tune by Montreal singer and songwriter Kate McGarrigle, pays homage to these delicious treats and captures the essence of what makes Montreal bagels so special. So, as you bite into your freshly baked bagel, consider adding a melody to your meal!
FAQ’s
Can I use bread flour instead of high-gluten flour for the bagels?
Yes, you can substitute bread flour for high-gluten flour. While the texture might vary slightly, bread flour can still yield delicious Montreal bagels.
Can I make the dough ahead of time and refrigerate it for baking later?
Absolutely! After kneading, you can refrigerate the dough in an airtight container for up to 24 hours before shaping and baking.
What’s the purpose of boiling the bagels before baking them?
Boiling the bagels before baking helps set the crust, giving them a chewy texture and a glossy finish. It’s a distinctive step in the Montreal bagel-making process.
Can I freeze the bagels after baking to enjoy later?
Yes, you can freeze the baked bagels. Let them cool completely, then store them in an airtight container or freezer bags. To enjoy, simply toast them straight from the freezer.
Can I use active dry yeast instead of instant yeast?
Yes, you can use active dry yeast, but remember to proof it in warm water before adding it to the flour mixture. Adjust the quantity accordingly based on package instructions.
What’s the best way to shape the bagels for a classic look?
Roll each dough ball into a rope, then join the ends to form a circle. Gently flatten and enlarge the center hole to create the iconic bagel shape.
Is the honey water bath essential for the recipe?
Yes, the honey water bath is crucial for achieving the signature texture and appearance of Montreal bagels. It’s what makes them chewy and adds a slight sweetness to the crust.
Can I add flavorings like cinnamon or herbs to the dough?
Certainly! Feel free to get creative and add your favorite flavorings to the dough before shaping. Just keep in mind that strong flavors might alter the traditional taste.
How long do the bagels stay fresh after baking?
Freshly baked bagels are best enjoyed within 2 to 3 days. You can extend their shelf life by storing them in an airtight container or freezing them.
Can I make mini-sized Montreal bagels for appetizers?
Absolutely! Simply divide the dough into smaller portions and shape mini bagels. Adjust the boiling and baking times accordingly for the smaller size.