If you’ve been on the hunt for a unique and mouthwatering dessert, look no further than the delightful world of mochi donuts. These chewy and irresistible treats combine the best of both worlds – the soft and chewy texture of traditional mochi with the indulgent satisfaction of a donut. In this article, we’re going to take you on a step-by-step journey to create your very own batch of homemade mochi donuts. Get ready to dazzle your taste buds and impress your friends and family with this one-of-a-kind recipe!
[ez-toc]
History
In the vast landscape of culinary creations, there are those recipes that stand the test of time and those that emerge as exciting trends, capturing the attention of food enthusiasts around the world. The fascinating journey of the mochi donut falls into the latter category, blending tradition with innovation to create a treat that’s both nostalgic and cutting-edge.
Ancient Roots of Mochi
To trace the origins of the mochi donut, we must first delve into the ancient world of mochi. Mochi, a chewy rice cake made from glutinous rice, has been a cherished delicacy in Japan for centuries. Its preparation involves pounding steamed rice until it achieves a sticky and elastic consistency. Mochi holds cultural significance in Japan and is often associated with celebratory occasions and festivals.
A Fusion of Cultures
The fusion of Japanese mochi with the concept of the American donut is where the magic of the mochi donut truly begins. The traditional donut, beloved for its airy and fried perfection, underwent a creative transformation when introduced to the mochi dough. The result was an unexpected marriage of textures – the crispy exterior of a donut melding with the delightfully chewy interior of mochi.
Enter the “Pon de Ring”
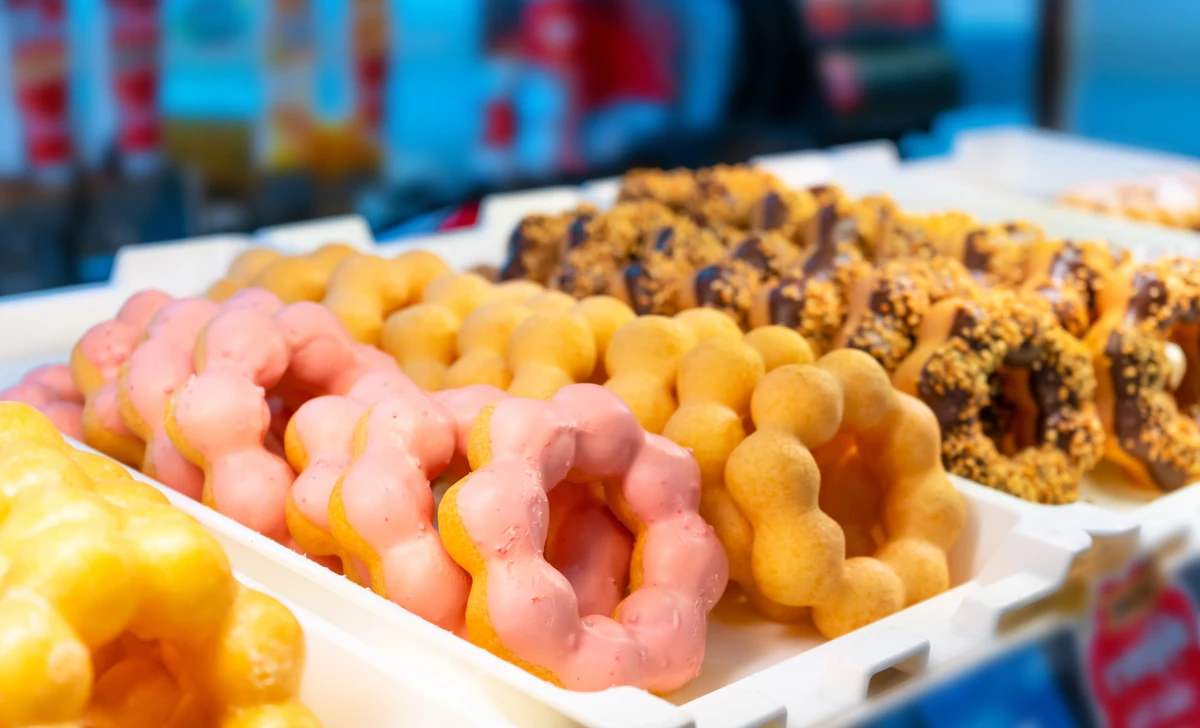
The iconic ring shape of the mochi donut, known as the “pon de ring,” has an interesting origin story. The name “pon de ring” is said to be inspired by the sound of fingers tapping on the surface of the donut. This unique shape not only sets mochi donuts apart visually but also contributes to their distinctive texture. The interconnected rings create a playful and interactive eating experience, encouraging bite-sized enjoyment.
Innovation and Culinary Creativity
As mochi donuts gained traction, innovative minds in the culinary world embraced the opportunity to experiment with flavors and aesthetics. From matcha-infused donuts that celebrate the essence of green tea to tropical fruit-inspired glazes, the mochi donut landscape expanded to cater to diverse palates. These creations aren’t just treats – they’re artistic expressions that engage multiple senses.
From Mom-and-Pop to Mainstream
Mochi donuts began as a hidden gem found in local bakeries and pop-up shops, where passionate bakers fused tradition with modern appeal. Social media played a pivotal role in the meteoric rise of mochi donuts, with users sharing captivating images of these treats that begged to be tasted. Soon, what was once a local secret turned into a global phenomenon, attracting attention from foodies and influencers alike.
Homemade Delights
The allure of crafting mochi donuts at home further added to their popularity. Enthusiastic bakers around the world rolled up their sleeves, armed with sweet rice flour and a sense of adventure. The internet became a treasure trove of recipes, tips, and tutorials, democratizing the process of mochi donut creation. Aspiring chefs embraced the challenge, transforming their kitchens into mini donut factories.
A Modern Classic
Today, the mochi donut stands as a testament to the power of culinary evolution. It pays homage to the cherished traditions of mochi while celebrating the bold and creative spirit of contemporary gastronomy. Mochi donuts have solidified their position as a modern classic, a treat that bridges cultures, generations, and tastes.
The journey from ancient mochi to the trendy mochi donut is a reminder that innovation and tradition need not be at odds. Instead, they can come together in perfect harmony, resulting in creations that bring joy and inspiration to tables around the world. So, the next time you savor a mochi donut, take a moment to appreciate the rich history and creativity that led to its delightful existence.
Time
| Cooking Step | Preparation Time |
|---|---|
| Mixing the Batter | 15 minutes |
| Shaping the Mochi Donuts | 20 minutes |
| Allowing the Dough to Rest | 30 minutes |
| Frying the Mochi Donuts | 25 minutes |
| Draining and Cooling | 15 minutes |
| Preparing Glazes and Toppings | 15 minutes |
| Glazing and Decorating | 20 minutes |
| Allowing Glaze to Set | 10 minutes |
| Admiring and Photographing | 10 minutes |
| Serving and Indulging | Variable |
Ingredients
| Ingredients | Quantity |
|---|---|
| Mochiko (Sweet Rice Flour) | 1 cup |
| Baking Powder | 1 ½ teaspoons |
| Granulated Sugar | ¼ cup |
| Milk | ½ cup |
| Egg | 1 |
| Vanilla Extract | 1 teaspoon |
| Vegetable Oil (for frying) | As needed |
| Glaze (of your choice) | As needed |
| Toppings (optional) | As desired |
Directions
Step 1: Mixing the Batter
- In a mixing bowl, combine the Mochiko (Sweet Rice Flour) and Baking Powder. Whisk them together to ensure even distribution.
- Add the Granulated Sugar to the dry mixture and whisk again.
Step 2: Creating the Dough
- In a separate bowl, whisk together the Milk, Egg, and Vanilla Extract until well combined.
- Gradually pour the wet ingredients into the dry mixture, stirring as you go. Mix until you have a smooth batter.
Step 3: Shaping the Mochi Donuts
- Heat up vegetable oil in a deep pot or fryer to around 350°F (175°C).
- Using a spoon, drop spoonfuls of the batter into the hot oil. Alternatively, use a piping bag or ziplock bag with a corner snipped off for more controlled shaping.
- Don’t overcrowd the pot – fry a few at a time to ensure even cooking.
Step 4: Frying to Perfection
- Fry the mochi donuts for about 2-3 minutes on each side or until they turn a lovely golden brown.
- Use a slotted spoon to remove the donuts from the oil and place them on a plate lined with paper towels to drain excess oil.
Step 5: Glazing and Decorating
- Once the donuts are cool enough to handle, it’s time to add the glaze. Dip the top of each donut into your chosen Glaze.
- If you’re feeling creative, sprinkle on your favorite Toppings while the glaze is still wet.
Step 6: Allowing the Glaze to Set
- Place the glazed donuts on a wire rack to allow the glaze to set. This will take around 10 minutes.
Step 7: Indulging and Sharing
- Your mochi donuts are now ready to be enjoyed! Serve them up and indulge in the chewy, sweet goodness.
- Don’t forget to share the joy – these treats are perfect for sharing with friends and family.
Step 8: Experiment and Have Fun
- Feel free to experiment with different glaze flavors and toppings. Let your creativity run wild!
- Try various shapes and sizes for a playful twist on the classic mochi donut.
Step 9: Cleaning Up
- After the delightful indulgence, clean up your workspace by wiping down surfaces and storing ingredients properly.
Step 10: Enjoy the Culinary Adventure
- Now that you’ve savored the fruits of your labor, relish in the memories of creating these unique mochi donuts.
With these simple steps, you’re well on your way to creating a batch of scrumptious mochi donuts that will have everyone coming back for more!
Equipment Required
Nutrition Information
| Nutrition Information | Per Serving (2 People) |
|---|---|
| Serving Size | 2 mochi donuts |
| Calories | ~280 calories |
| Total Fat | ~10g |
| Saturated Fat | ~2g |
| Trans Fat | 0g |
| Cholesterol | ~30mg |
| Sodium | ~200mg |
| Total Carbohydrates | ~43g |
| Dietary Fiber | ~1g |
| Sugars | ~14g |
| Protein | ~4g |
Please note that the nutritional values are approximate and can vary based on specific ingredients and preparation methods.
Tips
- Consistency is Key: Achieving the right batter consistency is crucial. It should be thick enough to hold its shape but not too stiff.
- Frying Temperature: Maintain a consistent oil temperature of around 350°F (175°C) for even cooking. Use a kitchen thermometer to ensure accuracy.
- Shaping Techniques: If using a spoon to drop the batter into the oil, dip the spoon in water between each scoop to prevent sticking.
- Glazing Efficiency: For a smoother glazing process, warm the glaze slightly before dipping the donuts.
- Toppings and Textures: Experiment with a variety of toppings – from crushed nuts to colorful sprinkles – to add texture and visual appeal.
- Cooling Rack Trick: To avoid soggy bottoms, place freshly fried donuts on a wire rack to cool. This allows excess oil to drip off.
Pros & Cons
| Pros | Cons |
|---|---|
| ✅ Unique and delicious fusion of flavors. | ❌ Requires frying, which can be less healthy. |
| ✅ Offers a chewy and satisfying texture. | ❌ Mochi dough can be sticky and challenging to work with. |
| ✅ Creative potential for diverse glazes and toppings. | ❌ May involve some trial and error to perfect the recipe. |
| ✅ Great for impressing guests at gatherings. | ❌ Glazing process can be messy and require additional cleanup. |
| ✅ Adaptable recipe with options for various dietary needs. | ❌ Time-consuming due to multiple steps and waiting periods. |
Conclusion
Congratulations, you’ve taken a delightful journey into the world of mochi donuts – a realm where chewy meets crispy, and tradition intertwines with innovation. As we wrap up this culinary adventure, remember that creating mochi donuts isn’t just about baking; it’s about crafting moments of joy, exploration, and creativity in your kitchen.
From mixing the batter to indulging in the finished treats, you’ve embraced the art of turning simple ingredients into a playful symphony of flavors and textures. Whether you’re sharing your creations with loved ones, delighting in your own handiwork, or capturing Instagram-worthy photos, mochi donuts offer a canvas for culinary expression.
So, why not dive in and try your hand at whipping up these unique delights? Unleash your imagination, experiment with flavors and toppings, and relish the feeling of accomplishment as you savor every bite. Remember, it’s not just about the destination – it’s about the journey, the laughter, and the memories you create along the way.
As you embark on this mochi donut-making adventure, let your kitchen become a canvas, your ingredients transform into treasures, and your creations light up your world. Embrace the delightful chewiness, the unexpected surprises, and the sheer joy that comes from creating something extraordinary. Now, it’s time to roll up your sleeves, gather your ingredients, and embark on a delicious journey that’s uniquely yours. Happy baking! 🍩🎉
Facts
- Fact 1: Mochi Donuts’ “Pon de Ring” Name
- 🍩 Emoji: Doughnut Did you know? The name “pon de ring” for the iconic mochi donut shape is inspired by the sound of fingers tapping on the surface of the donut. It’s like the donut is whispering its own name!
- Fact 2: Mochi Donuts: Ancient Roots in Japan
- 🌾 Emoji: Rice Plant Mochi donuts aren’t just trendy; they have ancient roots! Mochi, the chewy rice cake, dates back centuries in Japan. Mochi donuts are a fusion that pays homage to this cherished tradition.
- Fact 3: The Glaze Escapade: Creative Adventure
- 🎨 Emoji: Artist Palette Diving into the world of mochi donuts isn’t just about baking – it’s an artistic adventure! From matcha green to dreamy chocolate glazes, your donuts are your canvas, and your glaze is the paint.
- Fact 4: Donuts and Sharing: A Social Connection
- 👫 Emoji: Two People Holding Hands Making mochi donuts isn’t just about dough and glaze; it’s about sharing joy and connection. From family gatherings to virtual bake-offs, mochi donuts spark conversations and create memories.
- Fact 5: Rise of the Mochi Donut Fandom
- 🌍 Emoji: Earth Globe Americas Mochi donuts aren’t just a snack; they’re a global sensation! Social media has turned these chewy treats into a phenomenon that’s being shared and savored across continents.
FAQ’s
Can I make mochi donuts without a deep fryer?
Yes, you can! While deep frying achieves the classic texture, you can also pan-fry the donuts using a shallow pan with enough oil to cover the bottom. Keep an eye on the temperature to avoid overcooking.
Can I freeze leftover mochi donuts?
Absolutely! Allow the donuts to cool completely, then place them in an airtight container or freezer bag. When ready to enjoy, thaw at room temperature or reheat briefly in the oven.
Can I use other types of flour besides Mochiko?
Mochiko’s unique properties contribute to the chewiness. While substitutions might alter the texture, you can experiment with other glutinous rice flours if Mochiko is unavailable.
My batter is too thick. What should I do?
If your batter is too thick, gradually add small amounts of milk while mixing until you reach the desired consistency. This will help achieve the right texture for the donuts.
How can I prevent oil splatters while frying?
To minimize oil splatters, gently lower the donuts into the oil using a slotted spoon or a splatter guard. Additionally, wearing an apron and using a deep pot can help contain splatters.
Can I make the dough ahead of time?
While it’s best to fry the donuts immediately after making the dough, you can refrigerate the dough for a short period (around 1-2 hours) before frying. This can help with handling and shaping.
Can I bake the mochi donuts instead of frying?
Baking may alter the texture significantly, resulting in a less chewy donut. If you prefer a baked version, you might want to explore recipes specifically designed for baking.
My glaze is too thick. How can I fix it?
If your glaze is too thick, add a small amount of liquid (such as milk or juice) and mix until you achieve the desired consistency. Add liquid gradually to avoid over-thinning.
How long do the mochi donuts stay fresh?
Mochi donuts are best enjoyed on the day they are made. However, you can store them in an airtight container at room temperature for up to 2 days for optimal freshness.
Can I make mini versions of these donuts?
Absolutely! Adjust the size of the batter scoops to create mini mochi donut bites. Just remember that the frying time may be slightly shorter for smaller donuts, so keep a close eye on them.