There’s something truly magical about biting into a perfectly airy and delicately sweet French cruller. Its golden, crisp exterior gives way to a tender, melt-in-your-mouth interior that’s simply heavenly. If you’re a fan of exquisite pastries and have an adventurous spirit in the kitchen, then you’re in for a treat! In this guide, we’re going to embark on a culinary journey to craft these delectable French crullers from scratch. Get your apron on and let’s dive into the world of baking magic!
[ez-toc]
History
Crullers have a fascinating journey that spans centuries and continents. These delectable treats are more than just pastries; they’re a testament to the culinary creativity and adaptability of cultures throughout history.
Ancient Beginnings
The roots of crullers can be traced back to the ancient Mediterranean civilizations, where fried dough was a culinary staple. The concept of shaping dough into twists or knots before frying dates back to the Roman Empire. These early iterations were simple and rustic, made with basic ingredients like flour, water, and olive oil.
European Evolution
As time passed, crullers evolved along with the changing landscapes of Europe. The term “cruller” is believed to have originated from the Dutch word “kruller,” meaning “to curl.” Dutch settlers brought their version of these treats to America, where they were embraced and further developed.
In medieval Europe, crullers became associated with celebrations and festivities. They were often enjoyed during carnivals and special occasions, bringing a sense of indulgence to the masses. The recipes began to vary across regions, with each culture adding its unique twist – pun intended – to the recipe.
American Influence
When crullers made their way to America, they underwent another transformation. In the United States, crullers gained popularity in the 19th century and were frequently served in coffeehouses. These establishments provided a cozy environment for people to enjoy these delicate pastries alongside their freshly brewed cups of coffee.
American crullers often took on a softer, cake-like texture compared to their European counterparts. Bakers experimented with different ingredients and techniques, resulting in the airy and tender crullers we know today.
The Modern Cruller
Today’s French crullers, as we’ve come to adore, are a delightful blend of history and innovation. The process of crafting these pastries has been refined over generations, combining traditional methods with contemporary baking techniques. The addition of eggs and the use of choux pastry techniques have elevated crullers to a new level of lightness and elegance.
In recent times, crullers have experienced a resurgence in popularity, thanks in part to the revival of classic and nostalgic treats. Bakeries and home bakers alike are embracing these twists of culinary history, infusing them with creative glazes and fillings that pay homage to the past while appealing to modern tastes.
Time
| Step | Time |
|---|---|
| Mixing the Ingredients | 15 minutes |
| Cooking the Dough | 5 minutes |
| Incorporating the Eggs | 10 minutes |
| Piping the Dough | 10 minutes |
| Shaping the Crullers | 15 minutes |
| Resting Period | 20 minutes |
| Frying to Golden Perfection | 10 minutes |
| Glazing and Flavor Variations (Each) | 10 minutes |
| Savoring Your Creations | Indefinite 😉 |
| Troubleshooting Tips | Varies |
| Exploring the History | 5 minutes |
| Total Estimated Time | 110 minutes |
Ingredients
| Ingredient | Quantity |
|---|---|
| All-purpose flour | 1/2 cup |
| Unsalted butter | 2 tablespoons |
| Water | 1/2 cup |
| Granulated sugar | 1 tablespoon |
| Salt | 1/4 teaspoon |
| Eggs | 2 large |
| Vanilla extract | 1/2 teaspoon |
| Vegetable oil | For frying |
| Powdered sugar | 1 cup |
| Milk | 2 tablespoons |
| Chocolate chips | 1/4 cup |
| Fruit jam | 1/4 cup |
| Warm water (for glaze) | 2 tablespoons |
Directions
Step 1: Mixing the Ingredients
- In a medium saucepan, combine 1/2 cup of water, 2 tablespoons of unsalted butter, 1 tablespoon of granulated sugar, and 1/4 teaspoon of salt.
- Stir the mixture over medium heat until the butter is melted and the mixture comes to a gentle boil.
- Swiftly add 1/2 cup of all-purpose flour and stir vigorously until a dough forms. This may take some muscle, but keep stirring until the dough is smooth.
Step 2: Cooking the Dough
- Continue stirring and cook the dough for another couple of minutes to remove excess moisture. The dough should be smooth and pulling away from the sides of the pan.
Step 3: Incorporating the Eggs
- Add the eggs one at a time, ensuring each egg is fully incorporated before adding the next. The dough will transform from lumpy to velvety as you add the eggs.
Step 4: Creating the Cruller Shape
Piping the Dough
- Transfer the dough to a piping bag fitted with a star tip.
- Hold the piping bag perpendicular to a baking sheet and pipe swirls of dough, about the size of a small orange.
Shaping the Crullers
- Gently shape the piped dough into twists using damp fingers. Don’t worry about uniformity – crullers are charming in their whimsical shapes.
Step 5: The Crucial Resting Period
- Allow the piped crullers to rest at room temperature for about 20 minutes. This helps the dough relax and prevents splattering while frying.
Step 6: Frying to Golden Perfection
- In a medium saucepan, heat vegetable oil to around 350°F (175°C).
- Gently slide the crullers into the hot oil using a slotted spoon.
- Fry for about 2-3 minutes per side, or until they turn a beautiful golden brown. Remove and place on a paper towel-lined plate.
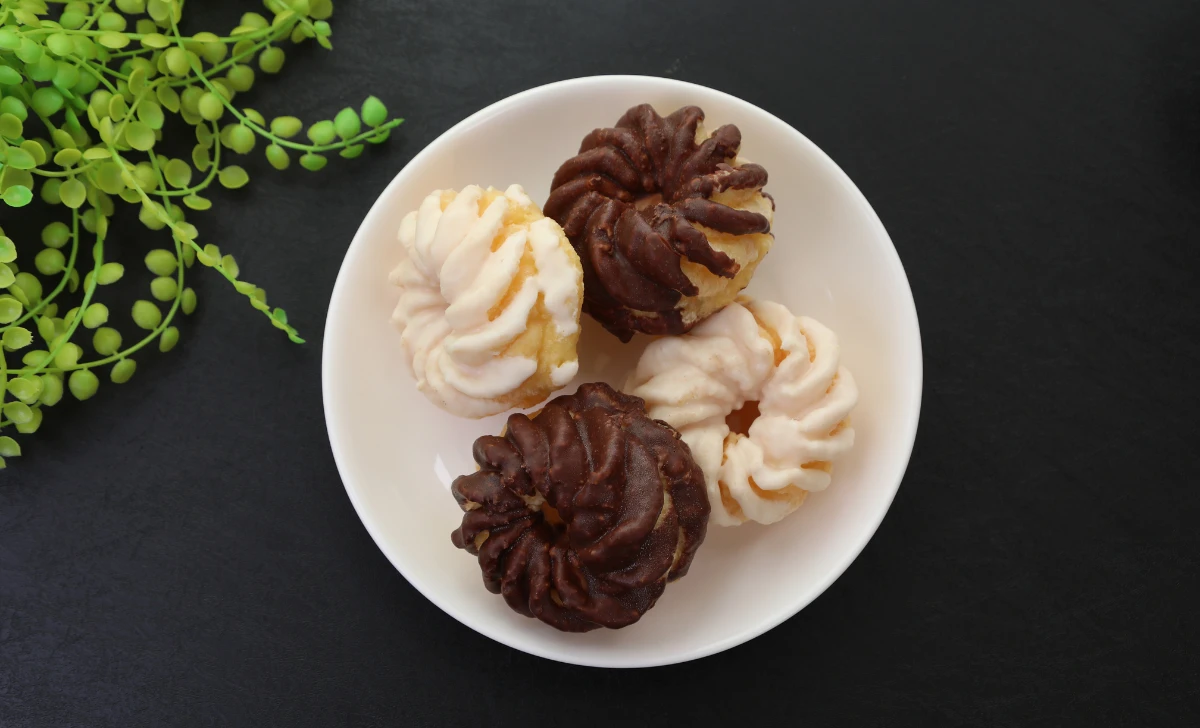
Step 7: Glazing and Flavor Variations
Classic Glaze
- Combine 1 cup of powdered sugar, a dash of 1/2 teaspoon of vanilla extract, and 2 tablespoons of milk. Mix until smooth.
- Dip the cooled crullers into the glaze and let them sit on a wire rack to set.
Chocolate Infusion
- Melt 1/4 cup of chocolate chips with a touch of butter.
- Dip the crullers into the melted chocolate mixture for a decadent twist.
Fruity Elegance
- Mix 1/4 cup of fruit jam with 2 tablespoons of warm water to create a luscious glaze.
- Drizzle or dip your crullers for a burst of fruity goodness.
Step 8: Savoring Your Creations
- Brew your favorite coffee, find a cozy spot, and indulge in the symphony of flavors and textures that these French crullers offer.
Step 9: Troubleshooting Tips for Success
- Refer to the troubleshooting tips provided in the article to tackle common cruller challenges.
Step 10: Exploring the History
- Take a few minutes to read about the fascinating history of crullers, spanning centuries and continents, and how they’ve evolved into the treats we enjoy today.
Equipment Required
Nutrition Information
| Nutrition Information | Per Serving |
|---|---|
| Serving Size | 1 cruller |
| Calories | 180 |
| Total Fat | 10g |
| – Saturated Fat | 5g |
| Cholesterol | 60mg |
| Sodium | 100mg |
| Total Carbohydrates | 20g |
| – Dietary Fiber | 0g |
| – Sugars | 12g |
| Protein | 3g |
Note: Nutritional values are approximate and may vary based on specific ingredients and portion sizes. Always refer to specific product labels for accurate information.
Tips
- Measure Precisely: Accurate measurements are crucial in baking. Use dry measuring cups for flour and sugar, and liquid measuring cups for liquids like water and milk.
- Be Patient: Incorporating the eggs into the dough might take a bit of time. Add them one at a time and ensure they’re fully blended before adding the next.
- Rest the Dough: Allowing the piped dough to rest before frying is essential. This rest relaxes the dough, resulting in crullers with a tender interior.
- Maintain Oil Temperature: Use a candy thermometer to monitor the oil temperature while frying. Consistent oil temperature ensures even cooking and a crispy exterior.
- Don’t Overcrowd the Pan: Fry a few crullers at a time to prevent overcrowding, which can lead to uneven cooking and soggy crullers.
- Pat Dry Before Glazing: Before dipping the crullers into glaze, gently pat them dry with a paper towel. This helps the glaze adhere better.
- Customize Glazes: Experiment with different glaze flavors. Replace vanilla extract with almond extract, or add a pinch of citrus zest for a refreshing twist.
- Test a Sample: Fry a small piece of dough before starting the batch. This test will help you gauge the right frying temperature and ensure the crullers turn out perfectly.
Pros & Cons
| Pros | Cons |
|---|---|
| ✅ Delightfully airy and tender crullers. | ❌ Requires careful oil temperature management. |
| ✅ Creative glazing options for varied flavors. | ❌ Relatively longer preparation time. |
| ✅ Customizable with different fillings. | ❌ Requires some skill in piping and shaping. |
| ✅ Opportunity to learn choux pastry techniques. | ❌ Higher calorie content due to frying. |
| ✅ Rewarding and impressive homemade pastries. | ❌ Potentially messy frying process. |
Conclusion
In the delightful world of baking, few pleasures match that of creating your own exquisite pastries. As we conclude our journey through the art of crafting French crullers, we invite you to step into your kitchen with confidence and curiosity. These golden-brown twists, with their delicate exteriors and melt-in-your-mouth interiors, are an invitation to embrace your inner baker and embark on a culinary adventure that’s as rewarding as it is scrumptious.
From mixing the ingredients to savoring the final result, every step is a testament to your creativity and determination. The process might appear intricate, but fear not; the journey is peppered with moments of joy, discovery, and the satisfaction of creating something truly exceptional.
Imagine the excitement as you pipe and shape the dough, envisioning the enchanting twists that will soon grace your plate. Picture the anticipation as you dunk your crullers into a glaze of your choice, creating a symphony of flavors that dance on your taste buds. With each bite, you’re not just savoring a treat; you’re indulging in the fruits of your labor, the embodiment of your dedication to culinary artistry.
So, whether you’re a baking enthusiast eager to expand your repertoire or a novice ready to embrace a delicious challenge, we encourage you to take the leap. Put on that apron, gather your ingredients, and let the magic of baking transport you to a realm of flavors and aromas that delight the senses and warm the heart. With this French Cruller recipe, you’re not just creating pastries – you’re creating memories, joy, and a true masterpiece of your own making. So, go ahead, start that oven, and let the enchantment begin. Happy baking! 🥐🍩👩🍳
Facts
- 🍬 Crullers: The Sweet Twists of History!
- Did you know that crullers have been around since ancient times? These twisted treats were enjoyed by the Romans, making crullers one of the earliest forms of portable happiness!
- 🌍 A Global Love for Twists and Turns
- Twisted pastries aren’t just popular in one corner of the world – they’re embraced globally! Different cultures have their own versions, from Spanish “Churros” to Indian “Jalebi.”
- 🎨 From Rags to Riches: The Humble Beginnings
- Crullers have come a long way from their modest origins. What started as simple fried dough has evolved into delicate pastries fit for kings and queens!
- 🥨 Knot Your Average Pastry
- The word “cruller” actually comes from the Dutch word “kruller,” meaning “to curl.” So, every time you indulge in a cruller, you’re enjoying a delicious piece of linguistic history.
- 🎉 Crullers: A Carnival of Flavors and Shapes
- Crullers have been the life of the party for centuries! They were a carnival favorite, bringing joy to revelers with their whimsical shapes and irresistible flavors.
FAQ’s
Can I refrigerate the dough overnight?
Yes, you can! After shaping the crullers, cover them tightly with plastic wrap and refrigerate overnight. This slow rise can enhance the flavor and texture of the crullers.
Why did my crullers turn out greasy?
Crullers turning greasy could be due to oil that’s not hot enough during frying. Ensure the oil reaches 350°F (175°C) before frying to prevent excessive oil absorption.
Can I freeze the crullers?
Absolutely! Once cooled and glazed, you can freeze crullers in an airtight container for up to 2 months. Thaw them at room temperature or gently reheat in the oven.
How do I achieve the perfect glaze consistency?
For a thick glaze, use a 1:1 ratio of powdered sugar to liquid (such as milk or water). Adjust the liquid amount to control the thickness according to your preference.
Can I replace the vanilla extract with another flavor?
Certainly! You can experiment with almond, lemon, or other extracts to infuse unique flavors into your crullers.
Why didn’t my crullers puff up during frying?
Crullers might not puff due to undermixing or overmixing the dough. Ensure the dough is well-mixed, but avoid excessive stirring.
Can I use a different type of oil for frying?
Yes, you can use oils with high smoke points, like canola or peanut oil, for frying. Just make sure to monitor the oil temperature to avoid burning.
My crullers turned out too dense. What went wrong?
A dense texture could result from overmixing the dough after adding the eggs. Mix only until the eggs are fully incorporated to maintain the desired lightness.
Can I make mini crullers instead of full-sized ones?
Absolutely! Adjust the size of your piped dough to create delightful bite-sized mini crullers, and adjust the frying time accordingly.
Can I bake the crullers instead of frying them?
While crullers are traditionally fried for their characteristic texture, you can experiment with baking them at around 375°F (190°C) until they’re golden brown for a different take on the classic recipe.