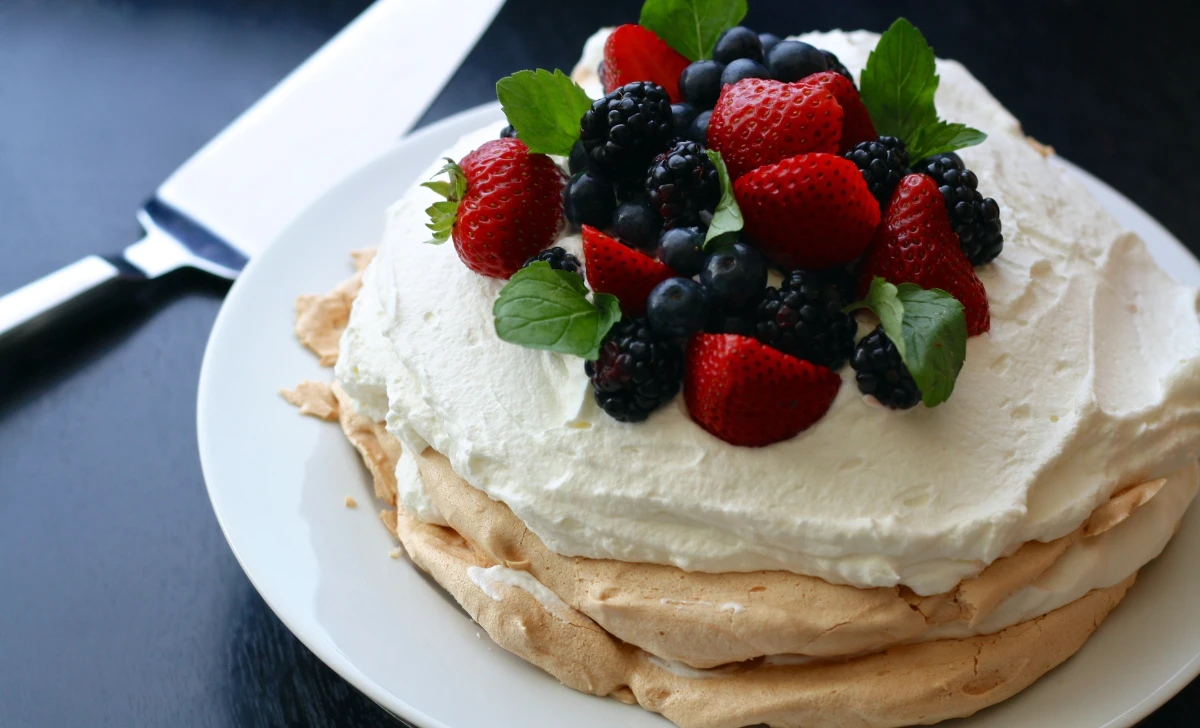
If you’re on the hunt for a dessert that’s as impressive as it is delicious, look no further than the iconic Pavlova. Named after the famous Russian ballerina Anna Pavlova, this meringue-based dessert is a showstopper at any gathering. With its crisp outer shell and soft, marshmallow-like interior, topped with a luscious layer of whipped cream and vibrant fruits, Pavlova is a true masterpiece. In this article, I’ll take you through the journey of creating this delectable treat step by step, sharing tips, tricks, and secrets along the way.
[ez-toc]
History
Every culinary masterpiece has a story to tell, and Pavlova is no exception. This dessert’s origins are as captivating as its taste, with a touch of controversy that adds to its allure.
Mythical Origins
The birthplace of Pavlova is a topic of debate between Australia and New Zealand. Both countries proudly claim to be the creators of this delightful dessert. According to popular legend, Pavlova was first crafted during Anna Pavlova’s tour of the Southern Hemisphere in the 1920s. The dessert was said to have been created in her honor, capturing her grace and lightness through the delicate meringue and cloud-like cream.
A Transcontinental Controversy
While the dessert itself is a work of art, its origins have sparked a friendly rivalry between Australia and New Zealand. Australians argue that a chef at a Perth hotel was the first to create the dish, while New Zealanders attribute its invention to a Wellington chef. Despite the ongoing debate, one thing is certain – both countries have embraced Pavlova as a symbol of their culinary prowess.
Cultural Influence and Evolution
Over the years, Pavlova has evolved beyond its classic form. Creative minds in kitchens around the world have experimented with flavors, shapes, and presentations. From mini Pavlova bites to towering Pavlova cakes, the dessert has undergone a delightful transformation while still paying homage to its meringue foundation.
Inviting Pavlova into Special Occasions
Birthdays Made Sweeter
Pavlova has become a staple at birthday celebrations, adding a touch of elegance to the festivities. Its customizable nature allows you to tailor the dessert to the celebrant’s preferences, from their favorite fruits to a personalized drizzle of chocolate or caramel.
Holiday Extravaganza
During holidays, Pavlova takes center stage on dessert tables. Its snow-white appearance makes it a natural fit for winter celebrations, while its vibrant fruit toppings bring a burst of summer to holiday feasts. Whether it’s Christmas, Easter, or a simple family gathering, Pavlova is the dessert that brings joy and delight.
Time
| Step | Time |
|---|---|
| Preparing the Meringue Base | |
| – Crafting the Perfect Meringue | 15 minutes |
| – Adding Vinegar and Cornstarch | 10 minutes |
| Baking the Pavlova | |
| – Achieving the Right Temperature | 90 minutes |
| – The Elusive Crispy Exterior | 15 minutes |
| Whipping Up the Creamy Topping | |
| – Choosing the Right Cream | 5 minutes |
| – Sweetening and Flavoring the Cream | 5 minutes |
| Art of Assembly: Toppings and Fruits | |
| – Selecting Fresh and Seasonal Fruits | 10 minutes |
| – Arrangement for Visual Appeal | 10 minutes |
| Serving and Savoring the Pavlova | |
| – Cutting the Perfect Slice | 5 minutes |
| – Indulgence with Every Bite |
Ingredients
| Ingredients | Quantity |
|---|---|
| Egg Whites | 2 large |
| Granulated Sugar | 1/2 cup |
| Cornstarch | 1 teaspoon |
| White Vinegar | 1 teaspoon |
| Vanilla Extract | 1/2 teaspoon |
| Heavy Whipping Cream | 1/2 cup |
| Powdered Sugar | 2 tablespoons |
| Assorted Fresh Fruits | 1 cup |
| Berries (e.g., strawberries, | |
| blueberries, raspberries) | |
| Kiwi | 1, peeled and |
| sliced | |
| Passion Fruit | 1, seeds scooped |
| Chocolate Drizzle (Optional) | as desired |
Directions
Preparing the Meringue Base
Crafting the Perfect Meringue
- Preheat the Oven: Begin by preheating your oven to 250°F (120°C). Line a baking sheet with parchment paper.
- Whip Egg Whites: In a clean, dry bowl, whisk the egg whites using an electric mixer on medium speed until soft peaks form.
- Gradually Add Sugar: Gradually add the granulated sugar, a spoonful at a time, while continuing to whip the egg whites. Increase the mixer speed to high and whip until glossy and stiff peaks form.
Adding Vinegar and Cornstarch
- Fold in Vinegar and Cornstarch: Gently fold in the white vinegar and cornstarch using a spatula. These ingredients will help achieve the Pavlova’s signature texture.
Baking the Pavlova
Achieving the Right Temperature
- Form the Base: Transfer the meringue onto the prepared baking sheet. Shape it into a circle, creating a slight well in the center to hold the toppings.
- Bake Low and Slow: Place the baking sheet in the preheated oven and bake for about 90 minutes. The Pavlova should be crisp on the outside and slightly marshmallow-like on the inside.
The Elusive Crispy Exterior
- Use Cream of Tartar: For that perfect crispy shell, remove the Pavlova from the oven, and let it cool slightly. Dust the top with a bit of cream of tartar.
- Return to the Oven: Return the Pavlova to the oven for an additional 15 minutes to develop the desired exterior texture.
Whipping Up the Creamy Topping
Choosing the Right Cream
- Whip the Cream: While the Pavlova is cooling, whip the heavy whipping cream until soft peaks form. Be careful not to overwhip.
Sweetening and Flavoring the Cream
- Add Vanilla and Sugar: Gently fold in the vanilla extract and powdered sugar into the whipped cream. This will infuse the cream with a subtle sweetness and flavor.
Art of Assembly: Toppings and Fruits
Selecting Fresh and Seasonal Fruits
- Prepare the Fruits: Wash, peel, and slice the fruits as needed. Choose a variety of colors and textures to create a visually appealing topping.
Arrangement for Visual Appeal
- Assemble the Pavlova: Once the meringue is completely cooled, carefully transfer it to a serving plate. Spread the whipped cream over the meringue, then arrange the prepared fruits on top.
Serving and Savoring the Pavlova
Cutting the Perfect Slice
- Slice and Serve: To slice, use a serrated knife dipped in warm water. Gently cut into the Pavlova, and serve each slice onto individual plates.
Indulgence with Every Bite
- Enjoy the Medley: Take a bite and savor the combination of the crispy meringue, velvety cream, and burst of fruity freshness. Let the flavors dance on your taste buds.
Equipment Required
Nutrition Information
| Nutrition Information | Per Serving |
|---|---|
| Serving Size | 1 slice |
| Calories | 250 |
| Total Fat | 12g |
| – Saturated Fat | 7g |
| Cholesterol | 40mg |
| Sodium | 40mg |
| Total Carbohydrates | 32g |
| – Dietary Fiber | 1g |
| – Sugars | 29g |
| Protein | 3g |
Please note that these values are approximate and may vary based on the specific ingredients and quantities used.
Tips
- Room Temperature Egg Whites: Ensure your egg whites are at room temperature before whipping. Cold egg whites can hinder the meringue’s volume and stability.
- Clean Equipment: Make sure your mixing bowl and beaters are clean and completely dry. Any traces of grease or moisture can affect the meringue’s ability to whip up properly.
- Gradual Sugar Addition: Add the granulated sugar slowly to the egg whites while whipping. This helps create a stable meringue with a glossy finish.
- Vinegar and Cornstarch Mix-In: Gently fold in the vinegar and cornstarch with a spatula to maintain the meringue’s airy texture.
- Stiff Peaks: Whip the egg whites until they form stiff peaks that hold their shape. Overwhipping can result in a dry meringue.
- Cooling Period: Allow the Pavlova to cool inside the oven after baking. Sudden temperature changes can cause the meringue to crack.
- Cream Stabilization: To stabilize the whipped cream, chill your mixing bowl and beaters beforehand. You can also add a touch of stabilizer like gelatin if you’re preparing the dessert ahead of time.
- Toppings Variety: Experiment with various fruits for your topping. Consider mango, pineapple, pomegranate seeds, or even caramelized bananas for unique flavors and textures.
- Fresh vs. Frozen Fruits: While fresh fruits are ideal, frozen fruits can work well too. Just make sure to thaw and drain them before using.
- Fruit Pairings: Pair fruits that complement each other in flavor and color. For example, the tartness of berries contrasts beautifully with the sweetness of kiwi.
Pros & Cons
| Pros | Cons |
|---|---|
| ✅ Impressive and elegant dessert | ❌ Requires precise technique |
| ✅ Customizable with various fruits | ❌ Sensitive to humidity |
| ✅ Perfect balance of textures | ❌ Long baking and cooling time |
| ✅ Gluten-free option available | ❌ Potential for cracking |
| ✅ Suitable for special occasions | ❌ High sugar and calorie content |
Conclusion
In the world of desserts, there’s a masterpiece waiting to be created – the enchanting Pavlova. With its delicate meringue, luscious cream, and vibrant fruits, this dessert is a symphony of flavors and textures that dances on your taste buds. While crafting a Pavlova demands a touch of patience and precision, the results are beyond rewarding.
From the art of whipping egg whites to the joy of arranging seasonal fruits, every step in this journey is an opportunity to embrace creativity and indulge in the sweetness of culinary craftsmanship. While cracks and imperfections are part of the Pavlova’s charm, the delight it brings to those who taste it is unparalleled.
So, whether you’re a seasoned baker or a curious kitchen explorer, I encourage you to take up the challenge and create your very own Pavlova masterpiece. Whether you’re celebrating a special occasion or simply treating yourself to a moment of indulgence, this dessert promises to be a showstopper that leaves a lasting impression. Let your kitchen become a stage for this sweet symphony – it’s time to create, savor, and share the magic of a homemade Pavlova.
Facts
- 🌟 Fact 1: Sweet Serendipity 🌟
- Did you know? The creation of Pavlova wasn’t just a planned recipe; it emerged from a bit of culinary magic. Legend has it that the dessert was born when Anna Pavlova’s tour manager hastily whipped up a treat using the ingredients on hand to honor the ballerina. Sometimes, the most delightful creations come from spontaneous inspiration!
- 🍀 Fact 2: The Transcontinental Tiff 🍀
- Get this: The debate over whether Australia or New Zealand can lay claim to Pavlova’s creation is no light matter. It’s like a friendly food feud! While the origin is still up in the air, both countries embrace Pavlova as their own culinary gem, adding a touch of rivalry to the dessert’s legacy.
- 📚 Fact 3: A Meringue Mystery 📚
- Fascinating, isn’t it? The name “Pavlova” isn’t just about dessert; it’s about dancing! Anna Pavlova’s graceful performances inspired not only the dessert’s name but also its light and airy texture. Just like the ballerina, the meringue’s delicate nature captures hearts and taste buds.
- 🌍 Fact 4: A Dish of Diplomacy 🌍
- Wrap your head around this: Pavlova’s popularity transcends borders, but it once played a diplomatic role. During a 1926 tour of New Zealand, Anna Pavlova dined with the mayor of Wellington, who created the dessert in her honor. It’s proof that sometimes, dessert can be a bridge between cultures!
- 🎨 Fact 5: Edible Artistry 🎨
- Prepare to be amazed: Pavlova isn’t just a dessert; it’s a canvas for creativity! With its meringue base resembling a snowy landscape, the toppings become your palette. Think of it as a dessert masterpiece waiting to be painted with colorful fruits and a drizzle of decadence. It’s not just food; it’s edible art!
FAQ’s
Can I make the meringue base ahead of time?
Absolutely! You can prepare the meringue base a day in advance. Just store it in an airtight container in a cool, dry place to maintain its texture.
How do I prevent my Pavlova from collapsing after baking?
To prevent collapsing, ensure your meringue is baked through and crisp on the outside. Gradually cool the Pavlova in the oven with the door slightly ajar to avoid rapid temperature changes.
Can I use a hand mixer instead of an electric mixer?
Yes, you can use a hand mixer to whip the egg whites, but an electric mixer is recommended for faster and more efficient results.
My Pavlova cracked! What should I do?
Don’t worry! Embrace the cracks as part of the dessert’s charm. Simply fill them with extra whipped cream and fruits to create a stunning visual effect.
Can I use a sugar substitute for the meringue?
While it’s possible to use sugar substitutes, the texture and stability of the meringue may be affected. It’s best to use granulated sugar for the most reliable results.
Can I make a dairy-free version of this recipe?
Absolutely! You can use coconut whipped cream or a non-dairy alternative for the topping. Just ensure the cream has a high fat content to whip properly.
How do I know when the meringue is ready for baking?
The meringue is ready when it forms stiff, glossy peaks and the sugar is fully dissolved. Rub a bit between your fingers; it should feel smooth, not gritty.
Can I freeze leftover Pavlova?
While freezing isn’t ideal as the texture may change, you can freeze leftover Pavlova. Thaw it in the refrigerator before serving, and enjoy it within a day or two.
Can I use flavored extracts in the meringue?
Yes, you can experiment with flavored extracts like almond or citrus to add unique twists to the meringue. Just use them sparingly to maintain the delicate flavor balance.
Can I add nuts to the meringue for extra texture?
Absolutely! You can fold chopped nuts like toasted almonds or hazelnuts into the meringue for added crunch and a hint of nutty flavor.