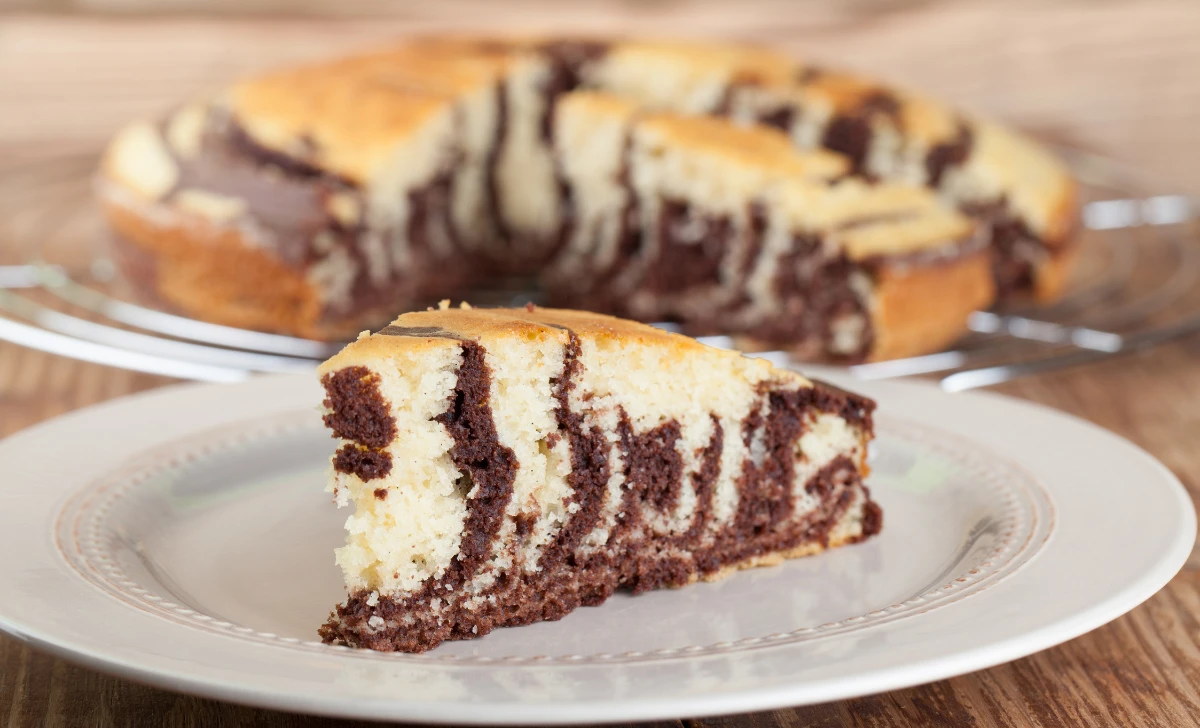
If you’re looking for a mouthwatering dessert that combines the rich flavors of chocolate and vanilla, look no further than a marble cake. Marble cake is a classic treat that features a beautiful swirl pattern of chocolate and vanilla throughout the cake. It’s not only visually appealing but also incredibly delicious. In this article, we will guide you through a simple and foolproof marble cake recipe that you can easily recreate at home. So let’s get started and indulge in the goodness of a homemade marble cake.
[ez-toc]
History
The history of marble cake can be traced back to the 19th century. It is believed to have originated in Germany, where it is known as “Marmorkuchen,” which translates to “marble cake.” This delightful dessert quickly gained popularity and spread across Europe and eventually made its way to America.
The concept of marbleizing cake batter can be attributed to the art of marbling, which involves creating intricate patterns by swirling different colors together. Bakers began experimenting with incorporating this marbling technique into their cakes, resulting in the creation of the marble cake.
Marble cake gained even more popularity in the United States during the 20th century. It became a staple dessert for special occasions such as birthdays, holidays, and celebrations. The visual appeal of the marble pattern, along with its delicious flavor combination, made it a favorite among both children and adults.
Over the years, variations of the marble cake recipe have emerged, incorporating different ingredients and flavors. While the classic version features a combination of vanilla and chocolate, creative bakers have introduced variations such as mocha, citrus, or even adding swirls of different colors and flavors.
Today, marble cake continues to be a beloved dessert worldwide. Its timeless appeal, versatility, and ease of preparation have made it a go-to recipe for both amateur and professional bakers. Whether enjoyed with a cup of coffee or served as a centerpiece at a celebration, marble cake remains a classic treat that brings joy and satisfaction to all who indulge in its delightful flavors.
Time
| Step | Time |
|---|---|
| Gathering the Ingredients | 10 minutes |
| Preparing the Cake Batter | 15 minutes |
| Creating the Marble Effect | 5 minutes |
| Baking the Marble Cake | 40 minutes |
| Total Cooking and Preparation Time | 70 minutes |
Note: The above times are approximate and may vary depending on individual cooking preferences and equipment used.
Ingredients
| Ingredients | Quantity |
|---|---|
| All-purpose flour | 1 ½ cups |
| Baking powder | 1 ½ teaspoons |
| Salt | ¼ teaspoon |
| Unsalted butter, softened | ½ cup |
| Granulated sugar | 1 cup |
| Eggs | 2 |
| Vanilla extract | 1 teaspoon |
| Milk | ½ cup |
| Unsweetened cocoa powder | 2 tablespoons |
| Hot water | 2 tablespoons |
Note: The above quantities are based on a serving size for 2 people. Adjust the quantities accordingly if you need to serve more or fewer people.
Directions
Step 1: Preheat the Oven
Preheat your oven to 350°F (175°C) and prepare a 9-inch round cake pan by greasing it and lightly dusting it with flour.
Step 2: Gathering the Ingredients
Gather all the ingredients listed in the table above to ensure you have everything you need before you begin.
Step 3: Preparing the Cake Batter
- In a medium bowl, whisk together the all-purpose flour, baking powder, and salt. Set aside.
- In a large mixing bowl, cream together the softened unsalted butter and granulated sugar until light and fluffy.
- Add the eggs, one at a time, beating well after each addition. Stir in the vanilla extract.
- Gradually add the dry ingredients to the butter mixture, alternating with the milk. Begin and end with the dry ingredients, mixing until just combined. Be careful not to overmix.
Step 4: Creating the Marble Effect
- Take about one-third of the prepared cake batter and transfer it to a separate bowl.
- In this separate bowl, add the unsweetened cocoa powder and hot water. Mix until well combined, creating a chocolate batter.
Step 5: Baking the Marble Cake
- Spoon dollops of the vanilla batter and chocolate batter alternately into the prepared cake pan.
- Once all the batter is in the pan, take a butter knife and gently swirl it through the batter to create a marble effect. Be careful not to overmix; you want distinct swirls of vanilla and chocolate.
- Place the cake pan in the preheated oven and bake for approximately 40 minutes or until a toothpick inserted into the center comes out clean.
- Once baked, remove the cake from the oven and let it cool in the pan for about 10 minutes. Then transfer it to a wire rack to cool completely.
Step 6: Serving and Enjoying
Slice the cooled marble cake into individual servings and serve it as is or with a dusting of powdered sugar on top. It pairs well with a cup of coffee or a glass of milk.
Enjoy your homemade marble cake!
Equipment Required
Nutrition Information
| Nutrition Information | Amount per Serving |
|---|---|
| Serving Size | 1 slice (1/8 cake) |
| Calories | 320 |
| Total Fat | 15g |
| – Saturated Fat | 9g |
| Cholesterol | 80mg |
| Sodium | 180mg |
| Total Carbohydrate | 44g |
| – Sugars | 28g |
| Protein | 4g |
| Calcium | 60mg |
| Iron | 1.5mg |
Note: The nutrition information provided is approximate and may vary based on specific ingredients used and serving sizes.
Tips
- Make sure all the ingredients, especially the butter and eggs, are at room temperature. This helps in achieving a smooth and well-incorporated batter.
- When measuring flour, spoon it into the measuring cup and level off the top with a knife. Avoid packing the flour into the cup, as it can lead to a denser cake.
- Be gentle when incorporating the dry ingredients into the butter mixture. Overmixing can result in a tough cake. Mix until just combined to maintain a tender texture.
- For a stronger chocolate flavor, you can increase the amount of unsweetened cocoa powder in the chocolate batter. Experiment with the amount to suit your taste preferences.
- While creating the marble effect, do not over-swirl the batters. A few gentle swirls with a butter knife or skewer will give you a beautiful marbled pattern.
- If you want to add a touch of richness to the cake, you can substitute some of the milk with sour cream or buttermilk. This will enhance the moistness and flavor of the cake.
- Feel free to customize the cake by adding mix-ins such as chocolate chips, chopped nuts, or even a sprinkle of cinnamon. Just fold them into the batter before creating the marble effect.
- To ensure the cake bakes evenly, rotate the cake pan halfway through the baking time. This helps to avoid any hot spots in the oven.
- Allow the cake to cool completely before slicing. This ensures cleaner slices and prevents the cake from crumbling.
- If desired, you can frost the marble cake with your favorite frosting, such as chocolate ganache or cream cheese frosting. It adds an extra layer of decadence to the dessert.
Pros & Cons
| Pros | Cons |
|---|---|
| ✔️ Delicious combination of flavors | ❌ Requires multiple steps |
| ✔️ Beautiful marbled appearance | ❌ Can be time-consuming |
| ✔️ Versatile recipe for variations | ❌ May require special equipment |
| ✔️ Great for special occasions | ❌ Higher calorie and fat content |
| ✔️ Can be made ahead of time | ❌ Potential for over- or under-baking |
Conclusion
In conclusion, the marble cake recipe offers a delightful combination of flavors, a visually appealing marbled pattern, and a versatile dessert option for various occasions. With its rich history and timeless charm, marble cake continues to be a beloved treat enjoyed by people of all ages.
By following the step-by-step directions provided, you can easily create a homemade marble cake that will impress your family and friends. The process may require some time and attention, but the end result is well worth the effort. The moist and tender texture, along with the swirls of chocolate and vanilla, make each bite a heavenly experience.
Whether you’re celebrating a special occasion or simply craving a delicious dessert, the marble cake is sure to satisfy your sweet tooth. Its versatility allows for endless variations, letting you add your own creative touch or experiment with different flavors. Plus, you can make it ahead of time, saving you valuable moments when hosting gatherings or events.
So, why not embark on a delightful baking adventure and treat yourself to a slice of homemade marble cake? Gather the ingredients, follow the steps, and enjoy the process of creating a masterpiece in your own kitchen. Indulge in the flavors, share the joy with loved ones, and experience the satisfaction of a dessert well-made.
Facts
- Fact 1: 🌍 Global Popularity
- Marble cake is a beloved dessert worldwide, known by different names in various countries. It’s called “Marmorkuchen” in Germany, “Battenberg cake” in the UK, and “Tiger Cake” in Sweden.
- Fact 2: 🎨 Artistic Inspiration
- The technique of marbling cake batter was inspired by the art of marbling paper, which dates back to the 12th century. Bakers incorporated this beautiful swirling effect into cakes, creating edible works of art.
- Fact 3: 📺 Lights, Camera, Marble Cake!
- Marble cake has made appearances in popular culture. It was featured in the iconic film “Matilda” during the memorable chocolate cake scene. The delicious cake caused quite a messy explosion!
- Fact 4: 🎂 Marble Cake for Special Occasions
- Marble cake has become a traditional choice for celebrations like weddings and birthdays. Its elegant marbled pattern adds a touch of sophistication to any special event.
- Fact 5: 🌈 Endless Possibilities
- While chocolate and vanilla are the classic flavors, marble cake offers endless opportunities for creativity. You can experiment with different flavor combinations like strawberry and lemon or matcha and white chocolate.
FAQ’s
Can I use whole wheat flour instead of all-purpose flour?
Yes, you can substitute whole wheat flour for all-purpose flour, but keep in mind that it may result in a denser texture and slightly different flavor.
Can I use vegetable oil instead of butter?
Yes, you can replace butter with an equal amount of vegetable oil. The texture and taste of the cake may vary slightly.
Can I make a gluten-free version of marble cake?
Yes, you can use gluten-free all-purpose flour as a substitute for regular flour to make a gluten-free marble cake.
How long can I store marble cake?
You can store marble cake at room temperature in an airtight container for up to 3 days. For longer storage, keep it refrigerated for up to a week.
Can I double the recipe to make a larger cake?
Yes, you can double the ingredients to make a larger marble cake. Adjust the baking time accordingly, as it may take longer to cook through.
Can I add frosting to the marble cake?
Absolutely! Marble cake pairs well with various frostings like chocolate ganache, buttercream, or cream cheese frosting. Get creative with your choices.
Can I make cupcakes instead of a whole cake?
Yes, you can adapt the recipe to make marble cupcakes. Adjust the baking time to around 18-20 minutes, or until a toothpick comes out clean.
How can I make the marble pattern more defined?
To achieve more defined swirls, avoid overmixing the batters and use a butter knife to gently swirl the two batters together without completely blending them.
Can I freeze marble cake?
Yes, you can freeze marble cake. Wrap it tightly in plastic wrap and store it in an airtight container or freezer bag for up to 2-3 months. Thaw before serving.
Can I add additional flavors, such as citrus zest or extracts?
Absolutely! Feel free to experiment and add your favorite flavors like lemon zest, almond extract, or orange extract to enhance the taste of your marble cake.