Have you ever craved a dessert that combines crispy, golden pastry with a luscious, sweet filling? Look no further than Kunafa! This Middle Eastern delicacy is a true delight for the senses. With its crunchy exterior, gooey center, and irresistible aroma, Kunafa has captured the hearts and taste buds of dessert lovers worldwide. In this article, we will guide you through the process of making a delicious Kunafa right in your own kitchen. So, put on your apron and get ready to embark on a culinary adventure!
[ez-toc]
History
Kunafa, a delectable dessert that tantalizes the taste buds with its crispy pastry and sumptuous filling, boasts a rich and fascinating history that stretches back centuries. The origins of this beloved treat can be traced to the Middle East, where it has become an integral part of the region’s culinary heritage.
The exact origins of Kunafa are shrouded in time, with various theories and legends surrounding its creation. One popular belief is that Kunafa was first made in the Palestinian city of Nablus, where it was known as “Kanafeh Nabulsieh.” According to this account, the recipe for Kunafa was passed down through generations, carefully guarded and preserved by local families.
As Kunafa’s reputation grew, it spread beyond Nablus and made its way to other parts of the Middle East and neighboring regions. Today, you can find variations of Kunafa in countries like Lebanon, Jordan, Egypt, Turkey, and Greece, each with its own unique twist on the dessert.
Kunafa’s popularity extends far beyond the Middle East. With globalization and the spread of cultural diversity, this tantalizing treat has gained recognition and a dedicated following worldwide. Its mouthwatering combination of flavors and textures has captivated dessert enthusiasts in every corner of the globe.
In addition to its historical significance, Kunafa holds cultural importance in various communities. It is often associated with special occasions, festivals, and family gatherings, where it serves as a symbol of celebration and hospitality. Sharing a plate of Kunafa with loved ones has become a cherished tradition, bringing people together over a shared love for this delectable dessert.
Over time, Kunafa has evolved and adapted to local tastes and preferences. While the classic version features sweet cheese and nuts, creative variations have emerged, introducing new fillings and flavors. Some innovative twists include using cream, fruits, or even savory ingredients, allowing Kunafa to transcend its traditional boundaries and become a versatile dish for chefs and home cooks alike.
As the years have passed, Kunafa has not only retained its authentic charm but has also found its way onto the menus of contemporary restaurants and gourmet pastry shops worldwide. Its unique combination of textures, flavors, and cultural significance has made it a dessert that continues to enchant and delight dessert enthusiasts of all backgrounds.
So, the next time you indulge in a plate of Kunafa, savor each bite and appreciate the centuries of tradition and craftsmanship that have gone into perfecting this culinary masterpiece. Kunafa is more than just a dessert; it is a testament to the rich history and cultural heritage that continues to bring joy to people’s lives.
Time
| Step | Time |
|---|---|
| Preparing the Syrup | 10 minutes |
| Preparing the Kunafa Dough | 15 minutes |
| Assembling the Kunafa | 10 minutes |
| Baking the Kunafa | 30-35 minutes |
| Cooling and Resting | 15 minutes |
| Serving and Presentation | 5 minutes |
Please note that the provided times are estimates and may vary depending on individual cooking skills and kitchen conditions. It’s always advisable to refer to the specific recipe and follow the instructions accordingly to achieve the best results.
Ingredients
| Ingredients | Amount |
|---|---|
| Kataifi or kunafa dough | 1 package |
| Unsalted butter | 1/2 cup |
| Granulated sugar | 1/2 cup |
| Water | 1/2 cup |
| Lemon juice | 1/2 tablespoon |
| Rosewater (optional) | 1/2 teaspoon |
| Sweet cheese (such as akkawi or mozzarella) | 1 cup |
| Finely chopped nuts (such as pistachios or almonds) | 1/2 cup |
Note: The above quantities are based on a serving size for 2 people. Adjust the quantities accordingly if you need to serve more or fewer people.
Directions
Step 1: Preparing the Syrup
- Combine Ingredients: In a saucepan, combine the granulated sugar and water. Place the pan over medium heat.
- Dissolve Sugar: Stir the mixture continuously until the sugar dissolves completely.
- Add Lemon Juice: Once the sugar has dissolved, add the lemon juice to the syrup. Continue stirring.
- Simmer and Thicken: Allow the syrup to simmer for about 5 minutes until it thickens slightly. Stir occasionally.
- Optional: Add Rosewater: Remove the pan from heat and stir in the rosewater (if desired). Set the syrup aside to cool.
Step 2: Preparing the Kunafa Dough
- Preheat Oven: Preheat your oven to 350°F (175°C).
- Prepare the Dough: Take the kataifi or kunafa dough and gently separate the strands with your fingers to loosen them.
- Melt Butter: Melt the unsalted butter.
- Coat the Dough: Drizzle the melted butter over the kataifi or kunafa dough. Use your hands to mix and coat the strands evenly.
Step 3: Assembling the Kunafa
- Layer the Bottom: Take half of the coated kataifi or kunafa dough and spread it evenly across the bottom of a greased baking dish.
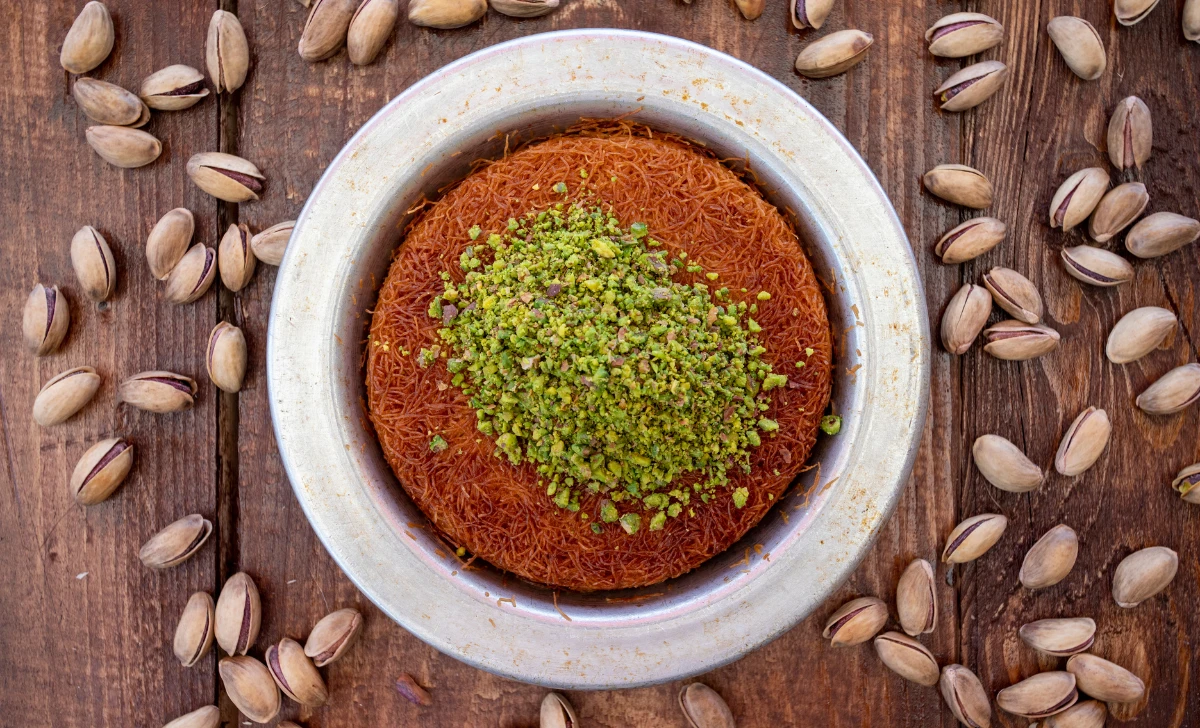
- Add Cheese and Nuts: Sprinkle the shredded sweet cheese and finely chopped nuts evenly over the dough layer.
- Add the Top Layer: Cover the cheese and nut layer with the remaining coated kataifi or kunafa dough. Press gently to ensure an even layer.
Step 4: Baking the Kunafa
- Bake in Preheated Oven: Place the baking dish with the assembled Kunafa in the preheated oven.
- Baking Time: Bake for approximately 30-35 minutes, or until the Kunafa turns golden brown and crisp.
Step 5: Cooling and Resting
- Remove from Oven: Once baked, remove the Kunafa from the oven and let it cool for a few minutes.
- Pour Syrup: Drizzle the prepared syrup evenly over the entire Kunafa while it is still warm. Allow the syrup to seep into the layers.
- Resting Time: Let the Kunafa rest for about 15 minutes to allow the flavors to meld together.
Step 6: Serving and Presentation
- Slice and Serve: Cut the Kunafa into individual portions and serve it warm or at room temperature.
- Garnish (Optional): For an added touch, garnish with extra chopped nuts, a sprinkle of powdered sugar, or a drizzle of honey.
- Enjoy! Dive into the delightful combination of textures and flavors that make Kunafa so irresistible.
Equipment Required
Nutrition Information
| Nutrition Information | Amount per Serving |
|---|---|
| Serving Size | 1/4 of Recipe |
| Calories | 350 |
| Total Fat | 20g |
| Saturated Fat | 10g |
| Cholesterol | 50mg |
| Sodium | 200mg |
| Total Carbohydrate | 38g |
| Dietary Fiber | 2g |
| Sugars | 24g |
| Protein | 7g |
Please note that the provided nutrition information is an estimate and may vary depending on the specific ingredients and quantities used in the recipe. It’s always advisable to calculate the exact nutritional values based on the specific brands and measurements you use.
Tips
- Thawing the Dough: If using frozen kataifi or kunafa dough, make sure to thaw it completely before separating the strands. Follow the package instructions for the best results.
- Handling the Dough: When working with the kataifi or kunafa dough, be gentle to avoid breaking the strands. Lightly separate them using your fingertips for a fluffy and crispy texture.
- Buttering the Dough: Ensure that the melted butter is evenly distributed throughout the kataifi or kunafa dough. This will help create a golden and crispy crust.
- Choosing the Cheese: Traditional Kunafa is made with sweet cheese like akkawi or mozzarella, but you can experiment with other soft, mildly salty cheeses to suit your taste. Just make sure the cheese melts well and doesn’t become too stringy.
- Nuts and Fillings: Feel free to get creative with the fillings. Besides pistachios or almonds, you can use chopped walnuts, cashews, or even dried fruits to add flavor and texture.
- Flavor Variations: Explore different flavor profiles by adding a touch of ground cinnamon or cardamom to the filling. You can also infuse the syrup with orange blossom water or other extracts to enhance the aroma.
- Baking Time and Temperature: Keep an eye on the Kunafa while baking, as oven temperatures may vary. Adjust the baking time accordingly to achieve the desired level of crispness and browning.
- Resting Time: Allowing the Kunafa to rest after baking and before adding the syrup helps the flavors meld together and enhances the overall taste. Patience is key!
- Serving Suggestions: While Kunafa is delightful on its own, you can serve it with a scoop of vanilla ice cream, a dollop of whipped cream, or a drizzle of chocolate sauce for an indulgent touch.
- Storage and Reheating: Kunafa is best enjoyed fresh, but if you have leftovers, store them in an airtight container in the refrigerator. To reheat, place the desired portion in a preheated oven for a few minutes to regain its crispness.
Pros & Cons
| Pros | Cons |
|---|---|
| ✔️ Delicious and indulgent dessert | ❌ High calorie content |
| ✔️ Unique and impressive presentation | ❌ Requires specific ingredients |
| ✔️ Versatile – can be customized with fillings | ❌ Time-consuming preparation process |
| ✔️ Cultural significance and heritage | ❌ Not suitable for dietary restrictions |
| ✔️ Loved by dessert enthusiasts worldwide | ❌ Potential challenges in achieving texture |
Conclusion
Embarking on a culinary adventure is always an exciting endeavor, and making Kunafa is no exception. This delightful Middle Eastern dessert with its crispy layers, sweet cheese, and fragrant syrup offers a truly indulgent experience for your taste buds.
Throughout this article, we have explored the rich history, step-by-step preparation process, and helpful tips and tricks for making the perfect Kunafa. From preparing the syrup with its delicate balance of sweetness to assembling the layers of dough and filling, every step is an opportunity to create a masterpiece of flavors and textures.
Kunafa is more than just a dessert; it’s a symbol of cultural heritage and celebration. By immersing yourself in the world of Kunafa, you can connect with the Middle Eastern traditions and share the joy of this beloved treat with your loved ones.
So, why not gather the ingredients, put on your chef’s hat, and dive into the delightful journey of making Kunafa? The satisfaction of creating a golden-brown masterpiece and savoring each bite will be worth every effort. Whether you’re hosting a special occasion or simply treating yourself, Kunafa is sure to impress and delight.
Remember, making Kunafa is a creative process, and you can customize it to suit your taste. Explore different fillings, garnishes, and flavor combinations to make it your own. Let your imagination run wild and create your own Kunafa masterpiece that reflects your unique culinary style.
Don’t hesitate to embark on this culinary adventure. Discover the joy of Kunafa, the delightful layers of flavors, and the cultural significance that makes it a truly special dessert. So, roll up your sleeves, preheat that oven, and let the sweet aromas fill your kitchen. Get ready to experience the magic of Kunafa firsthand. Your taste buds will thank you, and you’ll create memories that will last a lifetime.
Enjoy the journey, indulge in the flavors, and savor the delightful Kunafa!
Facts
- Fact 1: A Pastry Fit for Royalty 👑
- Did you know that Kunafa was a favorite dessert of the mighty Ottoman Empire’s sultans? It was considered a royal treat and was served to esteemed guests during grand feasts and celebrations. Indulging in Kunafa is like experiencing a taste of culinary regality!
- Fact 2: A Crispy Conundrum 🥮
- Ever wondered how Kunafa achieves its perfect balance of crispy layers? The secret lies in the unique process of brushing each layer of dough with butter before baking. This creates a heavenly golden crust that shatters with every bite, providing an irresistible textural experience.
- Fact 3: A Sweet Symphony of Cultures 🌍
- Kunafa’s popularity extends beyond the Middle East, with various countries putting their own flavorful twist on the dessert. In Greece, it is known as “Kataifi,” while in Turkey, it goes by the name “Kadayıf.” Each culture infuses its own culinary influences, making Kunafa a delicious representation of cross-cultural harmony.
- Fact 4: A Delightful Sensory Journey 🌺
- The aroma of rosewater wafting from freshly baked Kunafa is not just a treat for your taste buds but also for your olfactory senses. The delicate floral notes imparted by rosewater add an exquisite layer of fragrance to the dessert, transporting you to a world of culinary delight with every bite.
- Fact 5: The Sweet Origins 🏰
- Legend has it that the first Kunafa was made in the ancient city of Nablus, Palestine. It is believed that the original recipe has been passed down through generations, guarded and cherished by local families. Today, Nablus remains renowned for producing some of the most exquisite Kunafa in the world, keeping its delicious legacy alive.
FAQ’s
Can I use phyllo dough instead of kataifi or kunafa dough?
While phyllo dough is not an exact substitute for kataifi or kunafa dough, you can use it as an alternative. Keep in mind that the texture and results may differ slightly, but it can still yield a delicious dessert.
Can I make Kunafa without cheese?
Absolutely! While cheese is a traditional filling for Kunafa, you can explore other options. Consider using a creamy custard or a combination of nuts and dried fruits for a delightful non-cheese variation.
Can I prepare Kunafa in advance?
While it’s best enjoyed fresh, you can prepare the components of Kunafa in advance. Store the assembled but unbaked Kunafa in the refrigerator and bake it just before serving for the best texture and flavor.
Can I freeze leftover Kunafa?
Yes, you can freeze leftover Kunafa. Ensure it is properly wrapped or stored in an airtight container to maintain its texture. Thaw in the refrigerator and reheat in the oven for a few minutes to regain its crispiness.
Can I reduce the calorie content of Kunafa?
You can make some adjustments to reduce the calorie content. Opt for a lighter cheese or reduce the amount of sugar in the syrup. Additionally, watch the portion size and enjoy Kunafa in moderation.
Can I make a smaller or larger batch of Kunafa?
Yes, you can easily adjust the recipe to make a smaller or larger batch of Kunafa. Just ensure the ingredients are proportionally adjusted to maintain the right balance of flavors.
Can I use a different type of cheese?
Absolutely! While traditional sweet cheese like akkawi or mozzarella is commonly used, you can experiment with other soft, mild cheeses like ricotta or cottage cheese for a unique twist.
Can I use a different type of nuts for the filling?
Of course! The choice of nuts is flexible. Feel free to use your favorite nuts or a combination that suits your taste, such as walnuts, cashews, or hazelnuts.
Can I make Kunafa gluten-free?
Yes, you can make a gluten-free version of Kunafa by using gluten-free kataifi or kunafa dough, which is available in some specialty stores. Check the labels to ensure it’s suitable for your dietary needs.
Can I serve Kunafa with any accompaniments?
Absolutely! Kunafa can be enjoyed on its own, but you can enhance the experience by serving it with a scoop of vanilla ice cream, a drizzle of honey, or a sprinkle of powdered sugar for added sweetness and flavor.
