Tater Tots are a beloved comfort food that brings joy to both kids and adults alike. These bite-sized, crispy treats are made from grated potatoes, seasoned to perfection, and fried until golden brown. Whether served as a side dish, snack, or part of a main course, Tater Tots never fail to please. In this article, we will explore the history of Tater Tots, delve into the simple steps of making them at home, discuss various serving suggestions, and even offer some healthier alternatives.
[ez-toc]
History
The origins of the Tater Tots recipe can be traced back to the early 20th century in the United States. The story begins with the founding of the Ore-Ida company, which played a crucial role in popularizing this beloved potato snack.
In the 1930s, brothers Nephi and Golden Grigg founded the Ore-Ida company in Oregon. They started their business by selling frozen French fries, aiming to provide convenience to customers who were looking for a quick and easy way to enjoy potatoes. While French fries gained popularity, the Grigg brothers were faced with an issue – a considerable amount of potato scraps and bits were left over during the French fry production process.
Determined not to let any part of the potato go to waste, the Grigg brothers brainstormed ideas to utilize the leftover potato pieces. They experimented with various techniques, trying to find a way to transform these scraps into something delicious and marketable.
Finally, in 1953, the breakthrough came when the Grigg brothers developed the concept of Tater Tots. They took the discarded potato bits and combined them with flour and a special blend of seasonings. The mixture was then shaped into bite-sized cylindrical or barrel-shaped forms, creating the iconic Tater Tots we know today.
Initially, the Griggs faced skepticism about this new creation. However, they believed in the potential of Tater Tots as a tasty and convenient snack, and they persevered in their efforts to introduce them to the public. The name “Tater Tots” was coined to reflect both the main ingredient (tater, derived from “potato”) and the small, bite-sized nature of the treat.
To promote Tater Tots, the Ore-Ida company embarked on a marketing campaign that included offering free samples to school children. This strategy turned out to be highly successful, as children loved the crispy texture and delightful taste of Tater Tots. Soon, they became a hit not only in schools but also in households across the country.
The popularity of Tater Tots continued to grow over the decades. They became a staple in school cafeterias, fast-food restaurants, and home kitchens. People appreciated the convenience of these pre-made, frozen potato bites that could be easily cooked at home.
Tater Tots also became an integral part of American culture, often associated with comfort food and nostalgic memories of childhood. They were served as side dishes, snacks, and party appetizers, and even incorporated into creative recipes for casseroles, breakfast dishes, and more.
Today, Tater Tots remain a cherished snack and a symbol of American culinary innovation. Their enduring popularity is a testament to the ingenuity of the Grigg brothers and their commitment to turning leftovers into a beloved treat that has stood the test of time.
Time
| Step | Time |
|---|---|
| Preparing the Potatoes | 15 minutes |
| Shaping the Tater Tots | 20 minutes |
| Frying the Tater Tots | 25 minutes |
Please note that the times provided are approximate and can vary depending on individual cooking skills and equipment used. The preparation and cooking times are meant to give a general idea of the time required for each step in making delicious homemade Tater Tots.
Ingredients
| Ingredients | Quantity for 2 Servings |
|---|---|
| Potatoes | 2 medium-sized |
| All-purpose flour | 1/4 cup |
| Onion powder | 1/2 teaspoon |
| Garlic powder | 1/2 teaspoon |
| Salt | 1/2 teaspoon |
| Pepper | 1/4 teaspoon |
| Vegetable oil | For frying |
This table provides the quantities required to serve two people. Adjust the ingredients accordingly if you plan to serve more or fewer individuals. Enjoy your delicious homemade Tater Tots!
Directions
Step 1: Preparing the Potatoes
- Wash and Peel: Start by washing the potatoes thoroughly under running water. Peel the potatoes using a vegetable peeler to remove the skin.
- Grate the Potatoes: Use a box grater or a food processor with a grating attachment to grate the peeled potatoes. Place the grated potatoes in a clean kitchen towel and squeeze out any excess moisture.
Step 2: Shaping the Tater Tots
- Mix the Ingredients: In a mixing bowl, combine the grated potatoes, all-purpose flour, onion powder, garlic powder, salt, and pepper. Mix the ingredients until well combined, ensuring the flour and seasonings evenly coat the potatoes.
- Shape the Tater Tots: Take small portions of the potato mixture and roll them between your palms to create cylindrical or barrel-shaped Tater Tots. Place the shaped Tater Tots on a clean plate or tray.
Step 3: Frying the Tater Tots
- Heat the Oil: In a deep pan or skillet, heat vegetable oil over medium-high heat. The oil should be hot enough to sizzle when a small piece of potato is added.
- Fry the Tater Tots: Carefully place the shaped Tater Tots into the hot oil, ensuring they are not overcrowded in the pan. Fry them in batches if necessary. Cook the Tater Tots until they turn golden brown and crispy on all sides. This usually takes about 2-3 minutes per batch.
- Drain and Serve: Once the Tater Tots are fried to perfection, use a slotted spoon to remove them from the oil. Place them on a plate lined with paper towels to drain any excess oil.
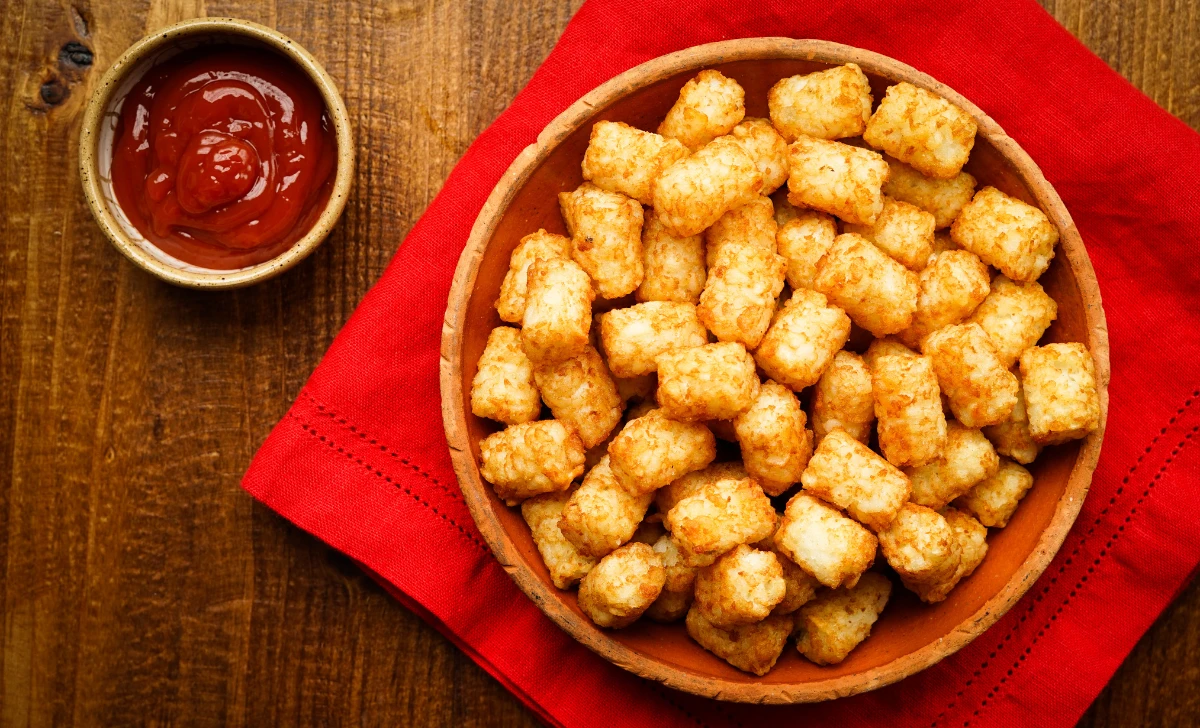
- Serve Hot: Tater Tots are best enjoyed immediately while they are hot and crispy. Serve them as a delightful side dish, a tasty snack, or a fun addition to your main course.
Equipment Required
Nutrition Information
| Nutrition Information | Per Serving (2-person serving) |
|---|---|
| Serving Size | 10-12 Tater Tots |
| Calories | Approximately 200 kcal |
| Total Fat | 8g |
| Saturated Fat | 1g |
| Trans Fat | 0g |
| Cholesterol | 0mg |
| Sodium | 300mg |
| Total Carbohydrates | 30g |
| Dietary Fiber | 2g |
| Sugars | 1g |
| Protein | 3g |
Please note that the nutrition information provided is an estimate and may vary slightly based on the specific ingredients used and the cooking method. It’s always a good idea to refer to the packaging of individual ingredients for more accurate nutritional details.
Enjoy your Tater Tots while being mindful of portion sizes and incorporating them into a balanced diet!
Tips
- Select the Right Potatoes: Opt for starchy or all-purpose potatoes like Russet or Yukon Gold for the best results. They have a higher starch content, which helps create a fluffy texture inside the Tater Tots.
- Keep the Potatoes Dry: After grating the potatoes, ensure you squeeze out as much moisture as possible using a kitchen towel. Dry potatoes will result in crispier Tater Tots.
- Experiment with Seasonings: Feel free to customize the seasoning blend to suit your taste preferences. Add a pinch of cayenne pepper for a spicy kick or sprinkle some paprika for a smoky flavor.
- Consistent Sizing: When shaping the Tater Tots, try to make them as uniform in size as possible. This will ensure even cooking and a consistent texture.
- Hot Oil for Crispy Tater Tots: Heat the vegetable oil to the right temperature before frying. The oil should sizzle when you add a small piece of potato to it. If the oil is not hot enough, the Tater Tots might turn out greasy.
- Avoid Overcrowding the Pan: Fry the Tater Tots in batches, making sure not to overcrowd the pan. This allows them to cook evenly and become crispy.
- Use a Thermometer: If you’re unsure about the oil temperature, use a kitchen thermometer to gauge the heat accurately. The ideal frying temperature is around 350°F (175°C).
- Healthy Alternatives: For a healthier version, consider baking the Tater Tots in the oven instead of frying them. Lightly coat them with cooking spray and bake at 425°F (220°C) for about 20-25 minutes, flipping halfway through.
Pros & Cons
| Pros | Cons |
|---|---|
| ✅ Quick and Easy to Prepare | ❌ High in Calories |
| ✅ Delicious and Crispy | ❌ Deep-Frying Required |
| ✅ Customizable Seasonings | ❌ May Absorb Excess Oil |
| ✅ Versatile Side Dish | ❌ Not Suitable for Gluten-Free Diets |
| ✅ Kid-Friendly Snack | ❌ Limited Nutritional Value |
Conclusion
In conclusion, the Tater Tots recipe is a delightful and irresistible treat that brings joy to both young and old. With its crispy exterior and fluffy interior, these bite-sized potato wonders are sure to win over your taste buds.
Preparing Tater Tots at home is a rewarding experience, allowing you to tailor the seasoning to suit your palate and experiment with various creative variations. The recipe is relatively simple and requires only a handful of ingredients, making it a convenient option for a quick and satisfying snack or side dish.
While Tater Tots may not be the healthiest option due to their frying process and calorie content, they make an excellent occasional indulgence or addition to your favorite comfort food dishes.
So why not don your apron, gather your ingredients, and embark on a culinary adventure with homemade Tater Tots? Treat yourself and your loved ones to this classic American delight that is sure to bring smiles to your faces.
Whether enjoyed as a family snack, a party appetizer, or a side dish during mealtime, Tater Tots are guaranteed to be a crowd-pleaser. So, roll up your sleeves, get cooking, and savor the deliciousness of these crispy and flavorful bites.
Don’t miss the chance to experience the joy of making your own Tater Tots. Give this recipe a try and relish the satisfaction of creating a scrumptious snack from scratch.
Remember, the key to culinary success lies in the joy of experimentation and the love of good food. So, let the aroma of freshly fried Tater Tots fill your kitchen and create fond memories that will linger long after the last tot is savored.
Facts
- 1. 🥔 Invention Born from Scraps 🍟
- Fact: The iconic Tater Tots recipe was created as a clever solution to minimize waste. In 1953, the founders of Ore-Ida, Nephi, and Golden Grigg, sought to utilize leftover potato scraps from their French fry production. They chopped up the scraps, seasoned them, and voilà! Tater Tots were born, turning what would have been discarded into a beloved snack.
- 2. 🌟 “Tater Tots” Name Fun Fact 🍟
- Fact: The catchy name “Tater Tots” wasn’t the original choice. Initially, the Grigg brothers considered naming them “Potato Gems.” However, a housewife focus group fell in love with the term “Tater Tots,” and the rest is history. This fun name perfectly encapsulates the playful and scrumptious nature of these little potato treasures.
- 3. 🇺🇸 Presidential Seal of Approval 🍟
- Fact: Tater Tots have not only won the hearts of millions but also earned a prestigious honor. In 1984, the Tater Tot casserole was served at the White House during a formal state dinner, gaining approval from none other than the President of the United States, Ronald Reagan. It’s a testament to the widespread appeal and popularity of this humble yet beloved dish.
- 4. 🌮 Taco Bell Connection 🍟
- Fact: Did you know that Tater Tots briefly had a fast-food cameo? In 1995, Taco Bell experimented with a limited-time menu item called “Tater Tots Nachos.” Unfortunately, the concept didn’t catch on, and the item was discontinued. Nevertheless, it’s a fun fact that showcases the versatility of Tater Tots as a potential taco topping!
- 5. 🌟 Guinness World Record Holder 🍟
- Fact: Tater Tots have earned their place in the Guinness World Records! In 2019, a restaurant in California claimed the title for the “Largest Serving of Tater Tots.” They piled a staggering 6,362 pounds (over 2.8 metric tons!) of Tater Tots on a single giant plate. It’s an awe-inspiring feat that celebrates the beloved snack’s massive popularity.
FAQ’s
Can I bake Tater Tots instead of frying them?
Yes, you can bake Tater Tots for a healthier alternative. Preheat your oven to 425°F (220°C), lightly coat the Tater Tots with cooking spray, and arrange them on a baking sheet. Bake for 20-25 minutes, flipping halfway through, until they are golden and crispy.
How long do Tater Tots stay fresh after cooking?
Cooked Tater Tots can be stored in an airtight container in the refrigerator for up to 3 days. Reheat them in the oven or toaster oven to maintain their crispiness.
Are Tater Tots gluten-free?
Traditional Tater Tots made with all-purpose flour are not gluten-free. However, you can make gluten-free Tater Tots by using gluten-free flour or cornstarch as a substitute for regular flour.
Can I freeze Tater Tots for later use?
Absolutely! After frying or baking, let the Tater Tots cool to room temperature, then transfer them to a freezer-safe container or bag. They can be stored in the freezer for up to 2 months. Reheat in the oven or air fryer until hot and crispy.
Can I use an air fryer to cook Tater Tots?
Yes, you can cook Tater Tots in an air fryer for a healthier option. Simply preheat the air fryer to 400°F (200°C), lightly spray the Tater Tots with oil, and air fry for about 10-15 minutes, shaking the basket occasionally for even cooking.
How do I make Tater Tots crispier?
To achieve extra crispiness, make sure the grated potatoes are as dry as possible before shaping. Additionally, fry or bake the Tater Tots at a slightly higher temperature, and avoid overcrowding the pan or baking sheet.
Can I add other vegetables to the Tater Tots mixture?
Absolutely! Get creative by incorporating finely chopped vegetables like onions, bell peppers, or carrots to add color and extra flavor to the Tater Tots.
Are Tater Tots suitable for vegetarians?
Yes, Tater Tots are generally suitable for vegetarians as they are made from potatoes and plant-based ingredients. However, always check the specific brands or recipes for any potential non-vegetarian additives.
Can I use frozen grated potatoes for this recipe?
While fresh grated potatoes are recommended for the best texture, you can use frozen grated potatoes in a pinch. Thaw them thoroughly and ensure excess moisture is removed before mixing with the other ingredients.
What dipping sauces go well with Tater Tots?
Tater Tots pair wonderfully with various dipping sauces. Popular options include ketchup, barbecue sauce, ranch dressing, honey mustard, or even spicy Sriracha mayo. Experiment with different sauces to find your favorite combination!
