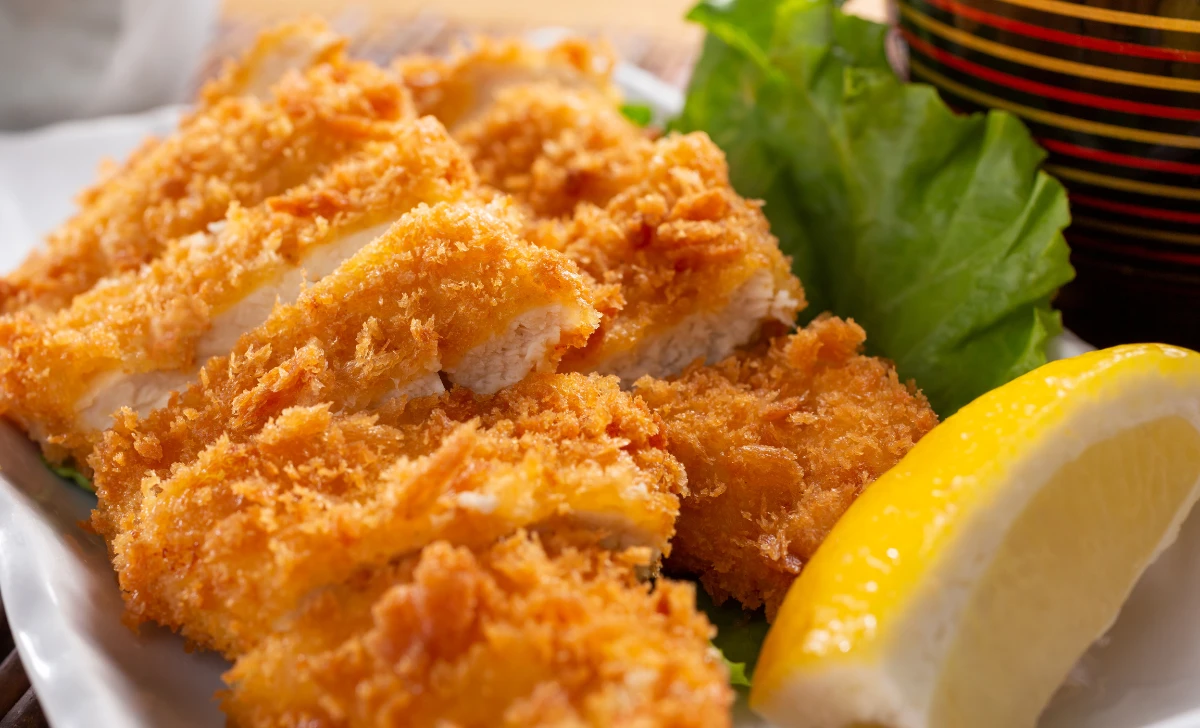
Are you in the mood for a delicious and satisfying meal that’s both crispy and tender? Look no further than the irresistible Katsu Chicken! This Japanese-inspired dish combines succulent chicken with a crispy breaded coating, making it a favorite for all ages. Whether you’re a culinary novice or an experienced home chef, follow this step-by-step guide to create a mouthwatering Katsu Chicken that’ll have your taste buds dancing.
[ez-toc]
History
Delving into the origins of Katsu Chicken is like embarking on a culinary journey that spans continents and cultures.
Origins of Katsu: A Breadcrumb-Covered History
The Katsu technique of breading and frying meat can be traced back to the 19th century when Japan opened its doors to Western influences. The term “Katsu” itself is derived from the English word “cutlet,” reflecting the dish’s European inspiration. As Japanese cuisine absorbed foreign elements, this cooking method underwent a transformation that gave birth to Katsu as we know it today.
The idea of breading and frying meat was an ingenious fusion of Western and Japanese culinary traditions. The technique allowed the Japanese to enjoy the delightful crunchiness of European-style breaded meats while incorporating their own flavors and ingredients. The result was a harmonious blend that captivated taste buds and led to the evolution of various Katsu dishes, including Katsu Chicken.
Katsu Outside Japan: International Popularity
Over time, Katsu Chicken made its way beyond Japanese shores, captivating palates worldwide. As Japanese cuisine gained popularity internationally, Katsu Chicken became a beloved dish in various countries, often with unique regional twists. The crispy texture, combined with the tender meat, resonated with diverse culinary cultures.
In many places, Katsu Chicken found its way onto menus, often accompanied by its iconic partner, Tonkatsu sauce. This tangy, slightly sweet sauce perfectly complements the savory crunch of Katsu, creating a dynamic flavor profile that transcends borders.
Today, Katsu Chicken stands as a testament to the power of culinary fusion. It showcases how a dish can travel across continents, adapt to new environments, and bring joy to people of different backgrounds.
From its humble beginnings in the kitchens of Japan to its widespread popularity in restaurants around the world, Katsu Chicken has carved its place in the hearts and stomachs of food enthusiasts everywhere.
Time
| Step | Time |
|---|---|
| Preparing the Chicken | |
| Flatten and Tenderize | 10 minutes |
| Seasoning | 15 minutes |
| Breading Process Demystified | |
| Flour Coating | 5 minutes |
| Dip in Beaten Eggs | 5 minutes |
| Breadcrumb Layer | 10 minutes |
| Pan-Frying to Crispy Perfection | |
| Choosing the Right Oil | 5 minutes |
| Frying Process | 8-10 minutes per side |
| Draining Excess Oil | 5 minutes |
| Serve with Love | |
| Accompaniments | 10 minutes |
| Adding Tonkatsu Sauce | 2 minutes |
| Garnishes | 5 minutes |
| Total Time | Approximately 1 hour |
Remember, these times are approximate and can vary based on your cooking speed and familiarity with the process. Enjoy your culinary journey of creating a delectable Katsu Chicken!
Ingredients
| Ingredients | Quantity |
|---|---|
| Chicken Breasts | 2 pieces |
| Panko Breadcrumbs | 1 cup |
| All-Purpose Flour | ½ cup |
| Eggs | 2 |
| Salt | To taste |
| Pepper | To taste |
| Vegetable Oil | For frying |
| Steamed Rice | 1 cup |
| Shredded Cabbage | 1 cup |
| Tonkatsu Sauce | Drizzle |
| Green Onions (optional) | For garnish |
This list of ingredients will help you prepare a delightful Katsu Chicken meal for two people. Enjoy your cooking!
Directions
Preparing the Chicken
- Flatten and Tenderize
- Place the chicken breasts between sheets of plastic wrap.
- Gently use a meat mallet or a heavy pan to flatten them to about ½-inch thickness.
- Seasoning
- Sprinkle both sides of the chicken breasts with salt and pepper.
- Allow the seasoning to penetrate by letting the chicken rest for about 15 minutes.
Breading Process Demystified
- Flour Coating
- Dredge each chicken breast in the all-purpose flour, shaking off any excess.
- Ensure an even, light coating of flour on both sides.
- Dip in Beaten Eggs
- Dip the flour-coated chicken into the beaten eggs, making sure to coat all sides evenly.
- Allow any excess egg to drip off.
- Breadcrumb Layer
- Press the egg-coated chicken into the panko breadcrumbs, patting gently to adhere.
- Make sure the breadcrumbs cover the chicken completely for that irresistible crunch.
Pan-Frying to Crispy Perfection
- Choosing the Right Oil
- Heat vegetable oil in a deep skillet or frying pan over medium-high heat.
- The oil should be around 350°F (175°C) for optimal frying.
- Frying Process
- Carefully place the breaded chicken into the hot oil.
- Fry for about 3-4 minutes on each side, or until the coating is golden brown and crispy.
- Draining Excess Oil
- Once fried, transfer the Katsu Chicken to a wire rack or paper towels.
- Allow excess oil to drain off, preserving the crunchiness.
Serve with Love
- Accompaniments
- Serve the Katsu Chicken with steamed rice on one side of the plate.
- Add a heap of shredded cabbage on the other side for a refreshing contrast.
- Adding Tonkatsu Sauce
- Drizzle a spoonful of Tonkatsu sauce over the Katsu Chicken.
- The tangy and slightly sweet sauce complements the dish perfectly.
- Garnishes (Optional)
- If desired, sprinkle chopped green onions over the Katsu Chicken for an extra burst of flavor and color.
Enjoy Your Delicious Creation!
You’ve successfully prepared a delectable Katsu Chicken dish that combines tender meat with a crispy and flavorful coating. The harmony of textures and tastes will surely leave you and your dining partner craving more. Serve your masterpiece with pride and savor every delightful bite!
Feel free to adjust any steps to match your preferences and enjoy the process of creating this culinary delight in your own kitchen.
Equipment Required
Nutrition Information
| Nutrition Information | Per Serving |
|---|---|
| Serving Size | 1 chicken breast |
| Calories | Approximately 350 |
| Total Fat | 15g |
| – Saturated Fat | 2.5g |
| Cholesterol | 160mg |
| Sodium | 600mg |
| Total Carbohydrates | 20g |
| – Dietary Fiber | 1g |
| – Sugars | 1g |
| Protein | 30g |
Please note that these values are approximate and can vary based on specific ingredients and portion sizes. It’s always a good idea to double-check nutrition information using specific brands and products if needed.
Tips
- Temperature Control is Key: Maintain the oil temperature at around 350°F (175°C) to achieve that perfect golden crispiness without overcooking the chicken.
- Avoid Overcrowding: Fry the chicken in batches if needed. Crowding the pan can lead to uneven cooking and affect the crunchiness.
- Resting Time: Allow the breaded chicken to rest for a few minutes after breading and before frying. This helps the coating adhere better and prevents it from falling off during frying.
- Use Fresh Ingredients: Fresh chicken and ingredients contribute to the best flavors and textures in your Katsu Chicken.
- Test Oil Readiness: To check if the oil is hot enough, drop a small breadcrumb into the oil. If it sizzles and floats to the top, the oil is ready for frying.
Pros & Cons
| Pros | Cons |
|---|---|
| ✔️ Crispy exterior, tender meat | ❌ Requires deep frying |
| ✔️ Simple and satisfying | ❌ Can be high in calories |
| ✔️ Versatile for variations | ❌ Potential for oil splatters |
| ✔️ Family-friendly favorite | ❌ May take time to prepare |
| ✔️ Combines different textures | ❌ Limited for those with allergies |
Conclusion
In conclusion, the journey of creating a delicious Katsu Chicken is an exploration of textures, flavors, and culinary fusion that transcends borders. The marriage of tender meat and crispy coating, combined with the tantalizing harmony of seasonings, is a symphony for the senses. From its origins in Japan to its global popularity, Katsu Chicken has earned its place as a beloved comfort dish that satisfies cravings and brings joy to every bite.
Embrace the opportunity to unleash your inner chef and embark on this culinary adventure. Whether you’re a novice cook or a seasoned pro, the step-by-step guide, insightful tips, and creative variations are here to support your success. The satisfaction of creating a Katsu Chicken masterpiece that delights your taste buds and those of your loved ones is a reward in itself.
So, why not step into the kitchen and embark on this journey? Let the aroma of sizzling breaded goodness fill the air as you transform simple ingredients into a culinary delight that’s both crispy and tender. Share the experience with family and friends, and relish the joy that comes from a well-prepared meal made with love.
The journey awaits – let the Katsu Chicken recipe be your passport to a delightful dining experience that’s as rewarding to create as it is to savor.
Facts
- 🌟 Fact 1: Crispy Beginnings 🍗
- Did you know that the origins of Katsu Chicken can be traced back to the 19th century, when Japan opened its culinary doors to the world? This crispy creation is a delightful result of the fusion between traditional Japanese techniques and Western influences, showcasing how global flavors can unite to create something truly mouthwatering.
- 🎉 Fact 2: Cutlet Evolution 🍽️
- The term “Katsu” in Japanese is derived from the English word “cutlet.” Imagine that! Katsu Chicken’s name itself is a linguistic testament to its international journey from crispy beginnings to becoming a beloved comfort dish around the world. It’s like a linguistically delicious global handshake!
- 🌍 Fact 3: Global Katsu Love 🌮
- Katsu Chicken is like a culinary superstar with its passport full of international flavors! From Tokyo to Toronto, this crispy comfort food has made its way to menus across the globe. Whether served in a bento box in Japan or as a gourmet entrée in Paris, Katsu Chicken bridges cultures through its crispy, tender, and universally loved appeal.
- 🧙 Fact 4: Katsu Alchemy 🥢
- Picture this: tender chicken meets a breadcrumb magic trick! The art of breading and frying transforms simple ingredients into a dish with a tantalizing contrast of textures and flavors. The alchemical process turns humble ingredients into crispy gold – it’s like watching a kitchen wizardry show!
- 🌮 Fact 5: Beyond Chicken 🥦
- Who says Katsu is limited to just chicken? Flex your culinary muscles by exploring delightful variations. From Pork Katsu to Veggie Katsu (yes, even for the plant-based foodies!), there’s a world of crispy possibilities waiting for you to discover. It’s like giving Katsu Chicken a makeover, and the results are simply deliciously surprising!
FAQ’s
Can I use bone-in chicken for this recipe?
While boneless chicken breasts work best for even cooking and breading, you can use bone-in chicken with slight adjustments in cooking time to ensure the meat is thoroughly cooked.
Is there a healthier cooking method instead of frying?
Yes, you can achieve similar results by oven-baking the breaded chicken at 400°F (200°C) for about 20-25 minutes, flipping halfway. It will be less crispy but still delicious.
Can I freeze the breaded chicken for later use?
Yes, you can freeze the breaded chicken on a baking sheet until solid, then transfer to a freezer-safe bag. When ready to cook, fry directly from frozen or bake at 375°F (190°C) until heated through.
How do I make the Tonkatsu sauce at home?
Mix 2 tablespoons of ketchup, 1 tablespoon of Worcestershire sauce, 1 tablespoon of soy sauce, 1 teaspoon of sugar, and a dash of Dijon mustard. Adjust ingredients to taste.
Can I use an air fryer to make Katsu Chicken?
Yes, preheat the air fryer to 375°F (190°C), lightly coat the breaded chicken with cooking spray, and air fry for about 12-15 minutes, flipping halfway.
What’s the best way to reheat leftover Katsu Chicken?
To maintain crispiness, reheat in a preheated oven at 350°F (175°C) for about 10-15 minutes or until warmed through.
Are there gluten-free alternatives for the breading?
Yes, use gluten-free all-purpose flour and gluten-free breadcrumbs to make the recipe gluten-free.
Can I marinate the chicken before breading it?
While marinating isn’t traditional for Katsu, you can add flavor by marinating the chicken in your preferred marinade for up to 4 hours before starting the breading process.
How do I make sure the chicken is cooked through without overcooking the coating?
Use a meat thermometer to check the internal temperature of the chicken. It should reach 165°F (74°C) while ensuring the coating remains crispy.
Can I use an alternative sauce instead of Tonkatsu sauce?
Absolutely! Try drizzling Katsu Chicken with Bulldog sauce, a tangy BBQ sauce, or even a homemade sweet and sour sauce for a unique flavor twist.