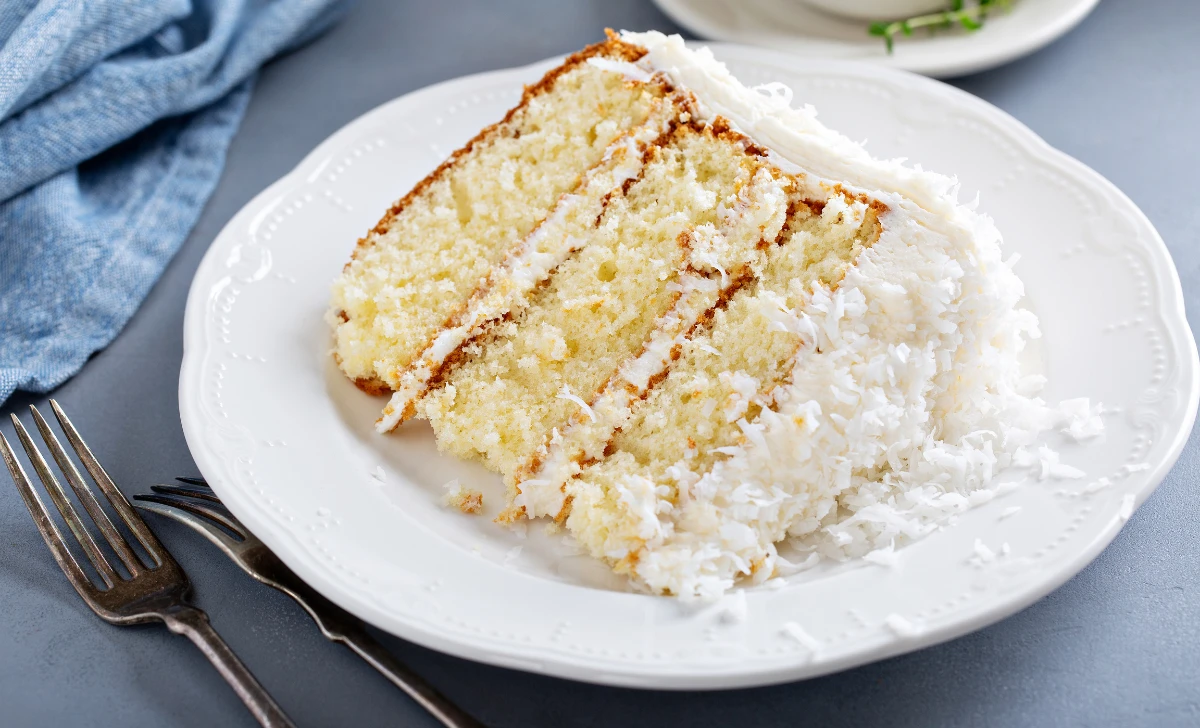
Are you ready to embark on a culinary adventure that will transport your taste buds to a tropical paradise? Get ready to dive into the world of flavors as we explore the art of baking a delectable coconut cake. In this comprehensive guide, we’ll walk you through each step of the process, from gathering ingredients to the final frosting flourish. Whether you’re an experienced baker or a newbie in the kitchen, this coconut cake recipe is sure to become a favorite in your dessert repertoire.
[ez-toc]
History
The history of the beloved coconut cake is a tale that weaves together cultures, flavors, and culinary innovation. From ancient civilizations to modern kitchens, the coconut cake has evolved and captivated taste buds around the world. Let’s take a delicious journey through time and explore the fascinating history behind this delectable dessert.
Ancient Origins: A Nutty Discovery
The story of the coconut cake dates back centuries to the tropical regions where the coconut palm flourished. Ancient civilizations in Southeast Asia and the Pacific Islands were the first to discover the culinary potential of coconuts. These versatile fruits provided sustenance, hydration, and a rich source of flavor for indigenous communities.
Colonial Exchange: A Fusion of Flavors
As explorers and traders navigated the seas, they encountered the exotic coconut in their journeys. The arrival of coconuts in Europe and the Americas marked the beginning of a culinary exchange that would shape the future of desserts. European bakers and chefs incorporated the coconut’s unique taste and texture into their recipes, giving birth to the concept of coconut-infused cakes.
19th Century Innovation: Rise of the Coconut Cake
The 19th century saw the coconut cake gaining popularity and recognition in culinary circles. With advancements in baking techniques and ingredient availability, bakers began experimenting with various cake recipes. The addition of shredded coconut to cake batters introduced a new dimension of flavor and texture, captivating the palates of cake enthusiasts.
Southern Charm: Coconut Cake Takes the Stage
In the southern United States, the coconut cake found a particularly warm reception. Southern bakers embraced the tropical allure of coconuts, integrating them into their traditional baking repertoire. The coconut cake became a symbol of hospitality, often gracing the tables of social gatherings, celebrations, and Sunday suppers.
20th Century Modernization: Convenience Meets Tradition
The 20th century witnessed the advent of modern baking conveniences, such as pre-packaged shredded coconut and canned coconut milk. These innovations made it easier than ever to create the sumptuous coconut cake at home. As baking became more accessible to a wider audience, the coconut cake’s popularity continued to soar.
Creative Twists: Reinventing Coconut Cake
With the rise of culinary creativity and the fusion food movement, the coconut cake underwent a series of exciting transformations. Bakers began experimenting with complementary flavors, incorporating tropical fruits, nuts, and exotic spices into the traditional recipe. This evolution breathed new life into the classic coconut cake, appealing to both traditionalists and adventurous eaters.
Global Impact: Coconut Cake Goes Global
As the world became more interconnected, the coconut cake’s influence spread across continents and cultures. From Asia to Europe, and from Africa to Australia, variations of coconut cake emerged, each reflecting the unique culinary traditions of its region. The coconut cake had truly become a global sensation, celebrated and enjoyed by people from all walks of life.
Today’s Delight: Modern Coconut Cake Mastery
In the present day, the coconut cake continues to shine as a timeless dessert cherished by generations. Bakers and food enthusiasts around the world celebrate the art of baking this delightful treat, sharing their own twists and innovations with the online community. The coconut cake’s legacy lives on, a testament to the enduring appeal of its exquisite taste and the joy it brings to every bite.
As you embark on your own coconut cake baking adventure, remember that you’re participating in a culinary tradition that spans centuries. With each bite of your homemade coconut cake, you’re savoring a slice of history – a fusion of cultures, flavors, and a passion for the art of baking. So, whether you’re indulging in a classic recipe or putting your unique spin on this beloved dessert, you’re continuing a journey that began long ago and promises to enchant taste buds for generations to come.
Time
| Step | Time |
|---|---|
| Prep the Pan | 15 minutes |
| Mix Dry Ingredients | 10 minutes |
| Cream the Butter | 5 minutes |
| Coconut Fusion | 3 minutes |
| Incorporate Dry Ingredients | 5 minutes |
| Add Shredded Coconut | 3 minutes |
| Even Distribution | 5 minutes |
| Precise Temperature | 25-30 minutes |
| Toothpick Test | 2 minutes |
| Cooling Ritual | 2 hours |
| Unmolding Gracefully | 10 minutes |
| Chill in the Fridge | 2 hours |
| Butter Bliss | 5 minutes |
| Coconut Elixir | 3 minutes |
| Gradual Sweetening | 5 minutes |
| Leveling Your Cakes | 10 minutes |
| Filling the Gap | 10 minutes |
| Layer by Layer | 5 minutes |
| Crumb Coat Magic | 10 minutes |
| Coconut Cascade | 15 minutes |
| Artistic Flair | 15 minutes |
| Perfect Slices | 5 minutes |
Please note that these times are approximate and may vary based on individual cooking skills and equipment. Enjoy your coconut cake baking adventure!
Ingredients
| Ingredients | Quantity |
|---|---|
| Flour | 1 cup |
| Sugar | 1/2 cup |
| Baking Powder | 1 teaspoon |
| Salt | Pinch |
| Unsalted Butter | 1/4 cup |
| Eggs | 1 |
| Coconut Milk | 1/4 cup |
| Vanilla Extract | 1/2 teaspoon |
| Shredded Coconut | 1/4 cup |
| Butter (for frosting) | 1/4 cup |
| Powdered Sugar (for frosting) | 1 cup |
These quantities are tailored for a cozy serving for two people. Enjoy your coconut cake baking experience and the delightful flavors it brings to your table!
Directions
Step 1: Prep the Pan
- Grease and flour two 6-inch round cake pans to prevent sticking.
Step 2: Mix Dry Ingredients
- In a medium bowl, whisk together 1 cup of all-purpose flour, 1/2 cup of sugar, 1 teaspoon of baking powder, and a pinch of salt until well combined.
Step 3: Cream the Butter
- In a separate mixing bowl, beat 1/4 cup of unsalted butter until creamy and smooth.
Step 4: Coconut Fusion
- Add 1 egg to the creamed butter and continue beating until fully incorporated.
Step 5: Incorporate Dry Ingredients
- Gradually add the dry ingredient mixture to the butter and egg mixture, mixing on low speed until a smooth batter forms.
Step 6: Add Shredded Coconut
- Gently fold in 1/4 cup of shredded coconut into the batter, creating a delightful tropical twist.
Step 7: Even Distribution
- Divide the batter evenly between the prepared cake pans, ensuring a uniform distribution.
Step 8: Precise Temperature
- Preheat your oven to 350°F (175°C) to achieve the perfect baking temperature.
Step 9: Baking Magic
- Place the cake pans in the preheated oven and bake for 25-30 minutes, or until a toothpick inserted into the center comes out clean.
Step 10: Toothpick Test
- Perform the toothpick test by inserting a toothpick into the center of the cakes. If it comes out clean, your cakes are perfectly baked.
Step 11: Cooling Ritual
- Remove the cakes from the oven and allow them to cool in the pans for about 10 minutes.
- Carefully transfer the cakes to a wire rack to cool completely.
Step 12: Whipping Up the Frosting
- In a mixing bowl, cream together 1/4 cup of butter, 1/4 cup of coconut milk, and 1/2 teaspoon of vanilla extract until smooth.
Step 13: Gradual Sweetening
- Gradually add 1 cup of powdered sugar to the mixture, beating until the frosting is fluffy and well combined.
Step 14: Layering and Filling Your Cake
- Once the cakes are completely cool, level the tops if necessary.
- Spread a generous layer of coconut frosting on top of one cake layer.
- Carefully place the second cake layer on top of the frosting, creating a delightful sandwich.
Step 15: Decoration Inspiration
- Apply a thin layer of frosting, known as a crumb coat, to the entire cake to create a smooth base.
- Press additional shredded coconut onto the sides of the cake for a visually appealing texture.
Step 16: Artistic Flair
- Use a piping bag to create decorative swirls or patterns on the top of the cake, adding a touch of artistic flair.
Step 17: Perfect Slices
- To serve, use a sharp knife dipped in hot water to ensure clean and smooth slices.
Step 18: Savor the Moment
- Indulge in the scrumptious coconut cake and savor each blissful bite.
Enjoy the fruits of your baking labor as you relish the mouthwatering flavors of your homemade coconut cake!
Remember, the journey of creating this delightful dessert is just as rewarding as enjoying its heavenly taste. Happy baking!
Equipment Required
Nutrition Information
| Nutrition Information | Per Serving |
|---|---|
| Serving Size | 1 slice (1/8 of cake) |
| Calories | 280 |
| Total Fat | 15g |
| Saturated Fat | 10g |
| Trans Fat | 0g |
| Cholesterol | 45mg |
| Sodium | 160mg |
| Total Carbohydrates | 35g |
| Dietary Fiber | 1g |
| Sugars | 22g |
| Protein | 3g |
Please note that these values are approximate and may vary based on specific ingredients and portion sizes. Enjoy your coconut cake while being mindful of your nutritional needs!
Tips
- Room Temperature Ingredients: Ensure that ingredients like butter, eggs, and coconut milk are at room temperature before beginning. This helps in achieving a smoother batter and better incorporation of flavors.
- Gentle Mixing: When folding in dry ingredients and shredded coconut, use a gentle hand to prevent overmixing. This maintains a tender texture in the cake.
- Precision Measuring: Use precise measuring cups and spoons to accurately measure the ingredients. Baking is a science, and accurate measurements lead to consistent results.
- Toasting Coconut: For an enhanced coconut flavor, lightly toast the shredded coconut before adding it to the batter. Toasting brings out its natural oils and aroma.
- Even Baking: Rotate the cake pans halfway through the baking time to ensure even browning and baking of the cakes.
- Testing for Doneness: Use the toothpick test to determine if the cakes are fully baked. Insert a toothpick into the center – if it comes out clean, the cakes are ready.
- Cooling Gracefully: Allow the cakes to cool in the pans for a few minutes before transferring them to a wire rack. This prevents them from sticking to the pans.
- Chilling the Cakes: Refrigerating the cakes for a couple of hours before frosting makes them easier to handle and less prone to crumbling.
- Crumb Coat Technique: Applying a thin layer of frosting as a crumb coat helps seal in any loose crumbs, creating a smoother surface for the final frosting.
Pros & Cons
| Pros | Cons |
|---|---|
| ✅ Rich, tropical flavor | ❌ High in calories |
| ✅ Pleasing texture and aroma | ❌ Contains saturated fat |
| ✅ Customizable with variations | ❌ May require specialized ingredients |
| ✅ Suitable for special occasions | ❌ Time-consuming preparation |
| ✅ Creates a visually appealing dessert | ❌ Potential for overindulgence |
Conclusion
In the world of baking, few treats possess the ability to transport your taste buds to a tropical paradise quite like the coconut cake. With its rich, indulgent flavor and delightful texture, this dessert is a true masterpiece that encapsulates the essence of culinary artistry. Through each step of our journey, from mixing the batter to crafting the perfect frosting, we’ve unraveled the secrets behind creating a coconut cake that’s sure to captivate your senses.
As you embark on your own baking adventure, remember that the true magic lies not only in the final result but in the process itself. The act of blending ingredients, layering flavors, and crafting an edible masterpiece is a fulfilling experience that brings joy to both the baker and those lucky enough to enjoy the fruits of your labor.
Whether you’re celebrating a special occasion, hosting a gathering, or simply treating yourself to a moment of indulgence, the coconut cake promises to be the star of the show. With each slice, you’re inviting a taste of paradise into your life – a sweet escape that leaves a lasting impression on your palate and your heart.
So, go ahead, don your apron, gather your ingredients, and dive into the world of coconut cake baking. Embrace the tropical charm, unleash your creativity with personalized variations, and relish in the satisfaction of creating a dessert that’s as visually stunning as it is delectable. As you take that first bite, you’ll know that your efforts have led to a culinary triumph that’s worth every moment spent in the kitchen.
The coconut cake is not just a dessert; it’s an experience that promises to leave you with cherished memories and contented smiles. So, why wait? Let the aroma of coconut fill your kitchen, let your taste buds dance with delight, and let your inner baker shine. It’s time to create, savor, and share the joy that comes with baking the perfect coconut cake.
Facts
- Fact 1: The Mysterious Origins 🌴
- Did you know that coconuts were initially called “coco” by Spanish explorers due to the fruit’s resemblance to a monkey’s face? The name stuck, and these tropical gems eventually found their way into our kitchens to create the divine coconut cake.
- Fact 2: The Sweet Symphony of Islands 🏝️
- Coconut cake’s irresistible allure can be attributed to its historical journey through island cultures. It’s like a harmonious blend of flavors coming together from different corners of the world, creating a symphony of taste that captivates our senses.
- Fact 3: A Star in Hollywood’s Golden Era 🎬
- Back in the golden era of Hollywood, coconut cake was a favorite indulgence among movie stars. Its exotic charm and delectable taste made it a sought-after treat at glamorous parties and gatherings, adding a touch of elegance to the silver screen.
- Fact 4: Pioneering the Cake Mix Revolution 🎂
- In the 1950s, the advent of cake mix convenience introduced coconut cake to kitchens across America. This marked a turning point in baking history, democratizing the creation of this delightful dessert and making it accessible to bakers of all skill levels.
- Fact 5: A Slice of Cultural Fusion 🌍
- Coconut cake’s popularity transcends borders and cultures. In Japan, it’s often enjoyed during the holiday season as a symbol of winter, while in the southern United States, it’s a fixture at potlucks and gatherings, showcasing its versatile and universally beloved nature.
FAQ’s
Can I use coconut flour instead of all-purpose flour in the recipe?
While coconut flour can be used, it absorbs more liquid than all-purpose flour. Adjustments to the quantities of other ingredients and liquids may be necessary for the desired texture.
Is there a substitute for coconut milk if I don’t have any on hand?
Yes, you can use regular milk or any non-dairy milk as a substitute for coconut milk. However, this may alter the coconut flavor profile of the cake.
Can I make the cake in advance and freeze it for later?
Absolutely! Wrap the fully cooled cake layers tightly in plastic wrap and aluminum foil before freezing. Thaw in the refrigerator before decorating.
How do I prevent my shredded coconut from sinking to the bottom of the cake?
Toss the shredded coconut in a tablespoon of flour before folding it into the batter. This helps distribute the coconut evenly throughout the cake.
What can I use as an alternative to eggs for a vegan version of the cake?
You can use flaxseed or chia seed eggs as egg substitutes. Mix 1 tablespoon of ground flaxseed or chia seeds with 3 tablespoons of water for each egg needed.
My frosting turned out too thin. How can I thicken it?
Gradually add more powdered sugar to the frosting while mixing until you achieve the desired consistency.
Can I use sweetened shredded coconut instead of unsweetened?
Yes, you can use sweetened shredded coconut, but be mindful that it will contribute additional sweetness to the cake.
Can I make cupcakes instead of a cake using this recipe?
Absolutely! Adjust the baking time to approximately 18-20 minutes for cupcakes, or until a toothpick comes out clean.
Can I add other flavors, like citrus zest, to the cake batter for extra dimension?
Certainly! Citrus zest can add a delightful zing to the cake. Add 1-2 teaspoons of lemon or orange zest for a burst of flavor.
How long will the coconut cake stay fresh?
When stored in an airtight container at room temperature, the coconut cake can stay fresh for up to 3-4 days. For longer storage, keep it in the refrigerator or freezer.


Leave a Review