Are you ready to embark on a culinary journey that will transport your taste buds straight to the charming streets of Lisbon? Look no further, because we’re about to dive into the enchanting world of Pastel de Nata, the beloved Portuguese custard tart that’s taking the dessert scene by storm. Get your aprons on and your sweet tooth ready, as we uncover the secrets behind crafting these delectable treats from scratch.
[ez-toc]
History
In the heart of Portugal, amidst the cobblestone streets and bustling cafes of Lisbon, lies a culinary gem that has captivated the world with its delicate layers and creamy custard filling – the Pastel de Nata. This beloved pastry, also known as a Portuguese custard tart, has a history as rich and enchanting as its flavor. Let’s step back in time and uncover the intriguing story behind this iconic treat.
A Taste of Belém: The Birthplace of Pastel de Nata
The journey of the Pastel de Nata begins in the early 19th century, in the historic district of Belém, just west of Lisbon. At the renowned bakery “Pastéis de Belém,” hidden within the shadow of the Jerónimos Monastery, the first chapter of this delectable tale unfolds. It was here that the secret recipe for these custard tarts was born, guarded with utmost care and passed down through generations.
A Secret Unveiled: The Recipe’s Evolution
As the 20th century dawned, Portugal underwent significant changes, and the recipe for Pastel de Nata began to venture beyond the confines of the bakery’s walls. Other cafes and bakeries in Lisbon adopted their version of the delicacy, adding subtle twists to the classic recipe. While the original Pastéis de Belém continued to draw crowds with their timeless recipe, imitations flourished across the city, solidifying the pastry’s reputation as a symbol of Portuguese culinary heritage.
Global Delights: Pastel de Nata Goes International
In the latter half of the 20th century, as the world began to shrink through globalization, so did the fame of the Pastel de Nata. Portuguese communities around the globe, from Macau to Brazil, carried their love for these custard tarts with them, introducing the delicacy to new cultures and palates. The combination of crispy, flaky crust and silky custard filling proved to be universally irresistible.
A Sweet Revolution: Pastel de Nata’s Modern Renaissance
The 21st century ushered in a renaissance for the Pastel de Nata. No longer confined to Portugal’s borders, these custard tarts became a symbol of the country’s warmth and hospitality. Food enthusiasts, bloggers, and travelers alike marveled at their complexity and simplicity, their sweet and savory balance, and their ability to evoke a sense of wanderlust with every bite.
Culinary Creativity: Pastel de Nata’s Variations
As the popularity of the Pastel de Nata spread, so did its versatility. Creative minds began experimenting with flavors and presentations, leading to exciting innovations. From chocolate-infused custard to savory versions filled with cheese and herbs, the Pastel de Nata embraced a spectrum of tastes, captivating both traditionalists and adventurers.
Preserving the Legacy: Pastel de Nata’s Cultural Significance
Today, the Pastel de Nata stands as a proud emblem of Portuguese culture. It embodies the country’s rich history, its maritime heritage, and its commitment to crafting flavors that resonate across generations. While modern adaptations continue to emerge, the essence of the original Pastel de Nata, with its delicate layers and creamy custard, remains a reminder of the past and a bridge to the future.
Time
| Step | Time |
|---|---|
| Preparing Ingredients | 20 minutes |
| Preparing Flaky Pastry | 30 minutes |
| Chilling Pastry Dough | 1 hour |
| Mixing Custard Filling | 15 minutes |
| Assembling Pastel de Nata | 15 minutes |
| Baking the Pastries | 20 minutes |
| Cooling and Dusting | 10 minutes |
| Brûléeing the Sugar Topping | 5 minutes |
| Final Presentation and Serving | 5 minutes |
Keep in mind that these times are approximate and can vary based on your experience and kitchen setup. Enjoy your time creating these delicious pastries!
Ingredients
| Ingredients | Quantity |
|---|---|
| Unsalted Butter | 60g |
| Puff Pastry Sheets | 2 sheets |
| Milk | 1/2 cup |
| Heavy Cream | 1/2 cup |
| Egg Yolks | 2 |
| Sugar | 1/3 cup |
| Vanilla Extract | 1 teaspoon |
| Ground Cinnamon | 1/4 teaspoon |
| Salt | Pinch |
| All-Purpose Flour | 1 tablespoon |
Please note that this quantity is tailored for a 2-person serving. Adjust accordingly if you’re preparing more servings or have larger appetites. Enjoy your baking adventure!
Directions
Step 1: Preparing Ingredients
Gather all your ingredients and equipment before you start. This will make the process smoother and more enjoyable.
Step 2: Preparing Flaky Pastry
- Thaw the Puff Pastry: If using frozen puff pastry, follow the package instructions to thaw it properly.
- Butter and Fold: Melt a small amount of unsalted butter and brush it over the pastry sheet. Fold the sheet into thirds, then roll it out again gently. Repeat this process twice to create flaky layers.
Step 3: Chilling Pastry Dough
- Wrap and Refrigerate: Wrap the prepared pastry in plastic wrap and refrigerate it for about an hour. This helps the layers set and makes it easier to work with.
Step 4: Mixing Custard Filling
- Whisk Egg Yolks: In a bowl, whisk the egg yolks until they’re smooth and creamy.
- Combine Cream and Milk: In a saucepan, heat the heavy cream and milk over medium heat until warm. Do not boil.
- Add Sugar and Flavorings: Stir in sugar, vanilla extract, ground cinnamon, and a pinch of salt. Mix until the sugar is dissolved.
Step 5: Assembling Pastel de Nata
- Preheat Oven: Preheat your oven to 400°F (200°C).
- Roll Out Pastry: Roll out the chilled pastry to a thin sheet and cut out circles that fit your muffin tin.
- Line Muffin Tin: Gently press the pastry circles into the muffin tin, forming small pastry cups.
Step 6: Baking the Pastries
- Fill with Custard: Pour the prepared custard filling into the pastry cups, filling them about 2/3 full.
- Bake: Place the muffin tin in the preheated oven and bake for about 15-20 minutes or until the custard is set and the pastry is golden brown.
Step 7: Cooling and Dusting
- Cooling: Once baked, allow the Pastel de Nata to cool in the muffin tin for a few minutes.
- Dusting: Carefully remove the tarts from the tin and place them on a wire rack to cool completely. Dust the tops with a touch of ground cinnamon.
Step 8: Brûléeing the Sugar Topping
- Sprinkle Sugar: Sprinkle a thin layer of sugar evenly over the tops of the cooled custard tarts.
- Caramelization: Use a kitchen torch to gently caramelize the sugar until it forms a crisp and golden top.
Step 9: Final Presentation and Serving
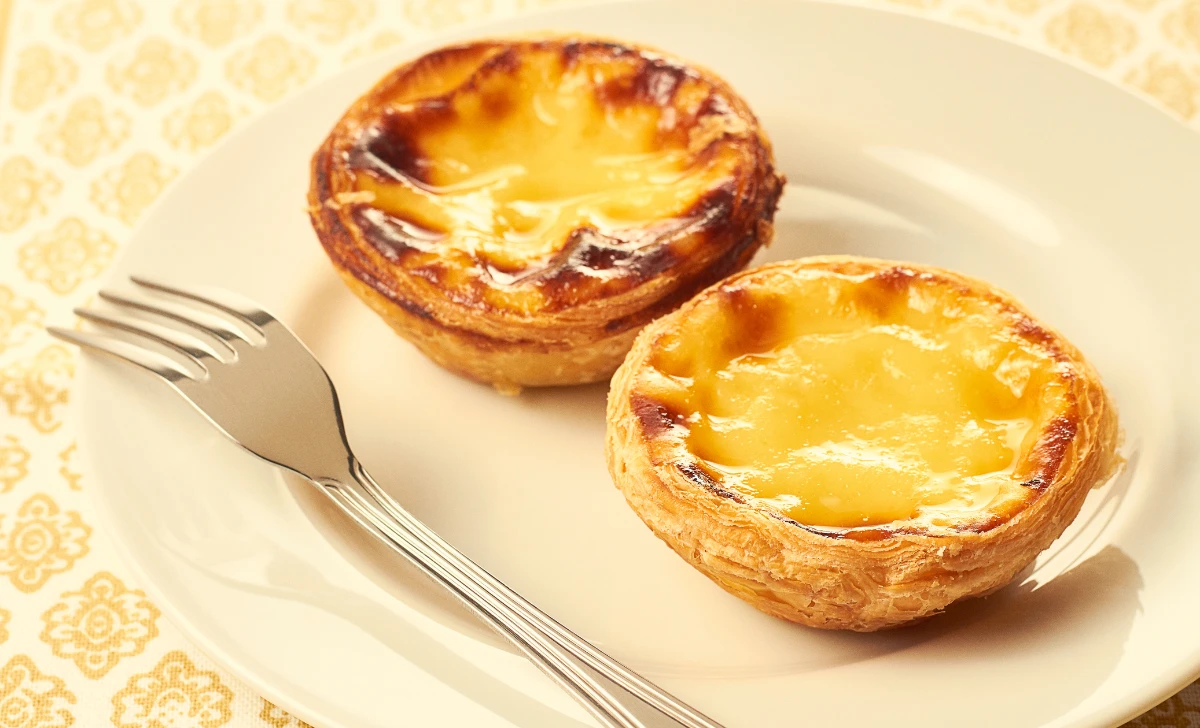
- Serve: Your Pastel de Nata are ready to be enjoyed! Serve them warm or at room temperature, and pair with your favorite beverage for a true Portuguese experience.
- Sprinkle and Savor: If desired, give your tarts an extra sprinkle of ground cinnamon before serving.
Equipment Required
Nutrition Information
| Nutrition Information | Per Serving |
|---|---|
| Serving Size | 1 tart (approx. 90g) |
| Calories | 245 |
| Total Fat | 15g |
| – Saturated Fat | 7g |
| Cholesterol | 92mg |
| Sodium | 95mg |
| Total Carbohydrates | 24g |
| – Dietary Fiber | 1g |
| – Sugars | 10g |
| Protein | 4g |
Please note that these values are approximate and can vary based on specific ingredients and portion sizes. Enjoy your Pastel de Nata while keeping these nutritional values in mind!
Tips
- Chill the Pastry: Ensuring the pastry is well-chilled before rolling and cutting helps maintain its flakiness.
- Keep Ingredients Cold: When making the custard, avoid overheating the cream and milk mixture. Warm it gently to prevent curdling.
- Whisk Vigorously: Whisk the egg yolks thoroughly to ensure a smooth custard texture without any lumps.
- Avoid Overfilling: Don’t overfill the pastry cups with custard, as they might spill over during baking. Aim for about 2/3 full.
- Mind the Oven: Keep a close eye on the tarts while baking, as oven temperatures can vary. Remove them once the custard is set and the tops are golden.
- Torching Safely: When brûléeing the sugar topping, hold the torch about 3-4 inches away from the surface and move it continuously to prevent burning.
- Practice Patience: Allow the tarts to cool slightly before removing them from the muffin tin to avoid breaking the delicate pastry.
Pros & Cons
| Pros | Cons |
|---|---|
| ✔️ Authentic Portuguese delight | ❌ Moderately high in calories |
| ✔️ Rich and creamy custard filling | ❌ Requires some pastry-making skill |
| ✔️ Flaky, buttery pastry layers | ❌ Time-consuming preparation |
| ✔️ Customizable with various flavors | ❌ Contains saturated fats |
| ✔️ Impressive presentation | ❌ Potential for uneven caramelization |
Conclusion
In conclusion, the enchanting world of Pastel de Nata invites you to embark on a culinary adventure that promises to delight your senses and transport you to the vibrant streets of Portugal. With its flaky, buttery pastry hugging a velvety custard filling, each bite is a celebration of tradition, innovation, and the art of creating something truly magical in your kitchen.
As you follow the simple yet rewarding steps outlined in this recipe, you’ll uncover the secrets behind crafting these delectable tarts from scratch. From preparing the perfect pastry layers to infusing the custard with aromatic flavors, every stage of the process is an opportunity to immerse yourself in the joy of baking. And remember, even if a few buttery layers don’t come out as pristine as you hoped, each imperfection adds to the charm of your homemade creations.
Whether you’re a seasoned baker or just starting your culinary journey, the Pastel de Nata recipe welcomes you with open arms. Its versatility allows for a wide range of flavors and presentations, encouraging you to unleash your creativity and put your own unique spin on this beloved treat.
So, why wait? Don your apron, gather your ingredients, and dive into the world of Pastel de Nata. Embrace the joy of baking, the thrill of experimentation, and the satisfaction of creating a dessert that embodies both tradition and innovation. With every bite, you’ll savor the essence of Portugal and experience the magic of crafting a little piece of Lisbon in your own kitchen. Your taste buds are in for a delightful journey – one that’s best shared with friends, family, and a sense of culinary curiosity. Happy baking! 🥐🇵🇹🍰
Facts
- 🌍 Fact 1: A Pastry Born from a Monk’s Ingenuity 🧙♂️
- Legend has it that the original Pastel de Nata recipe was created by the monks of the Jerónimos Monastery in Belém, Portugal. To sustain their order, they used egg whites to starch their clothes, leaving a surplus of yolks. These yolks were then ingeniously transformed into the creamy custard filling we know and love today.
- 🔥 Fact 2: The Fiery Brûlée Finish 🍮
- The iconic caramelized sugar topping of Pastel de Nata is not only for flavor but also a practical reason. Back in the day, it helped mask any imperfections that might have appeared on the custard’s surface during baking. Today, it’s a delightful contrast to the silky custard beneath.
- 🇧🇷 Fact 3: A Global Love Affair 🌎
- Portugal might be the birthplace of Pastel de Nata, but its popularity knows no bounds. In Brazil, these treats are known as “Pastel de Belém” and have become a beloved street food. Their crispy flakiness and creamy centers have captured the hearts of people worldwide, from Lisbon to São Paulo.
- 🧁 Fact 4: The Portuguese Custard Invasion 🥇
- In 2011, the Pastel de Nata’s delectable charm led it to be listed as one of the “50 Best Things to Eat in the World” by “The Guardian.” Sharing the spotlight with global favorites like sushi and gelato, this Portuguese delight proved that simplicity can indeed be extraordinary.
- 🎭 Fact 5: A Theatrical Influence 🎬
- Believe it or not, the Pastel de Nata’s delicate layers and creamy center have a connection to theater. It is said that the pastry’s creation was influenced by the Jesuit theater of the 18th century, which used egg yolks to starch costumes. This intriguing link adds a touch of drama to each bite!
FAQ’s
Can I use pre-made puff pastry for this recipe?
Absolutely! Using pre-made puff pastry is a convenient option. Just make sure it’s of good quality to achieve the desired flakiness.
Can I make the custard filling ahead of time?
While it’s best to prepare the custard filling just before baking, you can make it a few hours in advance and refrigerate it. Make sure to whisk it well before using.
Can I freeze unbaked Pastel de Nata for later?
Yes, you can! Assemble the Pastéis and freeze them on a baking sheet. Once frozen, transfer to a freezer-safe container. When ready to bake, add a few minutes to the baking time.
What’s the secret to getting that perfect custard texture?
The key to a perfect custard texture lies in whisking the egg yolks thoroughly and ensuring the cream mixture is warm, not boiling, when combined.
Can I make Pastel de Nata gluten-free?
Certainly! Look for gluten-free puff pastry and use a gluten-free flour blend for dusting your work surface and rolling pin.
Is it necessary to torch the sugar topping?
Torching the sugar topping is traditional, but if you prefer a different texture, you can skip this step. The tarts will still be delicious without the caramelized top.
Can I substitute the heavy cream with a lighter alternative?
While heavy cream contributes to the richness of the custard, you can try substituting with half-and-half or a combination of milk and cream for a lighter version.
How can I prevent the pastry from getting soggy?
To prevent a soggy bottom, ensure your pastry is well-chilled before baking, and avoid overfilling the cups with custard.
Can I make mini versions of Pastel de Nata?
Absolutely! Use mini muffin tins and adjust the baking time accordingly to create adorable bite-sized versions.
Can I reheat leftover Pastel de Nata?
Yes, you can! Reheat them in a preheated oven at 350°F (175°C) for a few minutes until warm. This will help retain their flakiness and custard texture.