Have you ever stood in the grocery store, looking at the small, pricey tubs of dairy-free yogurt? Have you wished you could make it yourself? You are not alone! For the longest time, I thought making yogurt at home was a complicated science experiment. But I want to share a little secret: it’s really easy. The result is much better than anything you can buy. This recipe will give you the creamiest, dreamiest, and most delicious dairy free yogurt you’ve ever had.
“For me, perfecting this recipe was a game-changer. It’s not just about avoiding dairy; it’s about creating pure, healthy dairy free yogurt right in your own kitchen. It puts you back in control of your food.”
Sophia Martinez
My Journey to Perfect Non-Dairy Yogurt
My adventure into making homemade yogurt started when my little one developed a dairy sensitivity. The store-bought options were not only pricey but often full of sweeteners and ingredients I couldn’t pronounce. I was determined to create the perfect dairy free yogurt recipe that was simple and wholesome for my family.
My first few attempts were… well, let’s call them “learning experiences.” Some were too runny, others separated, and one batch was just plain weird. But I didn’t give up! After many tests, I found the best mix of ingredients. I also found the easiest way to get that thick, spoonable texture every time. This recipe comes from a lot of trial and error. I’m excited to share it so you can avoid mistakes and enjoy tasty success!
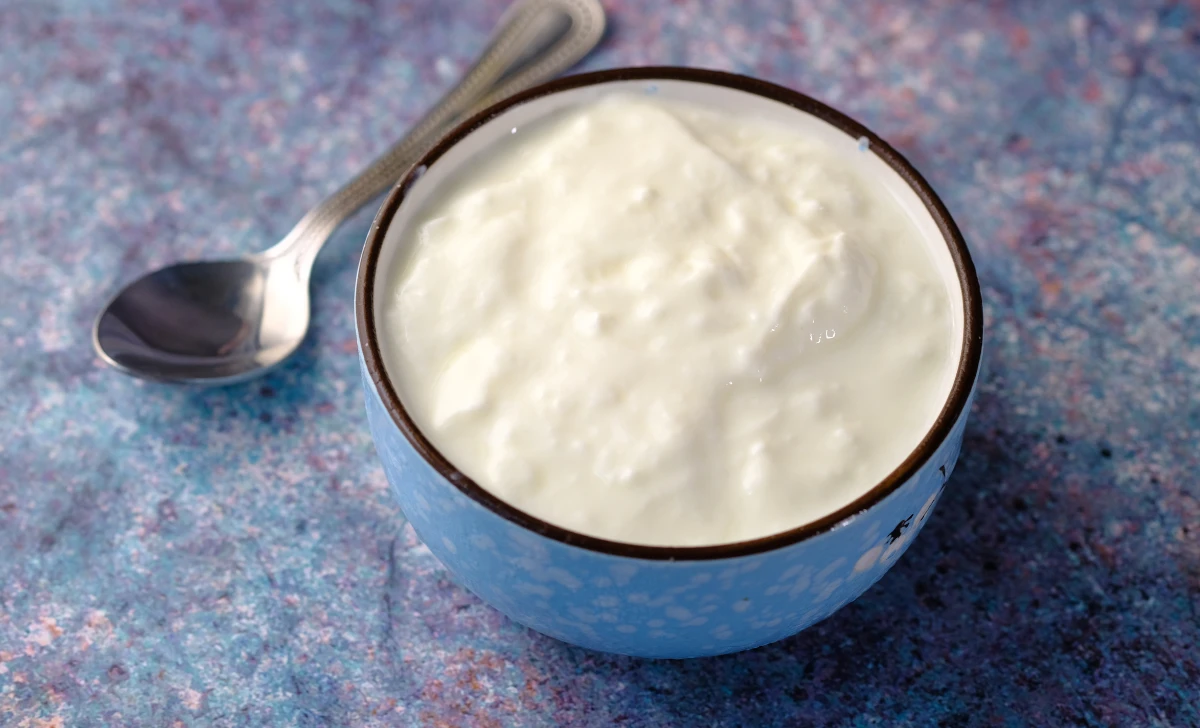
Creamy Homemade Dairy Free Yogurt
Equipment
- 1 Medium Saucepan
- 1 Whisk
- 1 Glass Jar with Lid (24 oz)
Ingredients
- 2 cans (13.5 oz each) Full-Fat Coconut Milk
- 1 tsp Agar-Agar Powder
- 1 tbsp Maple Syrup (optional)
- 2 capsules Dairy-Free Probiotics (or 3 tbsp existing dairy-free yogurt)
Instructions
- Chill coconut milk cans overnight. Scoop only the solid cream into a saucepan.
- Whisk in agar-agar powder until smooth.
- Heat over medium, whisking constantly, until it simmers for 1-2 minutes.
- Remove from heat and cool to 110°F (43°C) (warm to the touch).
- Whisk in the contents of the probiotic capsules.
- Pour into a clean glass jar, cover, and incubate in a warm place (like an oven with the light on) for 12-24 hours.
- Transfer the jar to the refrigerator and chill for at least 6 hours, or overnight, to set.
- Stir gently and serve.
Video
Notes
My Top 7 Tips for a Dairy Free Yogurt
- Sterilize Your Jar: Before you begin, it’s important to sterilize your equipment. This helps stop bad bacteria from interfering with your good probiotic cultures. Running your jars and utensils in a hot dishwasher is a good choice. For a step-by-step guide, visit HowToResults.com to learn how to sterilize jars for preserving.
- Use Full-Fat ONLY: Light coconut milk or carton milks lack enough fat. This means they can’t create the thick texture we want in our dairy-free yogurt.
- Don’t Skip the Cooling Step: Patience is key. If you add your probiotics when the milk is too hot, you’ll have a tasty coconut cream, but it won’t be yogurt.
- No Peeking! While your dairy free yogurt is incubating, resist the urge to stir it or jostle the jar. The cultures need a peaceful environment to work.
- Longer Incubation = Tangier Yogurt: If you enjoy a tarter taste, let your dairy-free yogurt sit for 24 hours. For a milder flavor, 12 hours is great.
- Chill Completely: The final chill is not optional! This is when the yogurt truly sets and thickens to its final consistency.
- Save Some for Next Time: After you make a good batch, save 3 tablespoons. You can use this as the starter for your next batch of dairy free yogurt.
Dairy Free Yogurt Variations to Try
Once you’ve mastered the basic recipe, you can get creative with your dairy free yogurt!
- Fruit-on-the-Bottom Yogurt: First, add a layer of your favorite fruit jam to the bottom of the jar. Then, pour in the yogurt mixture.
- Vanilla Bean Yogurt: Scrape the seeds from half a vanilla bean into the coconut milk when you heat it.
- Chocolate Yogurt: Whisk in 1-2 tablespoons of unsweetened cocoa powder with the agar-agar.
- Almond or Cashew Yogurt: You can try this recipe with other plant milks, but you may need more thickener.
- Thick Greek-Style Yogurt: To make extra-thick Greek-style dairy-free yogurt, strain it through a cheesecloth-lined strainer. Let it sit in the fridge for 2-4 hours.
How to Store Your Dairy Free Yogurt
Proper storage is key to keeping your dairy free yogurt fresh and delicious.
- To Store: Keep the yogurt in an airtight container (like the glass jar you made it in) in the refrigerator.
- How Long It Lasts: Your homemade dairy free yogurt will stay fresh for up to 7-10 days. You might notice a little liquid separation over time—that’s normal! Just give it a gentle stir before serving.
Troubleshooting Common Issues
- Why is my dairy free yogurt runny? This is the most common problem! It’s usually because the milk wasn’t cooled enough before adding the probiotics. It could also be that you didn’t use a thickener or that it wasn’t chilled long enough to fully set.
- Why did my yogurt separate? A little separation is normal. However, if it is very separated, it may have incubated too long or at too high a temperature.
Estimated Nutrition
This is an estimate for 1/2 cup serving, using unsweetened yogurt.
| Calories | 190 kcal |
| Carbohydrates | 5g |
| Protein | 2g |
| Fat | 18g |
| Sugar | 2g |
Conclusion
And there you have it—your own jar of thick, creamy, and wonderfully tangy homemade yogurt, completely dairy-free! Making this dairy-free yogurt at home is easy and very rewarding. It helps you avoid costly, additive-filled store-bought options. You can mix it into your morning granola, blend it in a smoothie, or enjoy it with fresh fruit. You’ll love having this healthy and tasty staple ready to use. I truly hope you love this recipe as much as my family does. If you give it a try, please come back and leave a comment and a star rating below—I can’t wait to hear how it turned out for you!
Looking for more simple and healthy recipes like this one? You can browse all of my recipes here SpoonnSpice.
FAQs
What is dairy-free yogurt made of?
Dairy free yogurt is made from a plant-based milk like coconut, almond, or soy. It’s then cultured with live active bacteria (probiotics), just like regular yogurt, to achieve its classic tangy flavor.
Can I make dairy-free yogurt without a yogurt maker?
Absolutely! This recipe is designed to be made without any special equipment. You can incubate your dairy free yogurt in a turned-off oven with the light on, which creates the perfect warm environment.
Is homemade dairy-free yogurt healthy?
Yes! When you make your own dairy-free yogurt, you can add healthy probiotics for gut health. You also control the sugar and avoid preservatives found in store-bought brands.
What is the best non-dairy milk for making yogurt?
For the creamiest and easiest dairy-free yogurt, use full-fat canned coconut milk. Its high fat content helps it thicken well.
How do you thicken dairy-free yogurt?
The best way to thicken dairy-free yogurt is to use a plant-based thickener. Agar-agar powder works well. It gives a firm texture that is similar to traditional yogurt.
Why is my homemade dairy free yogurt runny?
Runny dairy-free yogurt usually happens for three reasons. First, the probiotic cultures may have been killed by heat. Second, there might not be enough thickener used. Third, the yogurt may not have been chilled long enough to set properly.
How long does it take to make dairy-free yogurt?
The hands-on time is only about 15-20 minutes. The majority of the time is for incubation (12-24 hours) and chilling (at least 6 hours), where the dairy free yogurt cultures and sets.
Can I use a different sweetener?
Yes, you can use agave nectar, coconut sugar, or leave the sweetener out entirely for a plain, tangy dairy free yogurt. Adjust the amount to your personal taste.
What kind of probiotics should I use?
For this recipe, look for a high-quality, dairy-free probiotic capsule with at least 50 billion CFUs. You can also use a few tablespoons of a previous batch as a starter.
My yogurt tastes a little “coconuty.” How can I fix that?
The coconut flavor in your dairy free yogurt will become milder the longer you incubate it. A full 24-hour incubation or a splash of lemon juice after it’s chilled can help balance the flavor.