We need to be honest about lunch. For too long, we have settled for sad, cold sandwiches or boring salads. I remember coming home late one Tuesday, starving, with only a rotisserie chicken and some tortillas in the fridge. I wanted something hot, crispy, and comforting.
That is how these cheesy garlic chicken wraps were born.
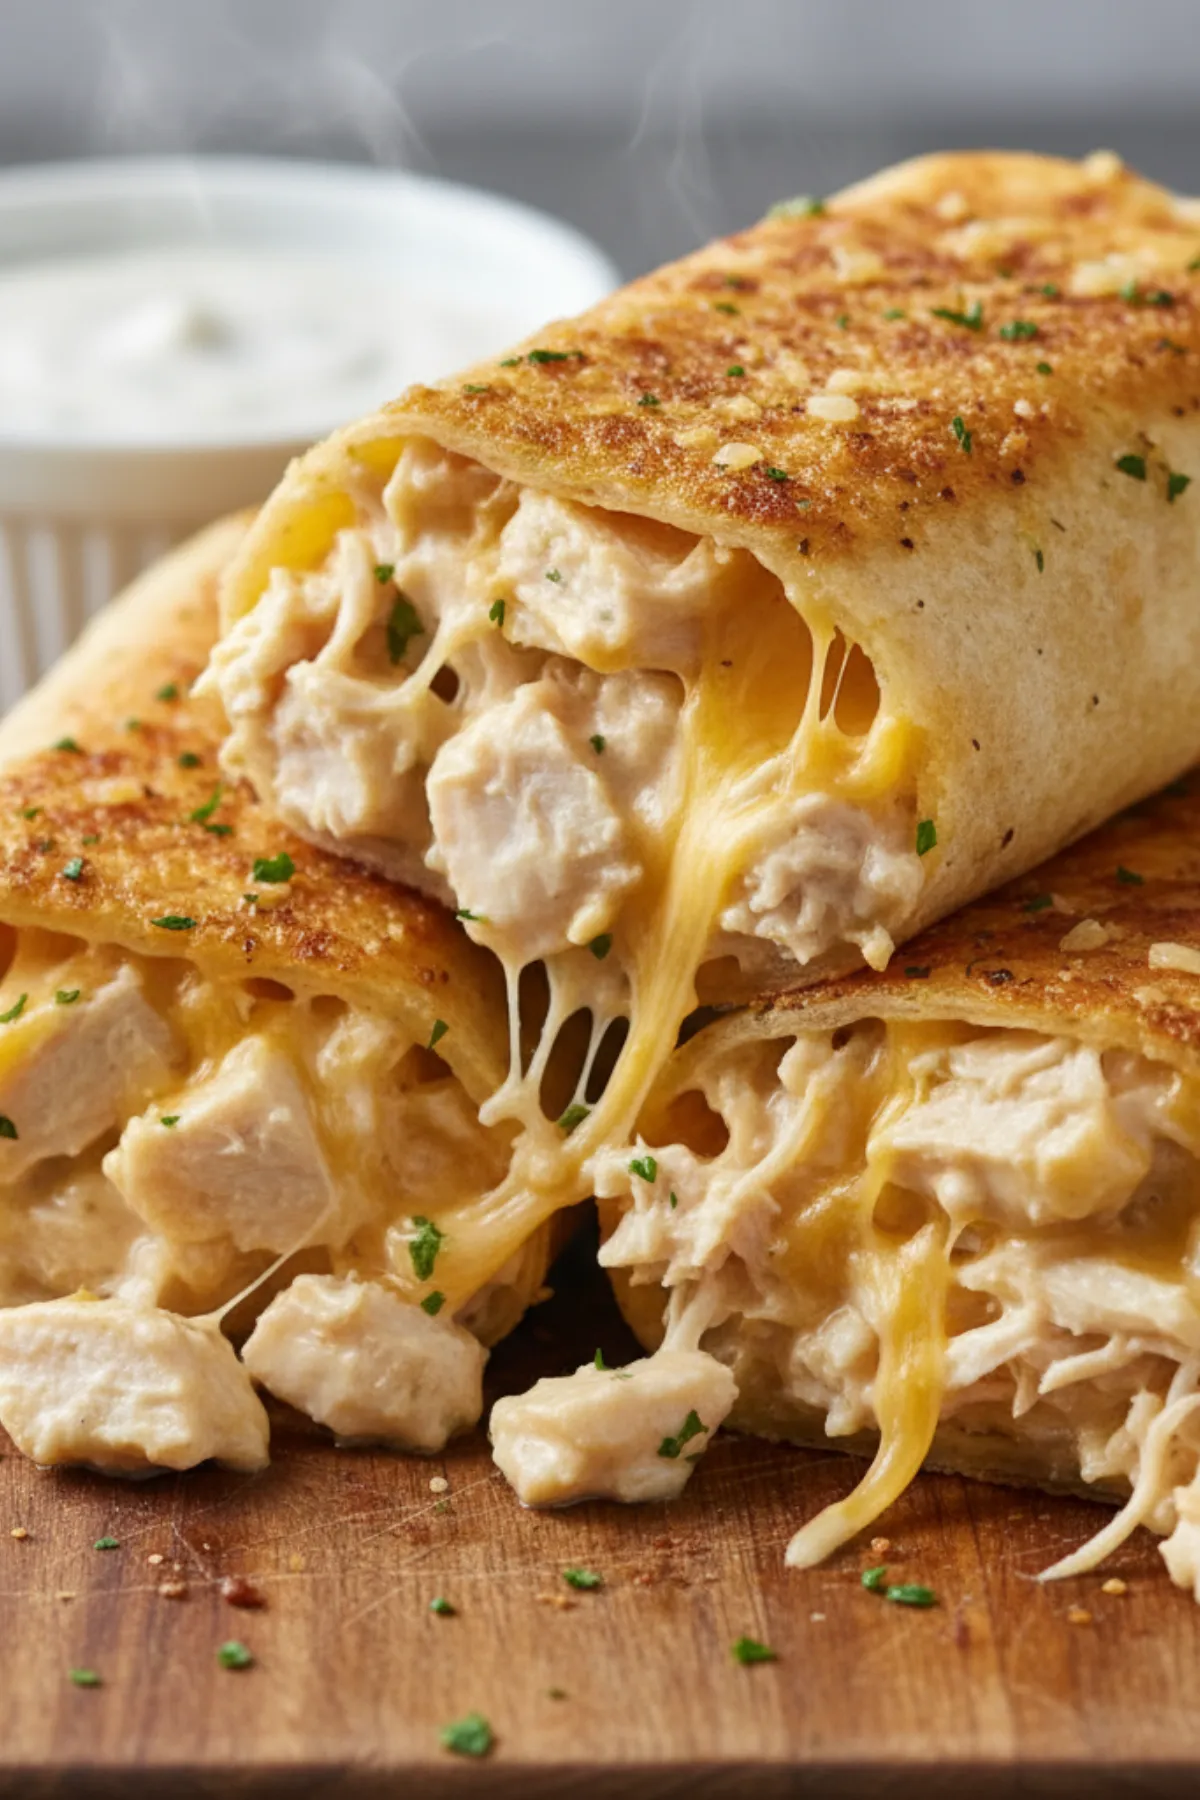
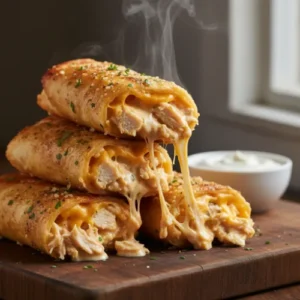
This isn’t just a wrap; it is a warm hug for your tastebuds. We take tender shredded chicken, toss it in a quick homemade garlic butter sauce, and smother it in melted cheese. But the real magic happens at the end. We toast the wrap in a hot skillet until the outside is golden and crunchy. It transforms a simple snack into a restaurant-quality meal. Whether you need a lightning-fast dinner or a hearty lunch, this recipe is about to become your new obsession.
Why You’ll Love This Recipe:
- Ready in 20 Minutes: Perfect for busy weeknights when you have zero energy.
- Crispy & Gooey: The texture combination of crunchy tortilla and molten cheese is unbeatable.
- Great for Leftovers: It’s the best way to use up leftover rotisserie chicken.
- Kid-Approved: Simple flavors that even picky eaters will ask for again.
- Budget-Friendly: Uses simple pantry staples you probably already have.
The Secret Ingredients for Unforgettable Cheesy Garlic Chicken Wraps

You don’t need fancy groceries to make a 5-star meal. However, choosing the right basics makes a huge difference. Here is what we are using.
- The Tortillas I recommend using large “burrito size” flour tortillas. They are soft and easy to fold. Corn tortillas tend to crack when you roll them this tight, so stick to flour for that perfect golden crunch.
- The Chicken To keep this fast, I use store-bought rotisserie chicken or leftover grilled chicken breast. You want the meat to be tender and already cooked. If you are starting from scratch, quickly poaching a chicken breast works too!
- The Cheese For the best cheesy garlic chicken wraps, buy a block of sharp cheddar or Monterey Jack and grate it yourself. Pre-shredded cheese has a powdery coating that stops it from melting smoothly. We want a gooey cheese pull here!
- The Garlic Butter This is the flavor bomb. We mix melted butter with fresh minced garlic and parsley. We use this inside the wrap for flavor and brush it on the outside for that crispy crust.
Bringing Your Cheesy Garlic Chicken Wraps to Life, Step by Step
Let’s get cooking! This moves fast, so have your skillet ready.
Step 1: Make the Garlic Butter In a small bowl, melt your butter. Stir in the minced garlic, a pinch of salt, and chopped fresh parsley. Divide this mixture in half. Half will go on the chicken, and half is for the pan.

Step 2: Prep the Filling In a medium bowl, toss your shredded chicken with half of the garlic butter mixture. This ensures every bite of meat is juicy and flavorful.
Step 3: Assemble the Wraps Lay a tortilla flat. Place a handful of shredded cheese in the center. Top with your garlic chicken mixture, then add another layer of cheese (because more cheese is always better).

Step 4: The Fold Fold the sides of the tortilla in towards the center. Then, roll it up tightly from the bottom, like a burrito. Make sure the ends are tucked in so the cheese doesn’t leak out!
Step 5: The Sear Heat a skillet over medium heat. Brush the remaining garlic butter on the outside of the wraps. Place the wraps in the pan, seam side down. Cook for 2-3 minutes per side until golden brown and crispy.
Pro-Tip: Placing them seam side down first seals the wrap shut so it doesn’t unroll while you eat it.
A Few Pro-Tips for a Perfect Result
I have made these hundreds of times, and I have learned a few tricks to make them perfect.
- Don’t Overstuff: It is tempting to pack them full, but if you overstuff the tortilla, it will rip when you fold it.
- Warm the Tortillas: Before rolling, microwave your tortillas for 10 seconds. Warm tortillas are flexible; cold tortillas crack and tear.
- Low and Slow Sear: Don’t turn the heat up too high. You want the cheese inside to melt fully before the outside burns. Medium heat is the sweet spot.
- Add a Crunch: If you like texture, add some crispy fried onions or diced red onion inside the wrap before rolling.
- Use a Weight: If you want them extra flat and crispy, press the wraps down with a spatula or a heavy pot while they cook in the skillet.
- Switch the Herbs: If you don’t like parsley, fresh chopped chives or cilantro work beautifully in the butter mixture.
- Safety First: Since we are using pre-cooked chicken, we are just reheating it. However, if you cook chicken from raw, ensure it reaches a safe internal temperature. According to the USDA, chicken must reach 165°F to be safe.
Cheesy Garlic Chicken Wraps Variations to Try
Cooking is about having fun! Here are a few ways to twist this recipe to fit your cravings.
If you love heat, try a Spicy Buffalo Version. Toss your chicken in buffalo sauce instead of garlic butter, and use Pepper Jack cheese. Dip it in blue cheese dressing for the full experience.
For my friends who are gluten-sensitive, you can make these Gluten-Free. Simply swap the flour tortilla for a certified gluten-free wrap. Be careful, as GF wraps can be more brittle, so warm them up well before rolling.
Want to add some veggies? Try the Chicken Veggie Supreme. Add sautéed bell peppers, spinach, and mushrooms to the filling. It’s a great way to sneak vitamins into a meal the kids will still love.
For a richer flavor, try the Bacon Ranch Twist. Add crispy crumbled bacon and a drizzle of ranch dressing inside the wrap before rolling.
How to Store & Reheat Your Cheesy Garlic Chicken Wraps
These wraps are best eaten fresh, but leftovers can still be delicious if you handle them right.
Storage: Let the wraps cool completely. Wrap them tightly in foil or plastic wrap and store them in the fridge for up to 3 days.
Freezing: You can freeze these un-cooked! Assemble the wraps, wrap them in foil, and freeze for up to a month. Thaw them in the fridge overnight before searing.
Reheating: Avoid the microwave! It will make the tortilla soggy and rubbery. Instead, reheat them in an air fryer at 350°F for 3-4 minutes, or back in a skillet until the crust is crispy again.
Perfect Pairings for Cheesy Garlic Chicken Wraps
Since these wraps are rich and savory, you need sides that balance the meal.
I love serving these with a fresh, crisp salad. It pairs perfectly with our Simple Garden Salad with Vinaigrette to cut through the cheesiness.
If you are in a “comfort food” mood, soup is a classic partner. Try dipping these crispy wraps into our Creamy Roasted Tomato Basil Soup. It’s like a grown-up grilled cheese and tomato soup combo!
Frequently Asked Questions (FAQ)
Can I make these ahead of time for lunch?
Yes! You can assemble them the night before and store them in the fridge. In the morning, just quickly sear them in the pan before packing, or pack them cold and heat them at work (though they will be softer).
What sauce goes well with these?
Ranch dressing is a classic choice. Honey mustard, garlic aioli, or even plain sour cream are also delicious for dipping.
Can I use turkey instead of chicken?
Absolutely. Leftover Thanksgiving turkey or even ground turkey works perfectly in this recipe.
My tortillas keep tearing, what am I doing wrong?
They are likely too cold or too dry. Microwave them between two damp paper towels for 15 seconds to make them pliable and moist before rolling.
Can I bake these instead of frying?
Yes. Place the wraps seam side down on a baking sheet. Brush with garlic butter and bake at 400°F for 10-12 minutes until golden.
Is this recipe spicy?
Not at all. The garlic adds flavor, not heat. If you want spice, add red pepper flakes to the butter.
Can I use low-carb tortillas?
Yes, low-carb or keto tortillas work well. Just watch them closely in the pan as they tend to brown faster than regular flour tortillas.
How do I stop the cheese from leaking out?
Fold the sides in deeply before rolling up. Think of it like swaddling a baby—you want a tight, enclosed package. Also, don’t put cheese right at the very edge of the tortilla.
Can I use garlic powder instead of fresh garlic?
In a pinch, yes. Use 1 teaspoon of garlic powder in the butter. However, fresh minced garlic gives a much punchier, authentic flavor.
Do I need to use butter?
You can use olive oil if you prefer, but butter gives the tortilla that classic golden, flaky crust that tastes like a grilled cheese sandwich.
Cheesy Garlic Chicken Wraps
Equipment
- Large Skillet (non-stick or cast iron)
- Pastry Brush
- Tongs
- Mixing Bowl
Ingredients
- 4 Large Flour Tortillas (Burrito Size)
- 2 cups Cooked Chicken, shredded (Rotisserie works best)
- 2 cups Sharp Cheddar Cheese, shredded
For the Garlic Butter:
- 3 tbsp Unsalted Butter, melted
- 2 cloves Garlic, minced
- 1 tbsp Fresh Parsley, chopped
- 1/4 tsp Salt
Instructions
- Make Sauce: In a small bowl, whisk together the melted butter, minced garlic, parsley, and salt.
- Season Chicken: Place the shredded chicken in a medium bowl. Pour half of the garlic butter mixture over the chicken and toss to coat evenly.
- Prepare Tortillas: Microwave tortillas for 10-15 seconds to make them pliable.
- Assemble: Lay a tortilla flat. Place 1/4 cup of cheese in the center. Top with 1/2 cup of the garlic chicken. Top with another 1/4 cup of cheese.
- Fold: Fold the left and right sides of the tortilla in towards the center. Roll the tortilla up tightly from the bottom to create a burrito shape.
- Heat Pan: Heat a large skillet over medium heat.
- Sear: Brush the outside of the wraps with the remaining garlic butter. Place the wraps in the hot skillet, seam side down. Cook for 2-3 minutes until golden brown.
- Flip: Carefully flip the wraps and cook for another 2-3 minutes on the other side until crispy and the cheese is melted.
- Serve: Remove from pan, cut in half diagonally, and serve immediately.
Notes
Conclusion
These cheesy garlic chicken wraps prove that fast food can still be homemade and delicious. With just a skillet and a few basic ingredients, you can create a meal that satisfies your deepest comfort food cravings. I hope they become a regular rotation in your kitchen just like they are in mine.
Ready for your next kitchen adventure? Explore more delicious recipes here at SpoonnSpice!