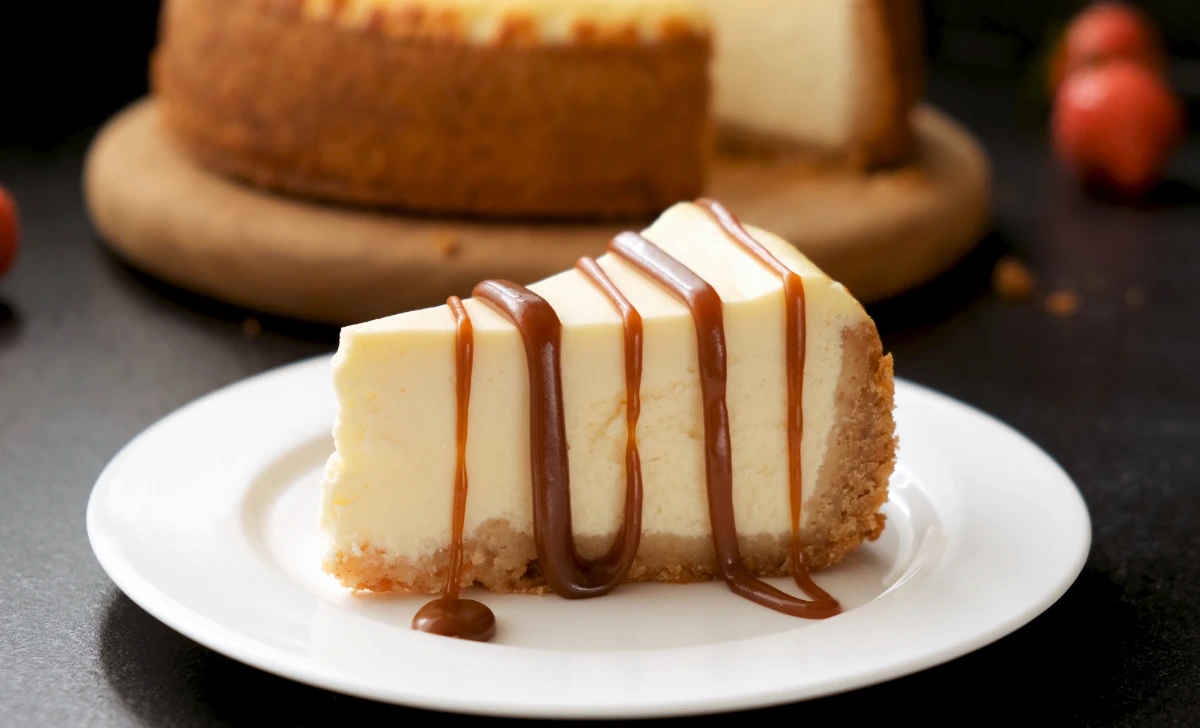
Who can resist the creamy, decadent goodness of a cheesecake? This delectable dessert has been enjoyed by people around the world for centuries. Whether you’re hosting a dinner party, celebrating a special occasion, or simply craving a sweet treat, a homemade cheesecake is always a crowd-pleaser. In this article, we will take you through the steps of creating a mouthwatering cheesecake that will leave your taste buds begging for more.
[ez-toc]
History
Cheesecake, with its rich and creamy texture, has a fascinating history that dates back to ancient times. Although the exact origin of cheesecake is still debated, it is believed to have its roots in ancient Greece.
The earliest known mention of cheesecake can be found in a Greek physician’s writings dating back to the 5th century BCE. The Greeks were known for their love of cheese and developed a simple recipe by combining fresh cheese, honey, and wheat. They would bake this mixture to create a cake-like dessert.
Cheesecake gained popularity throughout the Roman Empire, where it was introduced by the Greeks. The Romans made their own adaptations to the recipe, adding eggs to create a firmer texture. They also experimented with different flavors and toppings, such as fruit preserves and nuts.
During the Renaissance period, cheesecake spread across Europe and became a favorite among nobility and royalty. It was served at lavish banquets and feasts, often garnished with exotic spices and flavors. Each region in Europe developed its own version of cheesecake, adding local ingredients and techniques.
In the 18th century, as Europeans began to settle in America, they brought their cheesecake recipes with them. However, due to the scarcity of certain ingredients, such as fresh cheese, American bakers started using cream cheese instead. This change in the main ingredient led to the creation of the classic New York-style cheesecake, known for its dense and creamy texture.
Cheesecake continued to evolve and gain popularity in the 20th century. The introduction of electric mixers and refrigerators made it easier for home cooks to prepare this indulgent dessert. Today, cheesecake comes in a variety of flavors and styles, including chocolate, strawberry, and caramel, appealing to a wide range of tastes.
Time
| Step | Time |
|---|---|
| Preparing the Crust | 20 minutes |
| Making the Cheesecake Filling | 15 minutes |
| Baking the Cheesecake | 1 hour |
| Cooling and Topping | 2 hours |
| Total | 3 hours 35 minutes |
Note: The above times are approximate and may vary depending on individual cooking preferences and equipment used.
Ingredients
| Ingredients | Quantity |
|---|---|
| Graham cracker crumbs | 1 cup |
| Butter, melted | 4 tablespoons |
| Cream cheese, softened | 8 ounces |
| Granulated sugar | 1/2 cup |
| Eggs | 2 |
| Vanilla extract | 1 teaspoon |
| All-purpose flour | 2 tablespoons |
| Sour cream | 1/4 cup |
| Lemon juice | 1 tablespoon |
| Salt | 1/4 teaspoon |
| Fresh berries (optional) | For topping |
Note: The ingredient quantities mentioned in the table are for a 2-person serving of the cheesecake recipe. Adjust the quantities accordingly if you need to serve more or fewer people.
Directions
Step 1: Preparing the Crust
- Crush the graham crackers: Place the graham crackers in a resealable plastic bag and crush them into fine crumbs using a rolling pin or a food processor.
- Combine with melted butter: In a mixing bowl, combine the graham cracker crumbs with the melted butter. Stir until the crumbs are evenly coated.
- Press into the pan: Press the crumb mixture firmly into the bottom of a greased 9-inch springform pan to form an even crust. Set aside.
Step 2: Making the Cheesecake Filling
- Preheat the oven: Preheat your oven to 325°F (163°C).
- Mix cream cheese and sugar: In a large mixing bowl, beat the softened cream cheese and granulated sugar together until smooth and creamy.
- Add eggs, vanilla, and flour: Add the eggs one at a time, beating well after each addition. Mix in the vanilla extract and all-purpose flour until well combined.
- Incorporate sour cream and lemon juice: Stir in the sour cream and lemon juice until the mixture is smooth and creamy.
- Add salt: Sprinkle in the salt and mix until incorporated.
Step 3: Baking the Cheesecake
- Pour filling over crust: Pour the cheesecake filling over the prepared crust in the springform pan, spreading it evenly.
- Bake in the oven: Place the pan in the preheated oven and bake for approximately 55-60 minutes or until the center is set and the edges are lightly golden.
- Cooling: Once baked, remove the cheesecake from the oven and let it cool in the pan for about 10 minutes.
- Refrigerate: Transfer the cheesecake to the refrigerator and chill for at least 2 hours to allow it to set completely.
Step 4: Cooling and Topping
- Remove from the pan: After chilling, carefully remove the sides of the springform pan, leaving the cheesecake on the base.
- Add fresh berries (optional): If desired, top the cheesecake with fresh berries or any other preferred toppings.
- Serve: Slice and serve the delicious cheesecake to enjoy its creamy and decadent flavors.
Equipment Required
Nutrition Information
| Nutrition Information | Amount Per Serving |
|---|---|
| Serving Size | 1 slice (1/8 of cheesecake) |
| Calories | 350 |
| Total Fat | 25g |
| Saturated Fat | 14g |
| Trans Fat | 0g |
| Cholesterol | 125mg |
| Sodium | 280mg |
| Total Carbohydrate | 26g |
| Dietary Fiber | 0g |
| Sugars | 18g |
| Protein | 6g |
Note: The nutrition information provided is approximate and may vary depending on specific ingredients and variations made to the recipe. It’s always recommended to calculate and adjust the nutrition information based on the specific brands and quantities of ingredients used.
Tips
- Room temperature ingredients: Ensure that your cream cheese, eggs, and sour cream are at room temperature before starting. This allows for easier mixing and a smoother consistency.
- Grease the pan: Grease the springform pan thoroughly, including the sides, to prevent the crust from sticking.
- Press the crust firmly: When preparing the crust, press it firmly into the pan to create a solid base that holds together well.
- Avoid overmixing: When mixing the cheesecake filling, be careful not to overmix. Overmixing can introduce excess air and lead to cracks on the surface.
- Water bath method: To prevent cracks during baking, consider using a water bath. Place the springform pan in a larger pan filled with hot water, which helps maintain even heat distribution.
- Cooling and chilling: Allow the cheesecake to cool in the oven with the door slightly open before refrigerating. This gradual cooling process helps prevent drastic temperature changes that can cause cracks.
- Refrigeration time: Ensure that the cheesecake is refrigerated for the recommended time, typically a minimum of 2 hours, to achieve the desired firmness and texture.
- Topping creativity: While fresh berries are a classic choice, feel free to experiment with various toppings such as chocolate shavings, caramel sauce, or fruit compote to personalize your cheesecake.
Pros & Cons
| Pros | Cons |
|---|---|
| ✅ Delicious and indulgent dessert | ❌ High calorie content |
| ✅ Versatile – can be customized with various flavors and toppings | ❌ Time-consuming to prepare and bake |
| ✅ Impressive presentation for special occasions | ❌ Requires refrigeration time for proper setting |
| ✅ Can be made in advance and refrigerated | ❌ May crack during baking or cooling |
| ✅ Appeals to a wide range of taste preferences | ❌ Requires a springform pan for baking |
Conclusion
Indulge in the creamy delight of a homemade cheesecake that tantalizes your taste buds and leaves you craving for more. This classic dessert offers a perfect balance of smoothness and richness, making it a delightful treat for any occasion. With its versatile nature, you can customize the flavors and toppings to suit your preferences and create a dessert that truly reflects your unique style.
While preparing a cheesecake requires time and attention, the end result is well worth the effort. From the buttery graham cracker crust to the velvety cream cheese filling, each bite is a symphony of flavors that will captivate your senses. Whether you’re hosting a special gathering or simply treating yourself to a little indulgence, this recipe is sure to impress and satisfy.
Embrace your culinary creativity by experimenting with different crust variations, flavor additions, and toppings. Let your imagination run wild as you transform this timeless dessert into a masterpiece of your own. From tangy fruit compotes to luscious chocolate drizzles, the possibilities are endless.
So, why not embark on a cheesecake-making adventure? Gather your ingredients, follow the steps with care, and be rewarded with a heavenly dessert that will delight your family, friends, or even just yourself. Unleash your inner chef, create lasting memories, and savor the blissful pleasure of a homemade cheesecake.
Get ready to indulge in a slice of pure decadence. Your taste buds deserve it!
Facts
- Fact 1: Ancient Origins 🏛️
- Did you know that cheesecake dates back to ancient Greece? It was mentioned in Greek physician’s writings as early as the 5th century BCE, making it a dessert with a history spanning thousands of years! 🍰
- Fact 2: Roman Adaptations 🌍
- The Romans, known for their love of food, made their own adaptations to the cheesecake recipe brought by the Greeks. They added eggs to the mixture, creating a denser and firmer texture. The Romans also experimented with different flavors and toppings, making cheesecake a popular treat in ancient Rome. 🍳
- Fact 3: Cheesecake’s Journey to America 🇺🇸
- Cheesecake made its way to America through European settlers. However, due to the scarcity of traditional ingredients, American bakers started using cream cheese instead of fresh cheese. This gave rise to the iconic New York-style cheesecake known for its creamy and rich texture. 🗽
- Fact 4: The Cheesecake Factory’s Massive Menu 🍽️
- The Cheesecake Factory, a popular restaurant chain, is renowned for its extensive menu, including an astonishing variety of cheesecakes. With over 30 flavors to choose from, they have created a cheesecake lover’s paradise! 🧁
- Fact 5: Guinness World Record-Breaking Cheesecake 🌟
- In 2014, a team of pastry chefs in Poland set a Guinness World Record by creating the largest cheesecake ever made. This colossal dessert weighed a staggering 4,703 pounds (2,130 kilograms), truly taking cheesecake to new heights! 🏆
FAQ’s
Can I make a cheesecake without using a springform pan?
While a springform pan is ideal for easy removal, you can use a regular cake pan lined with parchment paper for easier release.
How long does it take for the cheesecake to cool before refrigerating?
Allow the cheesecake to cool at room temperature for about 1 hour before transferring it to the refrigerator for further chilling.
Can I substitute low-fat cream cheese in the recipe?
Yes, you can substitute low-fat cream cheese, but keep in mind that the texture and flavor may be slightly different.
Can I freeze the cheesecake for future use?
Absolutely! Wrap the cheesecake tightly in plastic wrap and store it in an airtight container before freezing for up to 2 months.
How do I prevent cracks from forming on the surface of the cheesecake?
To minimize cracks, avoid overmixing the batter, and ensure a gradual cooling process by leaving the cheesecake in the oven with the door slightly open.
Can I use a gluten-free alternative for the crust?
Yes, you can substitute gluten-free cookie crumbs or ground nuts for the crust to make it gluten-free.
Can I use a water bath when baking the cheesecake?
Using a water bath can help prevent cracks. Simply wrap the bottom of the springform pan with foil and place it in a larger pan filled with hot water before baking.
How long can I store the cheesecake in the refrigerator?
The cheesecake can be stored in the refrigerator for up to 4-5 days when properly covered.
Can I add a flavored swirl to the cheesecake batter?
Absolutely! Before baking, you can gently swirl in fruit preserves, chocolate sauce, or caramel for added flavor and visual appeal.
Can I use a different type of cookie for the crust instead of graham crackers?
Yes, you can experiment with different cookies like chocolate wafers, vanilla wafers, or even biscotti to create a unique crust for your cheesecake.




Leave a Review