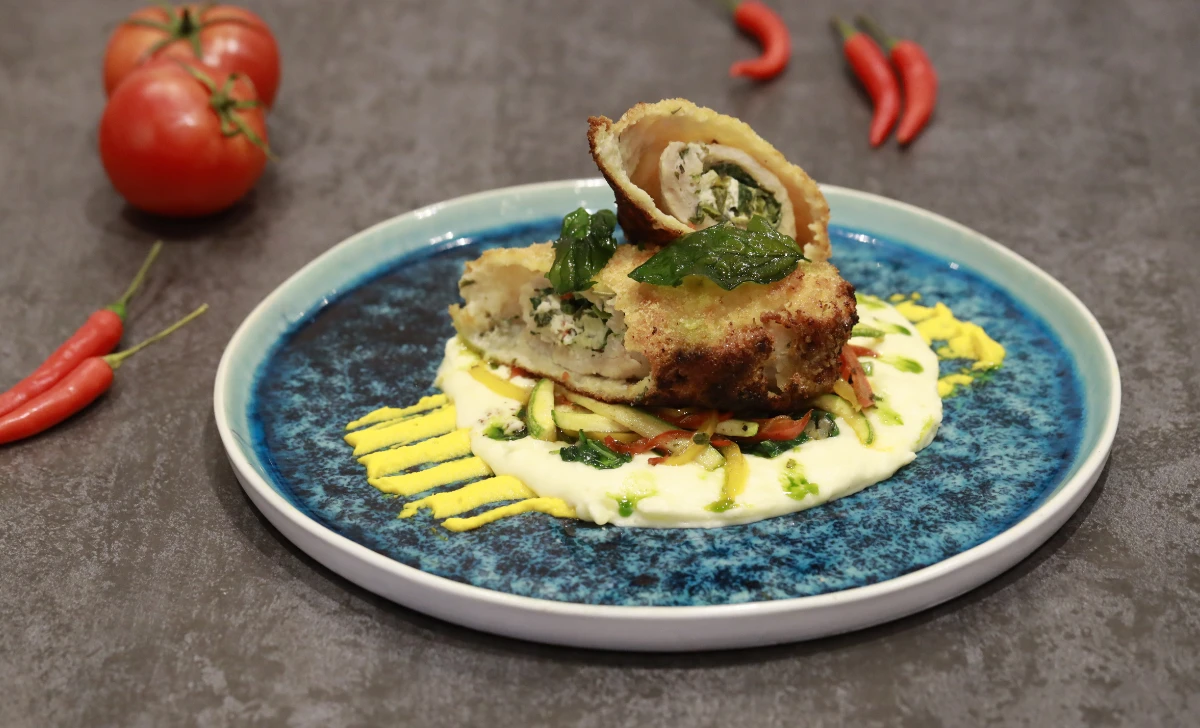
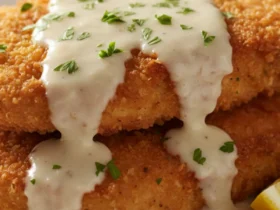
When it comes to classic comfort food, Chicken Kiev is a dish that never disappoints. This iconic dish boasts a perfect combination of crispy, golden-brown exteriors and a mouthwatering garlic butter filling. In this article, we’ll explore the origin of Chicken Kiev, the ingredients you need, and step-by-step instructions to create this delicious masterpiece.
[ez-toc]
History
The history of Chicken Kiev is a fascinating tale of culinary evolution and international influence. Despite its name, Chicken Kiev didn’t originate in the Ukrainian city of Kiev. Instead, its roots can be traced back to a blend of French and Russian culinary traditions.
The dish’s origin can be attributed to French haute cuisine, particularly a dish known as “côtelette de volaille,” which consisted of chicken or other poultry cutlets filled with seasoned butter. The French influence in this dish is evident in the use of butter and the culinary technique of filling the meat.
However, it was in Russia, during the late 18th or early 19th century, that Chicken Kiev as we know it today began to take shape. At that time, Russian cuisine was heavily influenced by French culinary practices due to the French chefs employed by Russian aristocracy. This fusion of French and Russian cooking gave birth to a dish similar to Chicken Kiev, where boneless chicken breasts were pounded flat, filled with seasoned butter, and then breaded and fried.
The dish’s connection to the Ukrainian city of Kiev is more symbolic than historical. It is said that the name “Kiev” was added to the dish to honor the city, which was known for its rich culinary heritage. While the dish became popular in Moscow, it was eventually introduced to Kiev and then to the broader Ukrainian culinary scene. This is why it came to be associated with the Ukrainian capital.
Over time, Chicken Kiev evolved into an iconic dish, appreciated not only in Russia and Ukraine but also around the world. Its international recognition and popularity have made it a staple in many restaurants and households, and it remains a symbol of culinary fusion, showcasing how different culinary traditions can come together to create a delectable masterpiece.
Time
| Step | Time |
|---|---|
| Preparing the Chicken | 15 minutes |
| Making the Garlic Butter Filling | 10 minutes |
| Assembling the Chicken Kiev | 5 minutes |
| Coating the Chicken | 10 minutes |
| Frying Chicken Kiev | 15 minutes (approx) |
| Baking Option for Healthier Version | 25-30 minutes |
| Serving Chicken Kiev | Varies |
Please note that the total time may vary depending on your cooking skills and kitchen setup, so plan accordingly to ensure a delicious and timely meal.
Ingredients
| Ingredients | Quantity |
|---|---|
| Boneless, skinless chicken breasts | 2 pieces |
| Unsalted butter, at room temperature | 1/2 cup |
| Cloves of garlic, minced | 2 cloves |
| Fresh parsley, chopped | 1 tablespoon |
| Salt and black pepper, to taste | As needed |
| All-purpose flour | 1/2 cup |
| Large eggs | 1 |
| Breadcrumbs | 1 cup |
| Vegetable oil for frying | As needed |
These quantities are suitable for preparing a delightful Chicken Kiev dish for two people. Adjust the amounts as needed for larger servings.
Directions
Preparing Chicken Kiev
- Pound the Chicken: Start by placing each boneless, skinless chicken breast between sheets of plastic wrap or parchment paper. Gently pound the chicken with a meat mallet or rolling pin until it’s an even thickness of about 1/2 inch. This ensures even cooking.
Making the Garlic Butter Filling
- Prepare the Garlic Butter: In a mixing bowl, combine the 1/2 cup of unsalted butter at room temperature, minced garlic (2 cloves), 1 tablespoon of chopped fresh parsley, and a pinch of salt and black pepper to taste. Mix the ingredients until well incorporated.
Assembling the Chicken Kiev
- Fill the Chicken: Take each pounded chicken breast and place a generous dollop of the garlic butter filling in the center. Be sure not to overfill. Fold the chicken over the filling and secure the edges to create a neat pocket. Seal it well to prevent any leakage during cooking.
Coating the Chicken
- Coat in Flour: In one bowl, place 1/2 cup of all-purpose flour. Coat each stuffed chicken breast evenly in the flour, shaking off any excess.
- Dip in Beaten Eggs: In another bowl, beat 1 large egg. Dip each chicken breast in the beaten egg, ensuring it’s thoroughly coated.
- Coat in Breadcrumbs: In a third bowl, place 1 cup of breadcrumbs. Roll the chicken in the breadcrumbs, pressing them gently to adhere. Make sure the chicken is evenly coated with breadcrumbs for a crispy finish.
Frying Chicken Kiev
- Heat Oil: In a frying pan, heat vegetable oil over medium-high heat until it’s hot but not smoking. The oil should be deep enough to submerge the chicken.
- Fry the Chicken: Carefully add the breaded chicken breasts to the hot oil. Fry for about 5-7 minutes per side, or until the chicken turns golden brown and is cooked through. Ensure the internal temperature of the chicken reaches 165°F (74°C) to ensure it’s safe to eat.
Baking Option for Healthier Version
- Preheat Oven: For a healthier alternative, preheat your oven to 375°F (190°C).
- Bake the Chicken: Place the breaded and filled chicken breasts on a baking sheet and bake for approximately 25-30 minutes or until they are cooked through and the coating is crispy. Baking is a great option for those looking to reduce oil usage.
Serving Chicken Kiev
- Garnish and Serve: Once your Chicken Kiev is cooked to perfection, serve it hot. You can garnish it with fresh parsley and even squeeze a bit of lemon juice for extra flavor. It pairs wonderfully with mashed potatoes or a crisp salad.
Follow these steps, and you’ll create a delicious and classic Chicken Kiev dish that’s sure to impress your taste buds and those of your dining companion. Enjoy your meal!
Equipment Required
Nutrition Information
| Nutrient | Amount per Serving |
|---|---|
| Serving Size | 1 Chicken Kiev |
| Calories | 450-550 calories |
| Total Fat | 30-40 grams |
| Saturated Fat | 15-20 grams |
| Cholesterol | 120-150 mg |
| Sodium | 500-600 mg |
| Total Carbohydrates | 20-30 grams |
| Dietary Fiber | 1-2 grams |
| Sugars | 1-2 grams |
| Protein | 25-30 grams |
Please note that the nutrition values can vary depending on factors such as the size of the chicken breast, the amount of butter used, and the specific brands of ingredients. It’s always a good idea to check the labels on the ingredients you use and adjust the values accordingly for precise dietary planning.
Tips
- Seal the Chicken Well: Make sure that the edges of the chicken are securely sealed to prevent the garlic butter from leaking during cooking.
- Use Fresh Herbs: Fresh parsley works wonders in the garlic butter filling. It provides a more aromatic and flavorful result.
- Even Coating: When breading the chicken, ensure that each breast is evenly coated with flour and breadcrumbs. This helps to achieve a uniform, crispy texture.
- Careful Frying: When frying, watch the chicken carefully. Overcooking can lead to dry chicken, so aim for a golden brown color without overdoing it.
- Temperature Check: Verify the internal temperature of the chicken reaches 165°F (74°C) to ensure it’s safe to eat.
- Healthier Option: For a lighter version, consider baking the Chicken Kiev in the oven instead of frying. It reduces the use of oil and still yields a delicious result.
Pros & Cons
| Pros | Cons |
|---|---|
| ✅ Delicious and Flavorful | ❌ High in Calories and Fat |
| ✅ Impressive Presentation | ❌ Time-Consuming Preparation |
| ✅ Versatile (Can Be Baked) | ❌ May Be Messy to Prepare |
| ✅ Can Be Customized | ❌ Not Suitable for Dietary Restrictions |
| ✅ Classic Comfort Food | ❌ Requires Deep Frying (Oil Usage) |
Conclusion
In conclusion, Chicken Kiev is a culinary masterpiece that transcends borders and brings together the flavors of different cuisines. Its crispy exterior and luscious garlic butter filling make it a timeless classic that never goes out of style.
This recipe offers you a chance to explore the rich history of this dish, which, despite its name, has a fascinating international heritage. It’s not only a delicious meal but also a symbol of culinary fusion, where French, Russian, and Ukrainian influences come together.
So, why not embark on a culinary journey and bring a taste of tradition and elegance to your dinner table? Whether you’re cooking for a special occasion or a comforting family dinner, Chicken Kiev is sure to impress your taste buds and those of your loved ones. The crispy, golden exterior and the burst of savory, aromatic flavors from the garlic butter filling will leave you craving for more.
Don’t hesitate to try your hand at preparing this iconic dish. Its versatility allows you to customize it according to your taste, and you can even opt for a healthier version by baking it. With a few simple steps, you can create a dish that not only tantalizes your senses but also leaves a lasting impression on your guests.
So, get into the kitchen, and experience the magic of Chicken Kiev. The history, the flavor, and the heartwarming satisfaction are all waiting for you. Happy cooking!
Facts
- 1. 🇫🇷 French Culinary Roots
- Did you know that the roots of Chicken Kiev can be traced back to French haute cuisine? The original concept of filling poultry with seasoned butter comes from France. It’s a delightful example of how culinary ideas travel across borders!
- 2. 🇷🇺 The Russian Connection
- Chicken Kiev, despite its Ukrainian name, gained popularity in Moscow during the 18th or 19th century. Russian cuisine was heavily influenced by French culinary practices, leading to the fusion of French and Russian cooking that gave birth to this dish.
- 3. 🌍 International Evolution
- Chicken Kiev is a true globetrotter! It started with French influence in Russia, adopted Ukrainian nomenclature, and has now become an internationally recognized dish, showcasing culinary fusion at its finest.
- 4. 🇺🇦 Honoring Kiev
- Why is it called “Chicken Kiev”? The name “Kiev” was added to honor the Ukrainian city, not because it was its place of origin. The association with Kiev reflects its connection to the city’s culinary heritage.
- 5. 🍽️ A Symbol of Elegance
- Chicken Kiev is not just a dish; it’s a symbol of elegance. With its crispy exterior and rich garlic butter filling, it has become a timeless classic, perfect for special occasions or simply indulging in culinary delight.
FAQ’s
Can I use chicken thighs instead of chicken breasts for Chicken Kiev?
Yes, you can use chicken thighs as a substitution for chicken breasts. Just remember to adjust the cooking time to ensure they are fully cooked.
Can I make Chicken Kiev in advance and reheat it?
Yes, you can prepare Chicken Kiev in advance, bread it, and keep it in the refrigerator. When ready to serve, fry or bake it until heated through and crispy.
Can I freeze Chicken Kiev?
Yes, you can freeze Chicken Kiev. You can freeze it before or after frying. Make sure it’s well-wrapped to prevent freezer burn.
What’s a good side dish to serve with Chicken Kiev?
Chicken Kiev pairs well with side dishes like mashed potatoes, steamed vegetables, or a fresh salad for a balanced meal.
What’s the difference between frying and baking Chicken Kiev?
Frying results in a crispy exterior, while baking is a healthier option with less oil usage and a lighter crust.
Can I make a vegetarian version of Chicken Kiev?
Yes, you can make a vegetarian version using large portobello mushrooms or other meat substitutes. Follow the same filling and breading process.
What is the best way to prevent the garlic butter from leaking during cooking?
To prevent leakage, ensure the chicken edges are well-sealed after adding the garlic butter filling. Use toothpicks or kitchen twine if necessary.
How do I know when the chicken is cooked through?
To ensure the chicken is fully cooked, use a meat thermometer. The internal temperature should reach 165°F (74°C).
Can I make Chicken Kiev with a gluten-free coating?
Yes, you can make it gluten-free by using gluten-free flour and breadcrumbs for coating the chicken.
Is it possible to prepare Chicken Kiev with a spicy kick?
Absolutely! You can add a pinch of cayenne pepper or paprika to the breadcrumb coating for a subtle spicy twist.




Leave a Review