Are you ready to embark on a culinary adventure that will transport your taste buds to the bustling streets of Egypt? Say hello to feteer, the golden and crispy pastry that’s both a meal and a masterpiece. In this delectable journey, we’ll unravel the secrets behind crafting the perfect feteer. From the basics of dough preparation to the art of filling and folding, get ready to become a feteer maestro. Let’s dive in and create a symphony of flavors with this feteer recipe!
[ez-toc]
History
Long before feteer became a beloved treat on dining tables around the world, its story was woven into the rich tapestry of Egyptian culinary history. This flaky and sumptuous pastry has a history as captivating as its taste. Let’s travel back in time to uncover the fascinating journey of feteer’s evolution.
Ancient Origins: The Birth of Feteer
The roots of feteer trace back to ancient Egypt, where resourceful bakers crafted this delectable treat using the simplest of ingredients. Feteer’s early form was likely a basic dough made from flour and water, shaped into flat rounds and baked on hot stones. These humble pastries served as sustenance for laborers, providing much-needed energy during a time when Egypt’s grand pyramids were under construction.
A Flourishing Influence: Culinary Fusion in Egypt
As centuries passed, Egypt’s location at the crossroads of Africa and the Middle East facilitated the exchange of cultural and culinary influences. This melting pot of flavors gave rise to the diversity that characterizes Egyptian cuisine today. Feteer underwent its own transformation, incorporating new ingredients and techniques from neighboring regions.
Medieval Marvels: Feteer’s Golden Age
During the medieval period, feteer evolved into a more refined creation, thanks to the artistry of skilled bakers. It became a staple at celebratory feasts and gatherings, symbolizing prosperity and joy. The dough was enriched with ingredients like butter and milk, creating a more luxurious and flakier texture. Feteer was no longer a mere sustenance; it had become a culinary masterpiece.
Rise of the Street Food Icon: Feteer’s Modern Era
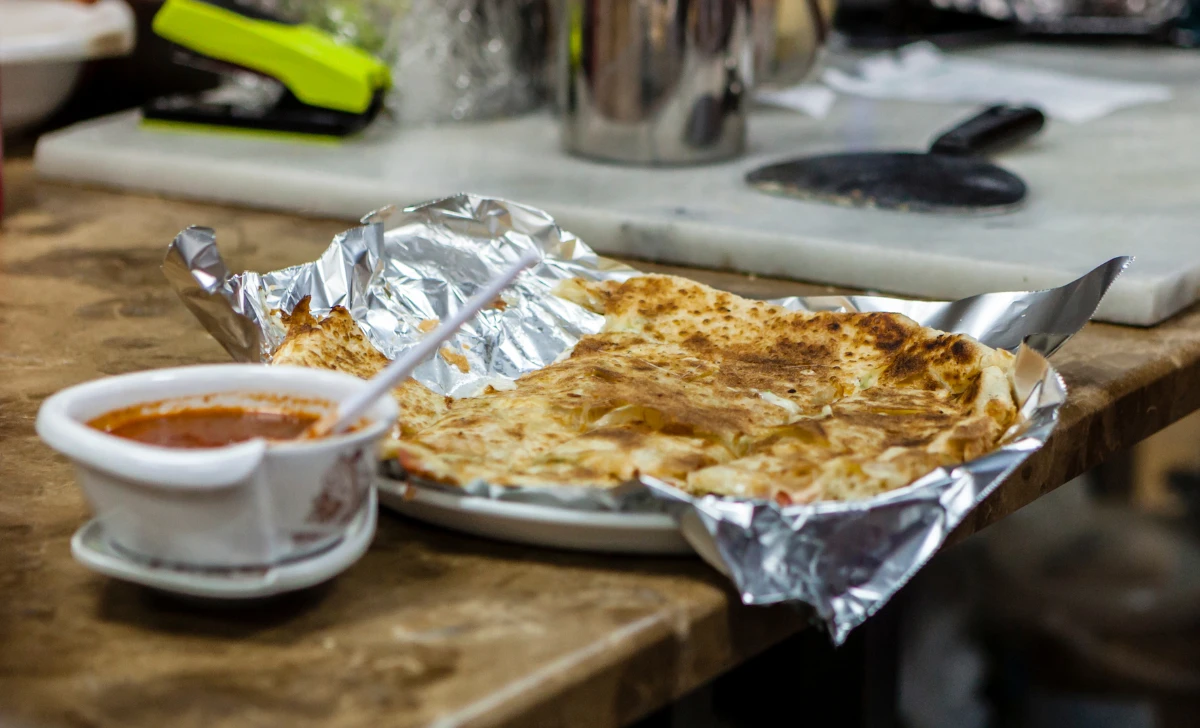
As Egypt embraced modernity, feteer took on a new role as a beloved street food. Bakeries and vendors in bustling markets perfected the art of crafting feteer on the go, delighting passersby with the aroma of freshly baked goodness. Fillings diversified, ranging from traditional cheese and herbs to innovative sweet options that catered to evolving tastes.
Global Recognition: Feteer’s Journey Beyond Borders
In recent decades, Egypt’s diaspora spread feteer’s fame across the globe. Egyptian communities brought their cherished recipe to new lands, introducing feteer to curious palates worldwide. As social media connected cultures and cuisines, feteer gained a global following, inspiring chefs and home cooks to recreate its magic in kitchens far and wide.
Reviving Tradition: Feteer’s Modern Renaissance
In a world where fast food often reigns, there’s a renewed appreciation for authentic and handmade culinary treasures. Feteer, with its labor-intensive process and rich history, has become a symbol of this culinary renaissance. Artisanal bakeries and culinary enthusiasts are embracing the challenge of crafting feteer using traditional methods, keeping the legacy alive.
Preserving Heritage: Feteer’s Future
As we savor each bite of feteer, we honor the generations of bakers who perfected this delicacy. Feteer is more than a pastry; it’s a cultural heirloom that connects us to ancient traditions and the spirit of innovation. From the ancient ovens of Egypt to the kitchens of today, feteer’s journey is a testament to the power of food to transcend time and bring people together.
Time
| Step | Time |
|---|---|
| Dough Preparation | 20 minutes |
| Dough Rising | 1 hour |
| Filling Preparation | 15 minutes |
| Rolling Out and Filling the Dough | 30 minutes |
| Final Proofing and Preheating the Oven | 20 minutes |
| Baking the Feteer | 25 minutes |
| Cooling and Slicing | 15 minutes |
| Total Time | About 2.5 hours |
Note: The times provided are approximate and may vary based on individual cooking skills and kitchen conditions.
Ingredients
| Ingredients | Quantity |
|---|---|
| All-Purpose Flour | 1 cup |
| Active Dry Yeast | 1 teaspoon |
| Salt | 1/2 teaspoon |
| Water | 1/3 cup |
| Sugar | 1 teaspoon |
| Butter | 2 tablespoons (melted) |
| Cheese (e.g., mozzarella, feta) | 1/2 cup (grated/crumbled) |
| Desired Filling (e.g., dates, spinach) | As needed |
| Olive Oil | 1 tablespoon |
Note: The quantities provided are for a 2-person serving and can be adjusted according to personal preferences and appetite.
Directions
Step 1: Dough Preparation
Ingredients:
- All-Purpose Flour
- Active Dry Yeast
- Salt
- Water
- Sugar
- In a mixing bowl, combine 1 cup of all-purpose flour, 1 teaspoon of active dry yeast, and 1/2 teaspoon of salt.
- In a separate bowl, mix 1/3 cup of warm water with 1 teaspoon of sugar. Let it sit for a few minutes until frothy.
- Pour the yeast mixture into the flour mixture. Mix well until a dough forms.
- Knead the dough on a floured surface for about 5-7 minutes until it becomes smooth and elastic.
Step 2: Dough Rising
Ingredients:
- Dough (prepared in Step 1)
- Place the kneaded dough in a lightly oiled bowl, cover it with a clean cloth, and let it rise for about 1 hour or until doubled in size.
Step 3: Filling Preparation
Ingredients:
- Cheese (e.g., mozzarella, feta)
- Desired Filling (e.g., dates, spinach)
- Prepare your chosen filling ingredients. Grate or crumble the cheese, and prepare any other fillings like chopped dates or sautéed spinach.
Step 4: Rolling Out and Filling the Dough
Ingredients:
- Dough (risen from Step 2)
- Butter (melted)
- Prepared Filling
- Olive Oil
- Preheat your oven to 400°F (200°C).
- Punch down the risen dough and divide it into 2 equal portions.
- On a floured surface, roll out one portion of the dough into a rectangular shape. Brush it with melted butter.
- Spread your chosen filling evenly over the dough, leaving a border around the edges.
- Carefully roll up the dough, starting from the longer side, to create a log.
- Repeat the process with the second portion of dough and filling.
Step 5: Final Proofing and Preheating the Oven
Ingredients:
- Rolled Dough (from Step 4)
- Place the rolled dough logs on a baking sheet lined with parchment paper.
- Brush the tops of the dough logs with a little olive oil.
- Cover the dough logs with a clean cloth and let them rest for about 20 minutes for the final proofing.
- While the dough is proofing, preheat your oven to 400°F (200°C).
Step 6: Baking the Feteer
Ingredients:
- Proofed Dough Logs (from Step 5)
- Once the dough has proofed, place the baking sheet in the preheated oven.
- Bake the feteer for approximately 20-25 minutes or until they turn golden brown and crispy.
Step 7: Cooling and Slicing
Ingredients:
- Baked Feteer (from Step 6)
- Remove the baked feteer from the oven and let them cool slightly on a wire rack.
- Once cooled, use a sharp knife to slice the feteer into portions.
- Serve your delicious feteer warm, alongside your favorite dips or sides.
Enjoy your homemade feteer, a masterpiece of flavors and textures that’s sure to delight your taste buds and transport you to the heart of Egyptian cuisine!
Equipment Required
Nutrition Information
| Nutrient | Amount |
|---|---|
| Serving Size | 1 portion |
| Calories | Approx. 350 kcal |
| Total Fat | 10g |
| Saturated Fat | 6g |
| Trans Fat | 0g |
| Cholesterol | 30mg |
| Sodium | 450mg |
| Total Carbohydrates | 55g |
| Dietary Fiber | 2g |
| Sugars | 2g |
| Protein | 10g |
| Vitamin D | 2% DV |
| Calcium | 10% DV |
| Iron | 15% DV |
| Potassium | 4% DV |
Note: The nutrition information provided is an estimate and may vary based on specific ingredients used and portion sizes.
Tips
- Temperature Matters: Ensure the water you use for activating the yeast is at a warm but not hot temperature. Too hot water can kill the yeast, while cold water won’t activate it properly.
- Kneading Technique: When kneading the dough, use the heel of your hand to push the dough away from you and then fold it back. This helps develop the gluten for a better texture.
- Rising Conditions: Place the dough in a warm, draft-free spot for rising. You can use your turned-off oven or microwave as a cozy spot.
- Butter Brushing: When brushing melted butter on the dough, be generous but not excessive. This adds flavor and contributes to the flakiness.
- Filling Distribution: Ensure an even distribution of filling to avoid uneven baking. Leave a border when spreading the filling to prevent leaks.
- Proofing Time: The final proofing time may vary based on room temperature. The dough should visibly puff up, indicating it’s ready for baking.
- Preheating the Oven: Make sure your oven is properly preheated before placing the feteer inside. This ensures even baking and that the layers puff up properly.
Pros & Cons
| Pros | Cons |
|---|---|
| ✔️ Delightful blend of flavors and textures | ❌ Requires time and patience |
| ✔️ Customizable fillings for diverse tastes | ❌ High in calories and saturated fat |
| ✔️ Impressive presentation and aroma | ❌ Not suitable for gluten-sensitive individuals |
| ✔️ Offers a cultural and culinary experience | ❌ Potential for dough to become tough if overworked |
| ✔️ Can be made in various sizes and shapes | ❌ Requires careful handling to prevent filling spillage |
Conclusion
As we wrap up this culinary journey, imagine the aroma of golden-brown pastries wafting through your kitchen, the anticipation of every flaky layer waiting to be savored. Feteer is more than just a recipe – it’s a celebration of tradition, innovation, and the joy of creating something truly special. From the first mix of flour to the final buttery bite, every step is a testament to the magic of food and the artistry that lies within each of us.
With its rich history, versatile fillings, and tantalizing flavors, feteer beckons you to step into the role of a culinary explorer. Whether you choose the classic cheese filling, the sweet temptation of dates, or venture into your own creative concoctions, every feteer you craft is a canvas for your imagination.
So why not embark on this adventure? Embrace the joy of kneading, the excitement of folding, and the satisfaction of savoring a dish that carries a piece of Egypt’s culinary soul. Feteer is not just a recipe; it’s an experience waiting to unfold in your kitchen. Gather your ingredients, set aside some time, and let your hands create a symphony of flavors that dance on the palate and warm the heart.
Remember, it’s not just about the end result – it’s about the journey, the learning, and the memories you’ll create along the way. So, tie on your apron, let the flour dust your hands, and let’s unlock the magic of feteer together. Your taste buds and culinary curiosity will thank you for it. Happy cooking, and may your feteer adventures be nothing short of extraordinary! 🌟🥐
Facts
- Fact 1: Feteer’s Ancient Connection 🏛️
- Did you know that feteer’s history dates back to ancient Egypt? It’s like a delicious time machine that lets you taste a slice of history with every bite!
- Fact 2: Feteer’s Shape-shifting Magic 🌀
- Feteer isn’t just a one-size-fits-all treat! You can roll it, twist it, or even fold it into delightful shapes. It’s the dough’s way of saying, “I’m here to have fun!”
- Fact 3: Feteer’s Sweet and Savory Dance 🍽️
- Imagine a dance floor where sweet and savory come together in perfect harmony – that’s feteer! From cheesy wonders to date-filled dreams, it’s a culinary tango that’ll make your taste buds groove.
- Fact 4: Feteer’s Street Food Stardom 🚚
- Feteer isn’t just a star in the kitchen; it’s a legend on the streets! Picture vibrant markets where the aroma of feteer lures you in, promising a taste of pure joy.
- Fact 5: Feteer’s Global Passport 🌍
- Feteer’s journey isn’t limited to Egypt – it’s a globetrotter! Thanks to Egyptian communities around the world, feteer has become an international sensation. It’s proof that good food knows no borders!
FAQ’s
Can I make the dough in advance and refrigerate it overnight?
Absolutely! After the dough has risen, you can cover it tightly with plastic wrap and refrigerate it for up to 24 hours. Just make sure to bring it back to room temperature before rolling and baking.
Can I use whole wheat flour for a healthier option?
Yes, you can substitute part or all of the all-purpose flour with whole wheat flour. Keep in mind that whole wheat flour might result in a denser texture, so a combination of both flours could be a good compromise.
Can I freeze the unbaked feteer for later?
While it’s best to bake feteer fresh, you can freeze unbaked rolled and filled dough. Place them on a baking sheet in the freezer until firm, then transfer to an airtight container. When ready to bake, allow them to thaw and proof before baking.
My feteer turned out too hard. What went wrong?
Over-kneading the dough or baking at too high a temperature can lead to tough feteer. Knead gently and bake at the recommended temperature to maintain the desired flakiness.
Can I make mini feteer for appetizers or parties?
Absolutely! Instead of rolling out large logs, divide the dough into smaller portions for bite-sized feteer. Adjust baking time accordingly.
Can I use different fillings in one batch of feteer?
Yes, you can definitely get creative! Try dividing the dough into sections and experimenting with different fillings in each. Just ensure even distribution to avoid uneven baking.
Is feteer suitable for a brunch or breakfast gathering?
Absolutely! Feteer’s versatility makes it a great addition to a brunch spread. Fillings like cheese, herbs, and even scrambled eggs can create a delightful morning treat.
Can I use a different type of yeast, like instant yeast?
Yes, you can use instant yeast in place of active dry yeast. Keep in mind that instant yeast may require slightly different activation techniques, so follow the instructions on the yeast packaging.
What dipping sauces pair well with feteer?
Feteer pairs beautifully with a variety of dips, such as tahini, hummus, garlic yogurt sauce, or even a simple marinara for savory feteer variations. For sweet feteer, try chocolate or caramel sauces.
Can I use a gluten-free flour blend for this recipe?
Yes, you can experiment with a gluten-free flour blend to create a gluten-free version of feteer. Keep in mind that the texture may differ slightly, so adjustments might be needed for the best result.


Leave a Review