Hey there, fellow food enthusiasts! Are you ready to embark on a delightful culinary journey that will leave your taste buds begging for more? Today, we’re diving headfirst into the delectable world of butter tarts! Get your aprons on, and let’s whip up some buttery goodness that will make your mouth water with every bite. In this article, I’ll walk you through a tried-and-true butter tarts recipe, complete with all the sweet details you need to create these mouthwatering treats. So, let’s get baking!
[ez-toc]
History
Before we delve into the butter tarts recipe, let’s take a trip down memory lane and explore the fascinating history behind these delightful treats. The origins of butter tarts can be traced back to Canada, where they have become a beloved national dessert. While there is no exact date or person credited with inventing butter tarts, their history can be pieced together from various cultural influences and regional recipes.
Early Beginnings
The roots of butter tarts can be traced back to the early 19th century when European settlers brought their culinary traditions to Canada. The original concept of butter tarts likely originated from similar tarts and pies found in England and Scotland. However, the unique twist that makes butter tarts stand out is the use of quintessentially Canadian ingredients like maple syrup and brown sugar.
Canadian Adaptation
Over the years, Canadian bakers embraced the concept of tarts and pies but added their own regional touches. The use of maple syrup, a staple in Canadian cuisine, quickly became a defining feature of Canadian butter tarts. As the recipe spread across the country, regional variations began to emerge, with some using raisins, pecans, or even walnuts to enhance the flavors.
A National Icon
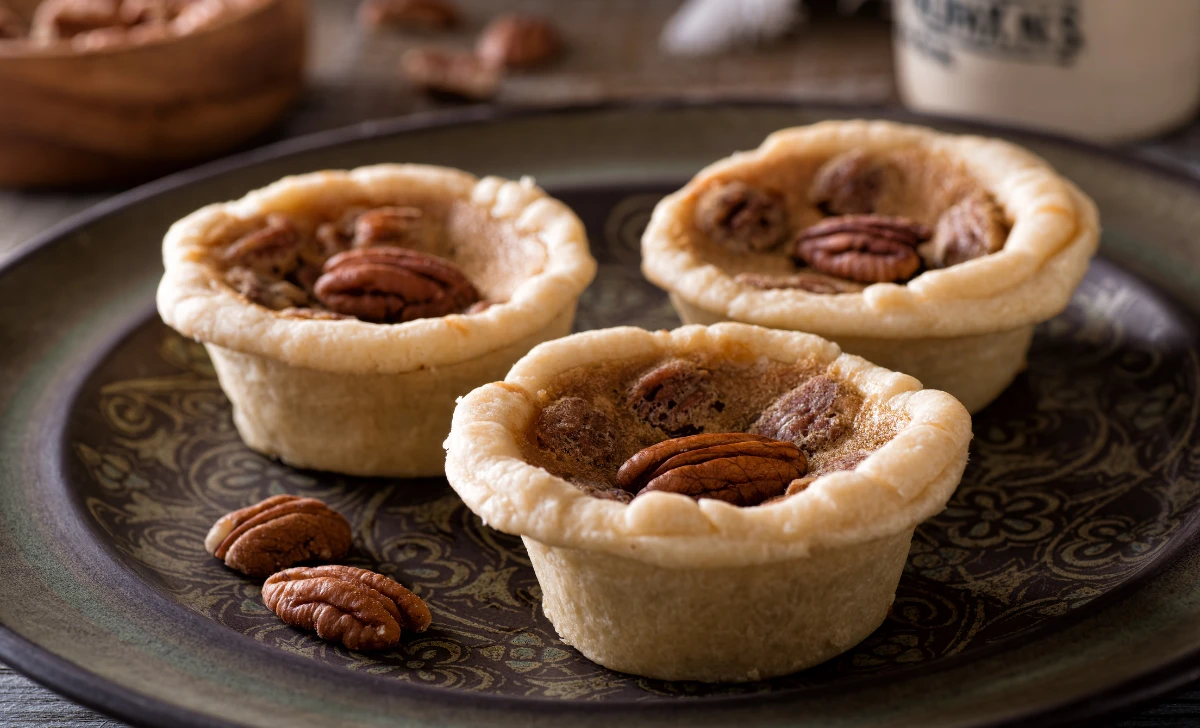
By the mid-20th century, butter tarts had firmly established themselves as a beloved Canadian dessert. They became a staple in holiday gatherings, family reunions, and community events. The irresistible combination of flaky pastry, gooey filling, and sweet caramelized sugar made them an instant hit among Canadians of all ages.
Butter Tarts Today
In the modern era, butter tarts have transcended borders and become known and loved around the world. Their simplicity and versatility have made them a popular dessert in many countries. However, the heart of butter tarts remains deeply rooted in Canadian culture, and they continue to be a cherished treat that sparks feelings of nostalgia and comfort.
Time
| Step | Time |
|---|---|
| Preparation Time | 20 mins |
| Chilling Time for Pastry | 30 mins |
| Making the Pastry Shells | 20 mins |
| Preparing the Filling | 15 mins |
| Assembling the Tarts | 10 mins |
| Baking Time | 15-20 mins |
| Cooling Time | 10 mins |
| Total Time | 2 hours |
Now that we have an idea of the time required, let’s dive into the ingredients and step-by-step instructions to create these heavenly butter tarts!
Ingredients
| Ingredients | Quantity |
|---|---|
| All-Purpose Flour | 1 cup |
| Unsalted Butter | 1/2 cup |
| Cold Water | 2-3 tablespoons |
| Brown Sugar | 1/2 cup |
| Maple Syrup | 1/4 cup |
| Eggs | 1 large |
| Vanilla Extract | 1 teaspoon |
| Salt | 1/4 teaspoon |
| Raisins (optional) | 1/4 cup |
| Pecans (optional) | 1/4 cup |
With all these ingredients ready, we can now proceed to create our delicious butter tarts. Let’s get baking!
Directions
Step 1: Preparation Time
Before we start the actual baking process, it’s essential to gather all the necessary ingredients and equipment. Preparing in advance ensures a smooth baking experience.
Step 2: Chilling Time for Pastry
Begin by preparing the pastry dough. In a mixing bowl, combine the all-purpose flour, unsalted butter (cut into small cubes), and a pinch of salt. Use your fingers to rub the butter into the flour until the mixture resembles coarse crumbs. Gradually add cold water, one tablespoon at a time, and mix until the dough comes together. Shape the dough into a ball, cover it with plastic wrap, and refrigerate it for at least 30 minutes.
Step 3: Making the Pastry Shells
Preheat your oven to 375°F (190°C). Take the chilled pastry dough from the refrigerator and let it sit at room temperature for a few minutes to make it easier to work with. On a floured surface, roll out the dough to a thickness of about 1/8 inch. Using a round cookie cutter or a glass, cut out circles that fit into your tart pans. Gently press the dough circles into the greased tart pans, ensuring the dough covers the bottom and sides evenly. Trim any excess dough hanging over the edges.
Step 4: Preparing the Filling
In a separate bowl, whisk together the brown sugar, maple syrup, beaten egg, vanilla extract, and a pinch of salt until the mixture is smooth and well combined. If you prefer a classic butter tart without any additional fillings, you can stop here. However, if you want to add a delightful twist, this is the time to mix in some raisins or pecans for an extra burst of flavor and texture.
Step 5: Assembling the Tarts
Now comes the exciting part! Take your prepared tart shells and evenly distribute the filling mixture among them. Be careful not to overfill, as the filling will expand slightly during baking. If you’ve opted for a variation with raisins or pecans, ensure each tart gets a fair share of these delicious add-ons.
Step 6: Baking Time
Place the filled tart pans on a baking sheet and transfer them to the preheated oven. Bake the butter tarts for about 15 to 20 minutes or until the pastry turns golden brown and the filling sets with a slight jiggle in the center. Keep a close eye on them to prevent over-baking.
Step 7: Cooling Time
Once the butter tarts are baked to perfection, remove them from the oven and allow them to cool in the tart pans for about 10 minutes. This will help the tarts set further and make them easier to handle.
Step 8: Indulge!
Congratulations! Your delectable butter tarts are now ready to be savored. Carefully remove them from the tart pans and place them on a wire rack to cool completely. Serve them warm or at room temperature, and enjoy the heavenly combination of flaky pastry and gooey, sweet filling.
Get creative with your toppings – a dollop of whipped cream or a scoop of vanilla ice cream would take these butter tarts to the next level of deliciousness!
Equipment Required
Nutrition Information
| Nutrient | Amount per Serving |
|---|---|
| Serving Size | 1 tart |
| Calories | 250 kcal |
| Total Fat | 12g |
| – Saturated Fat | 7g |
| – Trans Fat | 0g |
| Cholesterol | 45mg |
| Sodium | 90mg |
| Total Carbohydrate | 34g |
| – Dietary Fiber | 1g |
| – Sugars | 20g |
| Protein | 3g |
Please note that the nutrition information provided is an approximate value and may vary based on the specific ingredients and brands used. It’s always a good idea to double-check the nutrition labels of the ingredients you use for precise calculations. Enjoy your delicious butter tarts while keeping an eye on your nutritional intake!
Tips
- Keep the Butter Cold: When making the pastry dough, ensure your butter is cold. Cold butter helps create a flaky and tender crust. You can even chill the mixing bowl and utensils beforehand to keep everything as cold as possible.
- Don’t Overwork the Dough: When mixing the pastry dough, avoid overworking it. Overmixing can result in a tough crust. Mix until the dough just comes together, and don’t worry if there are still a few small butter pieces visible.
- Refrigerate the Dough: After forming the dough into a ball, allow it to rest in the refrigerator. Chilling the dough helps relax the gluten and prevents shrinkage during baking.
- Use Tart Pans with Removable Bottoms: Tart pans with removable bottoms make it easier to remove the tarts without damaging their delicate crusts. This way, you can showcase your beautiful tarts without any fuss.
- Prevent Sticking: Grease the tart pans well to prevent the pastry from sticking. Alternatively, you can line the pans with parchment paper for easy removal.
- Perfect Filling Consistency: Make sure your filling is smooth and well-mixed. Any lumps in the filling may affect the texture of the final product.
- Avoid Overfilling: When adding the filling to the tart shells, leave some room for the mixture to expand during baking. Overfilling can cause the tarts to overflow and lose their neat appearance.
- Test for Doneness: Keep a close eye on the tarts while baking. They should be golden brown, and the filling should be set with a slight jiggle in the center. To be sure, you can insert a toothpick or skewer – if it comes out clean, they are ready.
- Allow Time to Cool: After baking, let the tarts cool in the pans for a few minutes before transferring them to a wire rack. Cooling allows the tarts to set, making them easier to handle.
Pros & Cons
| Pros | Cons |
|---|---|
| ✔️ Delicious and Sweet | ❌ High in Calories |
| ✔️ Easy to Make | ❌ Rich and Indulgent |
| ✔️ Versatile Dessert | ❌ Contains Corn Syrup |
| ✔️ Canadian Classic | ❌ Not Suitable for Diets |
| ✔️ Perfect Balance of Flavors | ❌ Requires Pastry Making |
Conclusion
In conclusion, the butter tarts recipe is a delightful and iconic Canadian dessert that will undoubtedly tantalize your taste buds and warm your heart. With a flaky pastry crust embracing a gooey, sweet filling, each bite is a heavenly experience that sparks feelings of nostalgia and comfort. Whether you choose the classic version or get creative with variations like chocolate, coconut, or maple-walnut, these butter tarts are bound to impress your family and friends.
While this recipe may require a bit of time and effort, the end result is well worth it. The pros of indulging in these delectable treats, with their rich flavors and versatility, outweigh the cons of a few extra calories and preparation time. Besides, what better way to celebrate your baking prowess than with a batch of warm, freshly made butter tarts to share and savor?
So, gather your ingredients, put on your apron, and let the delightful aroma of buttery goodness fill your kitchen. Whether it’s a special occasion, a family gathering, or just a treat-yourself moment, these butter tarts are the perfect addition to any dessert table. Don’t hesitate to try out this classic recipe and embark on a culinary adventure that will leave everyone craving for more.
Get ready to enjoy a truly Canadian dessert experience with butter tarts – a sweet delight that has stood the test of time and continues to be a cherished favorite among both young and old. So, why wait? It’s time to bake, indulge, and create lasting memories with these irresistible buttery treats. Happy baking!
Facts
- Fact 1: A Sweet Mystery – The Origin of Butter Tarts
- 🕵️♀️ Did you know that the exact origin of butter tarts remains a delicious mystery? While we know they emerged in Canada, the identity of the brilliant mind behind this delectable creation remains unknown. It’s like a secret recipe guarded by time! 🤫
- Fact 2: Sweetening Canada – The Official Butter Tart Day
- 🎉 Canadians are so head over heels for butter tarts that they celebrate a whole day in their honor! Mark your calendars for the “National Butter Tart Day,” celebrated on the first Saturday of November every year. A day devoted to enjoying these heavenly treats – count us in! 🗓️
- Fact 3: A Fierce Competition – The Great Butter Tart Bake-Off
- 🏆 Butter tarts bring out the competitive spirit! Some regions in Canada host annual bake-offs to crown the maker of the best butter tarts. Bakers from all over compete to showcase their unique twists on the classic recipe. It’s not just a dessert; it’s a culinary showdown! 👩🍳👨🍳
- Fact 4: A Star-Studded Favorite – A Treat for Celebrities
- 🌟 Butter tarts have captured the hearts of not just everyday folks but celebrities too! Renowned Canadian stars like Celine Dion and Ryan Reynolds have publicly declared their love for these scrumptious treats. They’re not just desserts; they’re celeb-endorsed delights! 🤩
- Fact 5: The Quest for the Perfect Recipe – World’s Largest Butter Tart
- 🏰 The quest for the ultimate butter tart knows no bounds! In 2017, a town in Canada created the world’s largest butter tart, weighing a whopping 1,654 pounds! Now that’s a whole lot of buttery goodness! 🏰
FAQ’s
Can I make the pastry dough in advance?
Absolutely! You can prepare the pastry dough ahead of time and refrigerate it for up to 2 days. Just make sure to wrap it tightly in plastic wrap to prevent it from drying out.
Can I freeze the unbaked butter tarts?
Yes, you can freeze the unbaked butter tarts. After assembling the tarts, place them on a baking sheet in the freezer until firm. Then, transfer them to an airtight container or freezer bag, separating each tart with parchment paper. They can be frozen for up to 2 months. When ready to bake, simply place the frozen tarts in the preheated oven and extend the baking time slightly.
How do I prevent the filling from spilling over while baking?
To prevent the filling from spilling over, make sure not to overfill the tart shells. Leave a little room for expansion during baking, and don’t fill the tarts to the brim.
Can I make the butter tarts without nuts or raisins?
Absolutely! If you prefer a classic butter tart without any extras, you can omit the nuts and raisins from the filling. The pure buttery and sweet flavors will still shine through.
How do I store leftover butter tarts?
Store any leftover butter tarts in an airtight container at room temperature for up to 2 days. If you need them to last longer, you can refrigerate them for up to 5 days. For best results, reheat them in the oven for a few minutes before serving.
Can I use pre-made pastry dough for this recipe?
Yes, you can use store-bought pre-made pastry dough if you’re short on time. Just ensure it’s rolled out to the right thickness and follow the same steps for making the pastry shells.
How do I prevent the pastry from becoming soggy after adding the filling?
To avoid a soggy crust, brush the inside of the pastry shells with a beaten egg white before adding the filling. This creates a barrier and helps keep the crust flaky.
Can I make mini butter tarts instead of regular-sized ones?
Absolutely! Mini butter tarts are adorable and great for serving at parties or gatherings. Simply use mini tart pans and adjust the baking time accordingly, as they will bake faster.
Can I substitute the maple syrup with another sweetener?
Yes, you can substitute the maple syrup with an equal amount of corn syrup or honey if you prefer. Each sweetener will impart a slightly different flavor to the tarts.
Can I reheat leftover butter tarts?
Yes, you can reheat leftover butter tarts in the oven at a low temperature (around 300°F or 150°C) for about 5 minutes until warm. Avoid microwaving them, as it can make the crust soggy.



Leave a Review